Ace of spoons
  • Home
  • Recipes
  • Categories
    • No Bake
    • Breakfast
    • Brownies and Bars
    • Cakes
    • Main Dishes
    • Baked goods & Pastries
  • About
  • Contact
Top Posts
Banana Bread Pancakes 
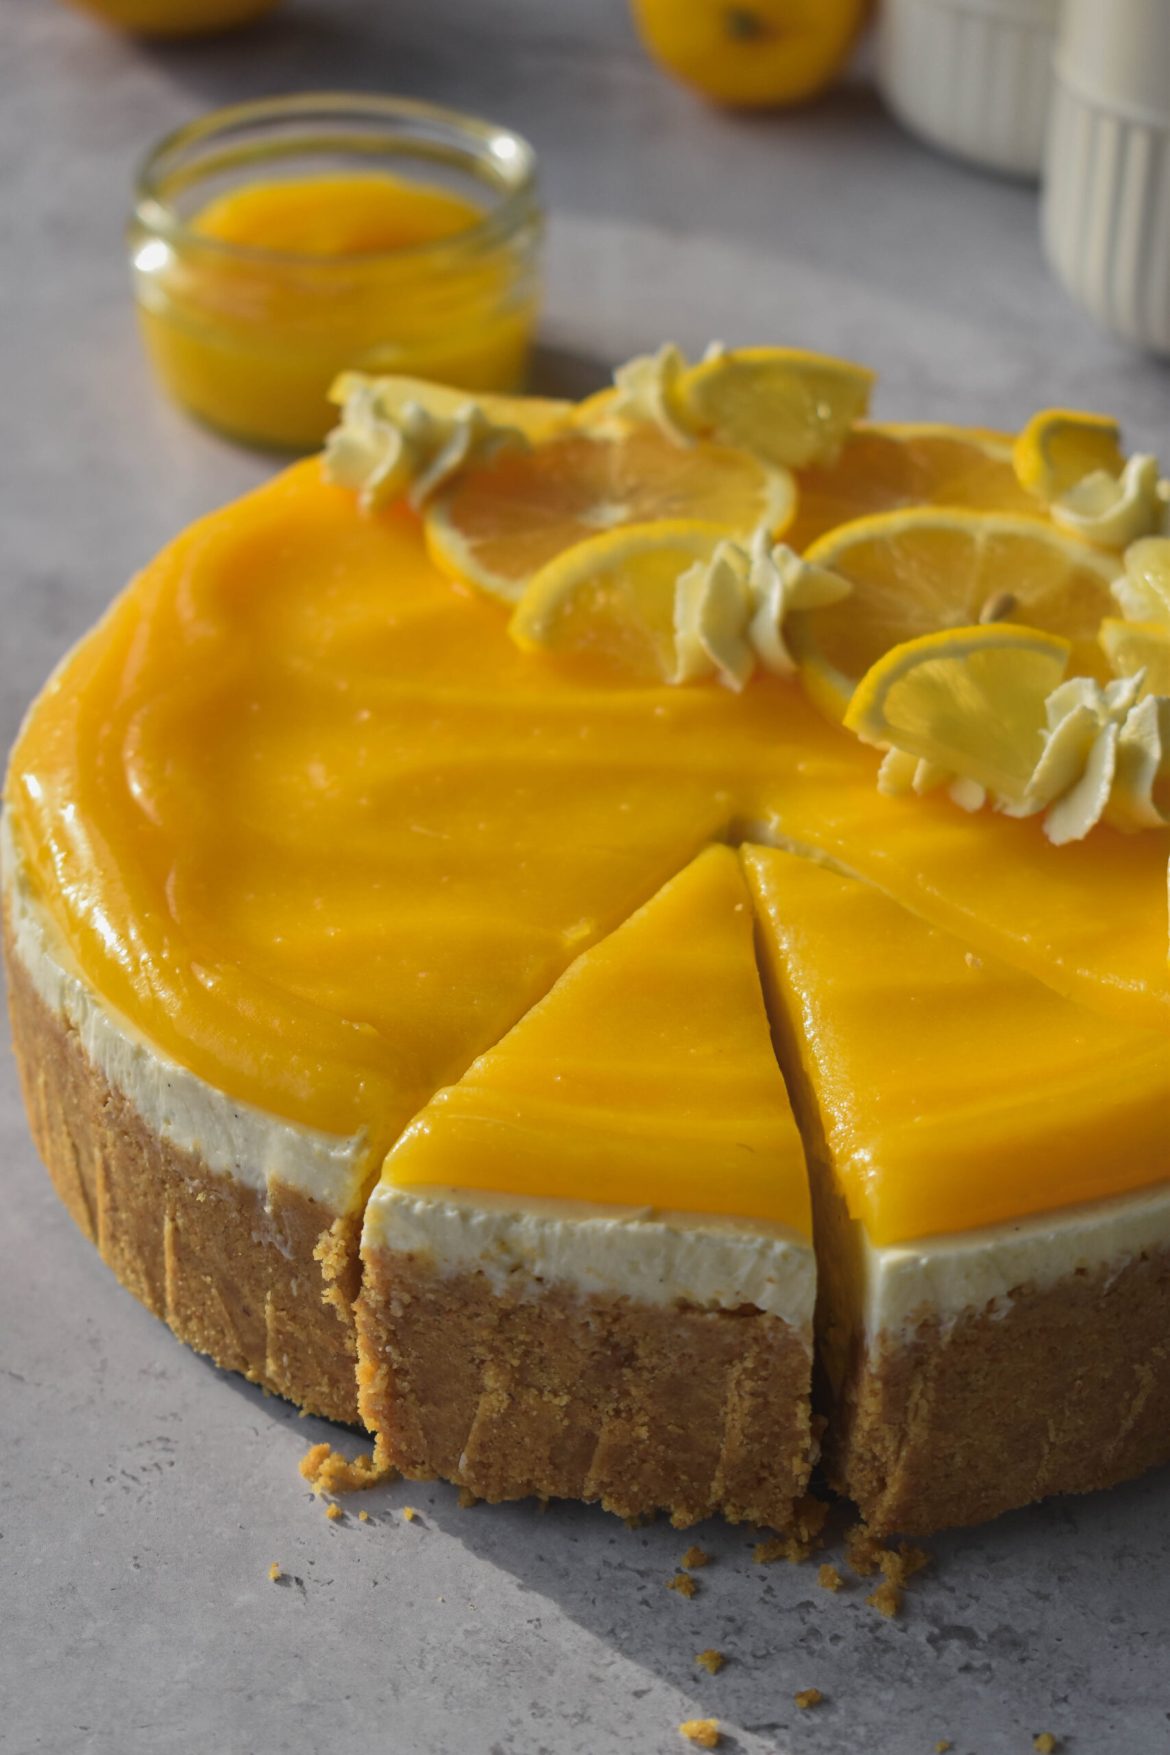
 No Bake Lemon Curd Cheesecake
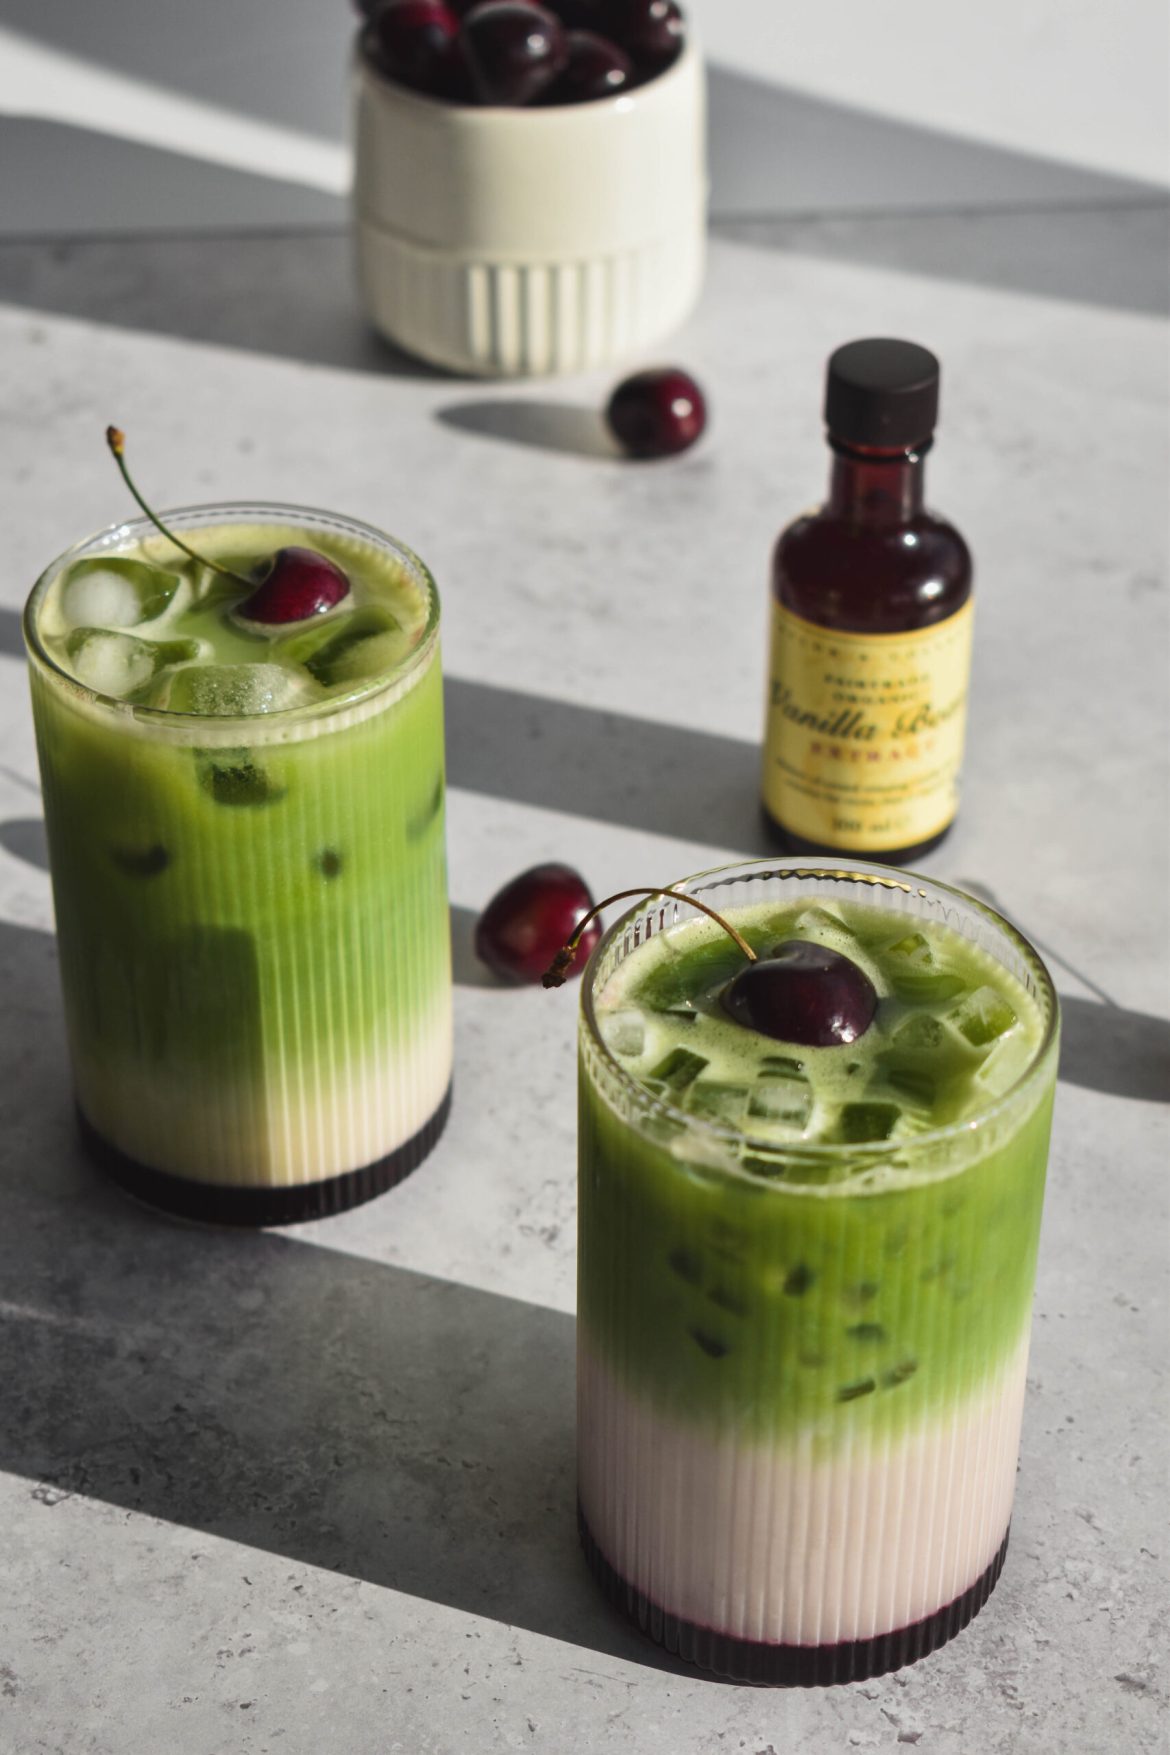
 Cherry Vanilla Matcha Latte
Tiramisu Pancakes 
Easy English Pancakes (Crepes)
Best American Buttermilk Pancakes
Easy High-Protein Bagels 
Rachels’ Iconic Thanksgiving Trifle: A ‘Friends’ Classic
Viral Dubai Chocolate Cheesecake
Vanilla Chai Latte
Ace of spoons
  • Home
  • Recipes
  • Categories
    • No Bake
    • Breakfast
    • Brownies and Bars
    • Cakes
    • Main Dishes
    • Baked goods & Pastries
  • About
  • Contact
Ace of spoons
Ace of spoons
  • Home
  • Recipes
  • Categories
    • No Bake
    • Breakfast
    • Brownies and Bars
    • Cakes
    • Main Dishes
    • Baked goods & Pastries
  • About
  • Contact
BreakfastPancakes and Waffles

Banana Bread Pancakes 

by Hunar Baig 1st September 2025
written by Hunar Baig

Banana Bread Pancakes 

If you’re reading this I’m guessing you love banana bread. Now, imagine those flavors transformed into a warm, fluffy stack of pancakes! These Banana Bread Pancakes are everything you love about banana bread—sweet, moist, and packed with banana flavour—combined with the soft, fluffy joy that is pancakes. 

Perfect for breakfast, brunch, or even dessert!!

Admittedly, I haven’t always been the biggest banana bread fan, but these pancakes are a completely different story. They are the perfect easy one bowl recipe to whip on a slow sunday morning, after a busy weekend, served with some coffee and calm. 

What Do Banana Bread Pancakes Taste Like?

These pancakes are soft, moist, and packed with banana flavor, just like a slice of warm banana bread. They have a slight caramelized sweetness from the bananas, that pairs so well with the pools of melty chocolate chips and crunch from the walnuts – but to be honest this is such a great base recipe, that you can customise any way you fancy! 

Why You’ll Love These Banana Bread Pancakes

  • All in one – You can easily whip up these using only one bowl and a whisk, no stand mixer, no fuss, just simple good food!!
  • Rich Banana Flavor – These pancakes are made with real mashed bananas for the perfect balance of sweetness and moisture.
  • Switch it up – These are so easy to customize, feel free to add in any mixins – basically anything you can add to banana bread you can add to these.
  • Simple Ingredients – Made with simple everyday ingredients – you can honestly whip these up anytime!

Ingredients for Banana Bread Pancakes

These simple ingredients come together to create the most moist and delicious banana bread pancakes:

  • Bananas – will make the pancakes moist and rich in banana flavour.
  • Plain Flour – The perfect base for light, delicate pancakes.
  • Eggs – Bind the batter and add moisture.
  • Melted Butter – Adds much-needed fat, and flavour and helps achieve crispy edges.
  • Light Brown Sugar – Sweetens the pancakes while helping maintain their softness.
  • Milk – Thins out the batter for a smooth, pourable consistency.
  • Salt – Enhances and balances the flavors.
  • Vanilla Extract – Adds depth and a subtle vanilla aroma.
  • Chocolate chips – will create pools of melted chocolate in the pancakes.
  • Chopped Walnuts – to add some texture and crunch!

How to Make Banana Bread Pancakes – Step by Step

Follow these simple steps to make perfect banana bread pancakes every time:

  1. In a large bowl mash the bananas with a fork or whisk till mostly smooth
  2. Crack in the eggs and whisk well till fully combined
  3. Then pour in the milk, oil and vanilla extract and whisk well
  4. Next, mix the flour, sugar, salt and baking powder and mix well. Until there are no streaks of flour
  5. Finally, add in the chocolate chips and chopped walnuts and give it one final mix
  6. Heat a pancake pan or any good non-stick pan on low heat
  7. Pour in a ¼ cup of the pancake batter at a time, allow to cook until bubbles appear on the surface and start to pop, then flip.
  8. Cook for 1-2 min on either side until fully cooked and golden brown.
  9. Serve with butter, whipped cream, syrup and some fresh sliced bananas and enjoy!

Tips and Tricks for the Best Banana Bread Pancakes

  • Use a non-stick pan – This ensures even cooking and easy flipping.
  • Let the batter rest – Allowing the batter to sit for 10 minutes results in fluffier pancakes.
  • Use ripe bananas – The riper, the better! Overripe bananas add natural sweetness and moisture.
  • Don’t overmix the batter – Overmixing can make the pancakes dense instead of fluffy.
  • Customize to your liking – Add fresh berries, almonds, nutella or even a drizzle of honey for extra flavour!

Banana Bread Pancakes

Hunar Baig
If you’re reading this I’m guessing you love banana bread. Now, imagine those flavors transformed into a warm, fluffy stack of pancakes! These Banana Bread Pancakes are everything you love about banana bread—sweet, moist, and packed with banana flavour—combined with the soft, fluffy joy that is pancakes.
Print Recipe Pin Recipe
Prep Time 15 minutes mins
Cook Time 20 minutes mins
Total Time 35 minutes mins
Course Breakfast, Brunch
Cuisine American
Servings 4 – 6 servings

Equipment

  • Large bowl
  • Whisk
  • Pancake pan or Non-stick pan
  • Spatula

Ingredients
  

Banana Bread Pancakes

  • 2 medium bananas
  • 2 eggs
  • 2 tbsp light brown sugar
  • 50 g melted butter (3 1/2 tbsp)
  • 1 tsp vanilla extract or paste
  • 240 g plain flour (2 cups)
  • 3 tsp baking powder
  • 150 ml whole milk – or milk of choice (2/3 cup)
  • 100 g chocolate chips (1/2 cup)
  • 50 g chopped walnuts (1/2 cup)

Toppings

  • butter
  • whipped cream
  • golden or maple syrup
  • sliced bananas
  • extra chocolate chips
  • extra chopped walnuts

Instructions
 

  • In a large bowl mash the bananas with a fork or whisk till mostly smooth
  • Crack in the eggs and whisk well till fully combined
  • Then pour in the milk, oil and vanilla extract and whisk well
  • Next, mix the flour, sugar, salt and baking powder and mix well. Until there are no streaks of flour and it's ready
  • Finally, add in the chocolate chips and chopped walnuts and give it one final mix
  • Heat a pancake pan or any good non-stick pan on low heat
  • Pour in a ¼ cup of the pancake batter at a time, allow to cook until bubbles appear on the surface and start to pop, then flip
  • Cook for 1-2 min on either side until fully cooked and golden brown
  • Serve with butter, whipped cream, syrup and some fresh sliced bananas and enjoy!

Notes

  • Use a non-stick pan – This ensures even cooking and easy flipping.
  • Let the batter rest – Allowing the batter to sit for 10 minutes results in fluffier pancakes.
  • Use ripe bananas – The riper, the better! Overripe bananas add natural sweetness and moisture.
  • Don’t overmix the batter – Overmixing can make the pancakes dense instead of fluffy.
  • Customize to your liking – Add fresh berries, almonds, nutella or even a drizzle of honey for extra flavour!
Keyword Banana Bread, Banana Bread Pancakes, Easy Pancake Recipe

Want to Share Your Banana Bread Pancakes?

Tag @aceofspoons_ on TikTok and Instagram if you make this recipe! I’d love to see your creations.

Enjoy your fluffy banana bread pancakes!

1st September 2025 0 comments
0 FacebookTwitterPinterestPocketThreadsBlueskyEmail
DessertsNo Bake

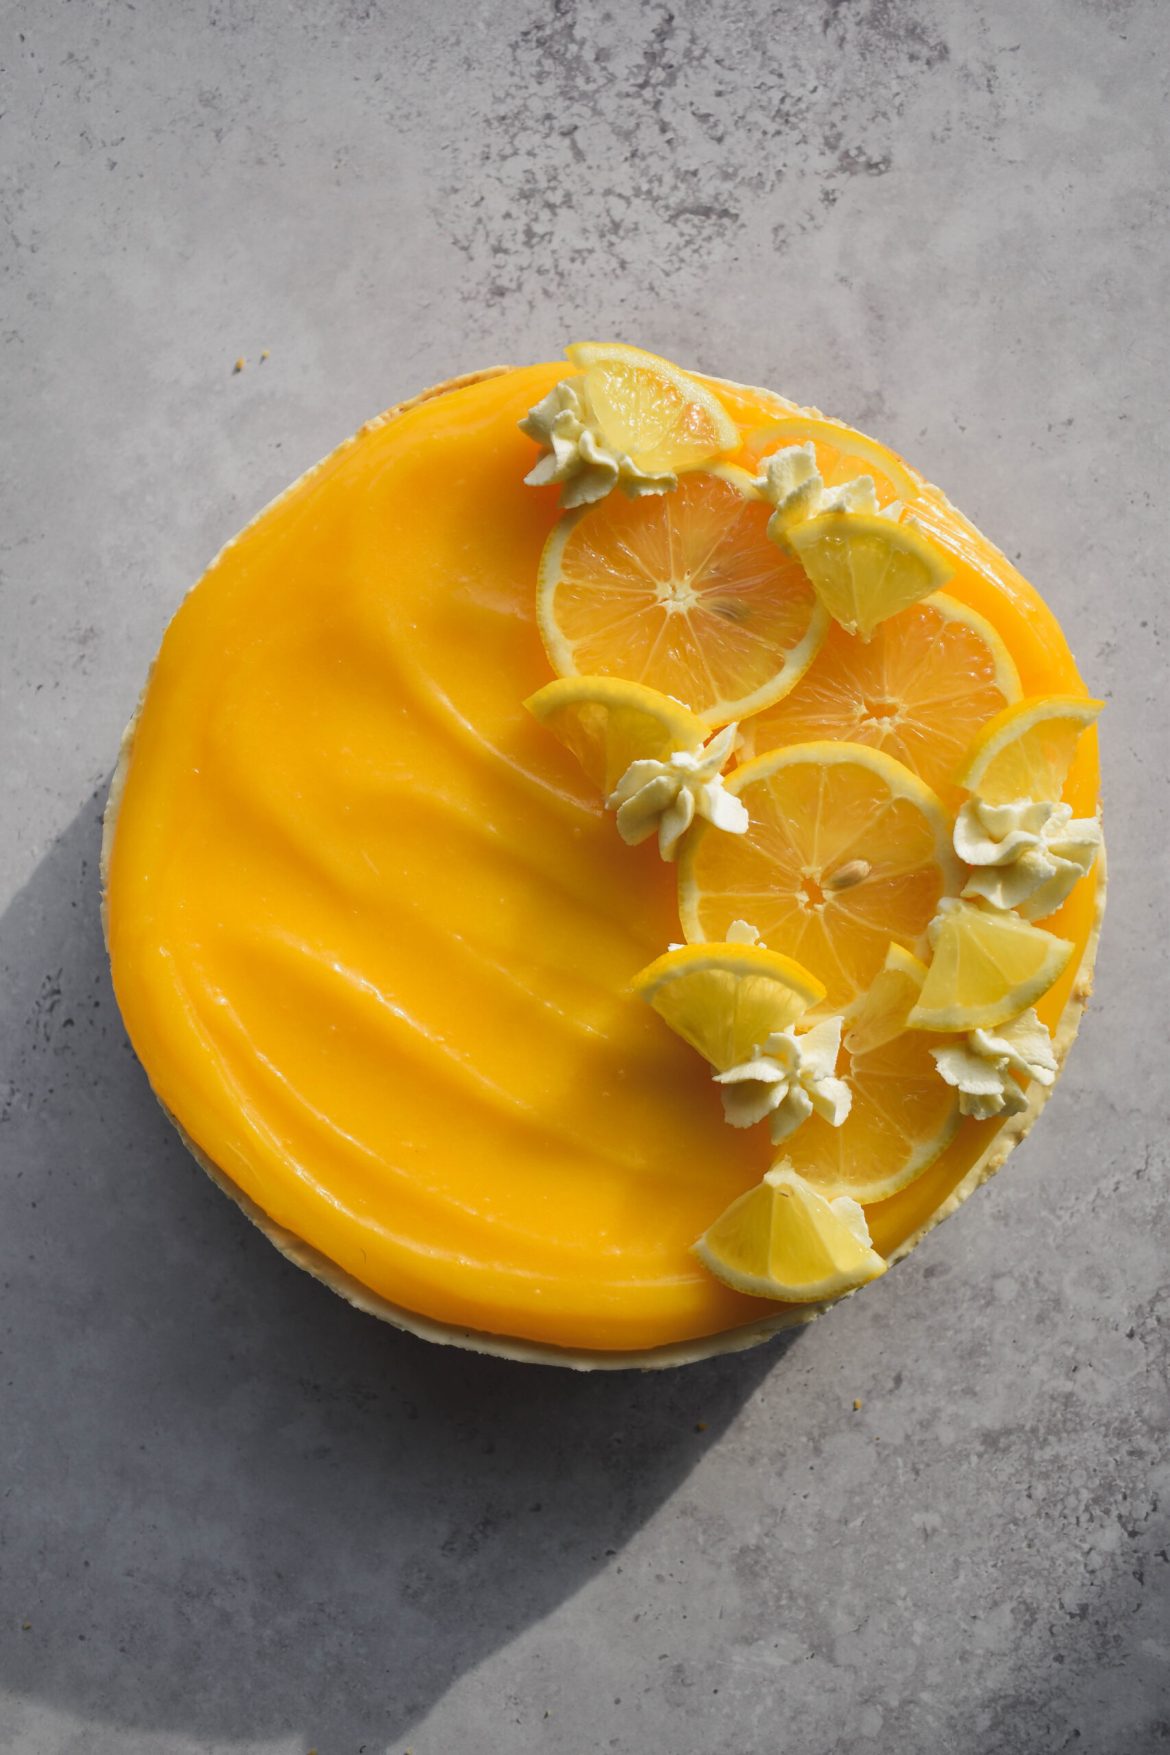
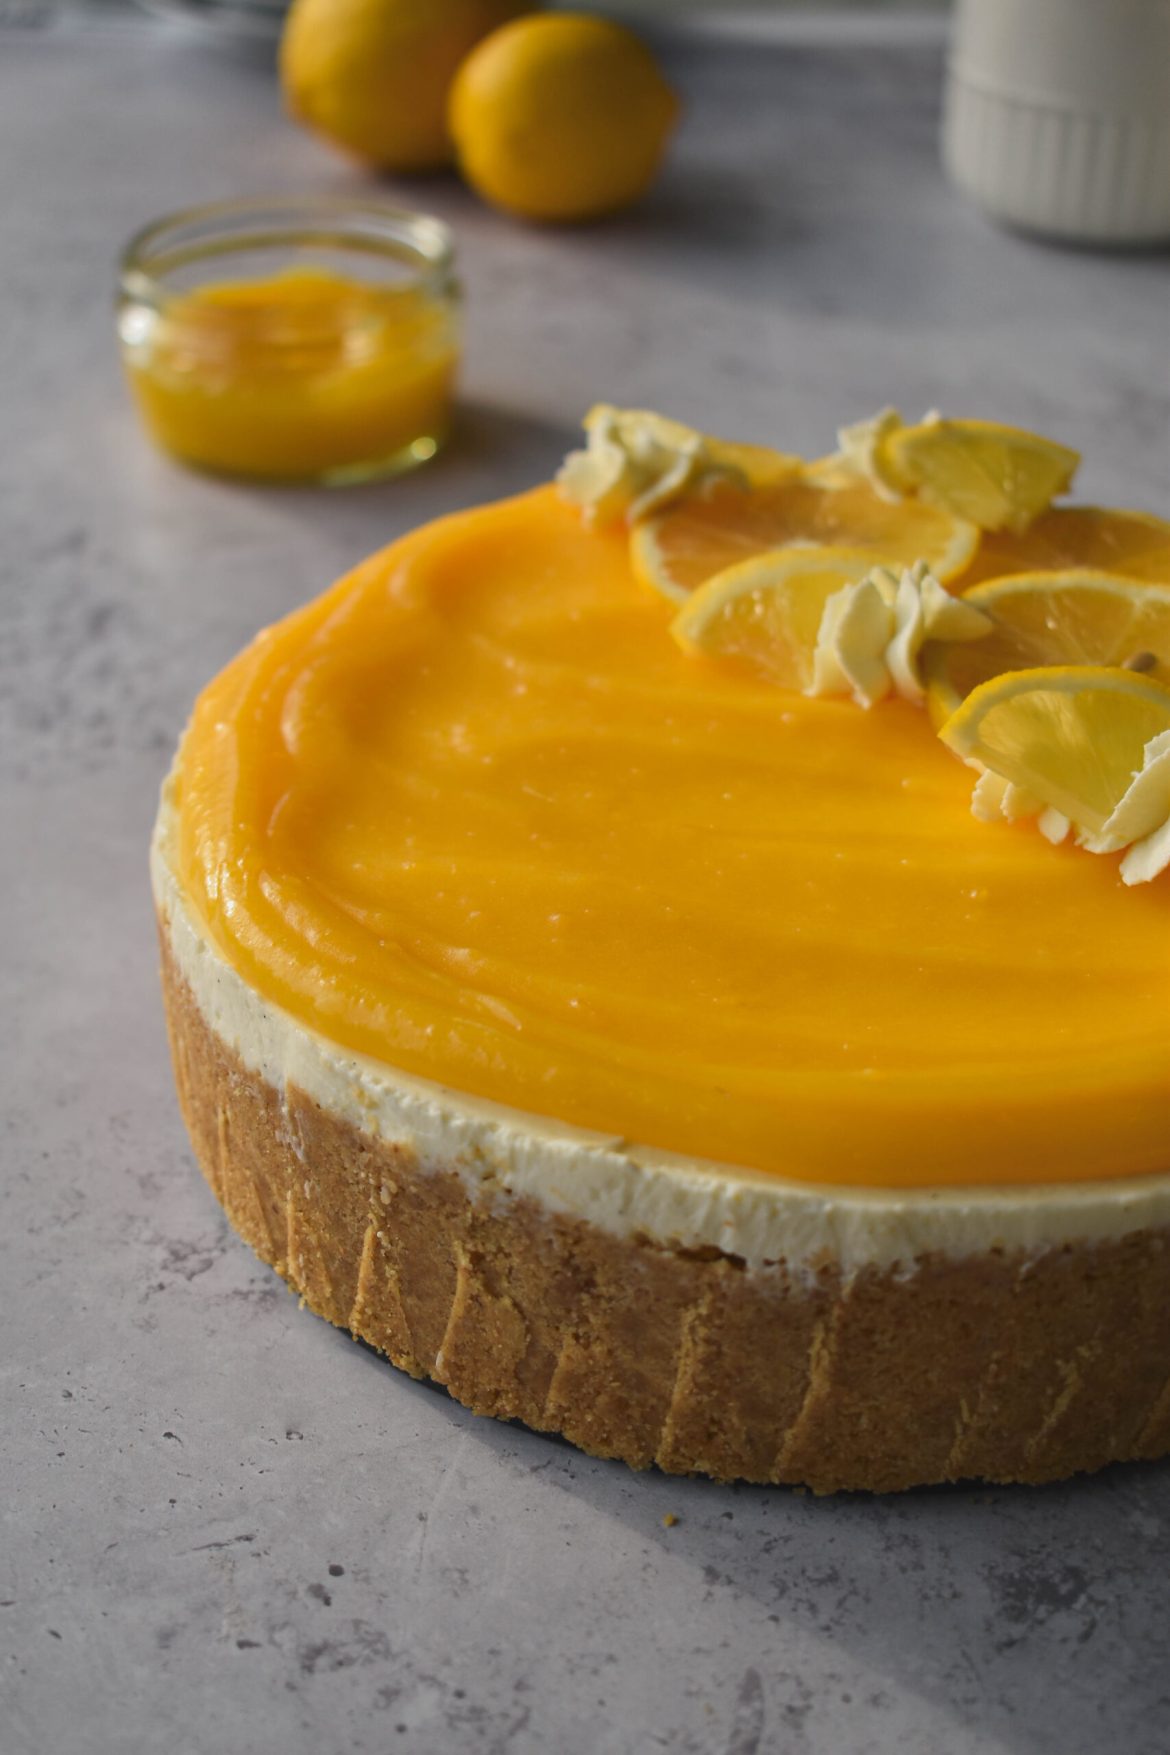
 No Bake Lemon Curd Cheesecake

by Hunar Baig 20th August 2025
written by Hunar Baig

No Bake Lemon Curd Cheesecake

If you love lemon desserts but often find them too sour, too bitter, too sweet or just not quite sweet enough — this no-bake lemon curd cheesecake was made for you. It strikes the perfect balance: between being rich, creamy, and sweet, while still being vibrant, zesty and bright. 

It’s the easiest lemon dessert you’ll ever make — and it’s so addictive, you’ll find yourself making it again and again.

The secret to that perfect lemon cheesecake flavor?

Instead of making a lemon cheesecake base, we go with a smooth vanilla one instead and top it with a sunny, bright lemon curd topping. This results in a citrusy, fresh lemon cheesecake that’s full of flavour, yet so creamy, rich, and moreish you’ll be going back for seconds.

Why You’ll Love This No-Bake Lemon Curd Cheesecake

Now while there are many reasons to love his rich, vibrant and zesty lemon curd cheesecake, here are a few of my faves:

  • No baking required – it’s quick, simple, and requires no oven. Making it the perfect dessert for spring and summer.
  • Lots of Lemon flavour – a lemon dessert that actually has all the bright, tangy, lemon notes you’re looking for.
  • Sweet and tangy balance – the vanilla cheesecake base contrasts beautifully with the tart zesty lemon curd, to create a cheesecake that is sour, sweet and perfectly balanced.
  • Make-ahead friendly – perfect for prepping in advance, especially for long hot summer days!

Ingredient Notes – No Bake Lemon Curd Cheesecake

Here’s what you’ll need to make the best No-Bake Lemon Curd Cheesecake:

Digestive biscuits or Graham crackers – of course we need biscuits for the biscuit base! But feel free to use any dry, sweet biscuits of your choice.

Cream Cheese – will be the base for the cheesecake. 

Double Cream / Heavy Cream – for the cheesecake filling!

Vanilla Extract – adds that classic vanilla flavour.

Salt – to balance everything out.

Lemon Juice – helps set the cheesecake without gelatine.

Melted Butter – for the crisp buttery base.

Icing Sugar + Sugar – to sweeten the cheesecake filling and base with.

Lemon curd – glossy, tangy, and irresistible, it’s the perfect topping for this cheesecake. Use store-bought or homemade (recipe below!).

What is no bake cheesecake? 

No bake cheesecake is a simpler, creamier, softer version of a regular cheesecake. Since there is no baking required it also means that is A LOT easier than a standard baked cheesecake. Baked cheesecakes have a silky texture that is quite firm, while no bake cheesecakes are soft, and super light. Personally, I am a big fan of both!

How to make the best No Bake Lemon Curd Cheesecake

Prepare the Crust

  1. Crush the biscuits into fine crumbs using a food processor or a rolling pin and food bag
  2. In a mixing bowl, combine the crumbs with melted butter and sugar. Mix until the texture resembles wet sand
  3. Press the mixture into the base (and slightly up the sides) of a greased 8 or 9-inch springform pan or loose bottomed cake tin
  4. Place the crust into the fridge or freezer for 10–20 minutes while preparing the filling

Make the Filling

  1. In a large bowl, using a handmixer, stand mixer or whisk, beat the softened cream cheese for around 3-5 mins,  until smooth and creamy
  2. Add in the icing sugar, caster sugar, salt, vanilla extract and lemon zest (optional). Gently combine together until fully combined and well incorporated
  3. In a separate bowl, using a handmixer, stand mixer or whisk, whip the double cream until stiff peaks form
  4. Gently fold ⅓ of the whipped cream into the cream cheese to loosen it, then gently fold in the rest of the cream, until fully combined.
  5. Pour the lemon juice into the cheesecake mixture and gently fold. You should end up with a mixture that is smooth, light and airy.

Assemble, Chill & Decorate

  1. Spoon the cheesecake filling onto the chilled base and smooth it out into an even layer
  2. Cover and refrigerate for at least 6–8 hours, or ideally overnight, until fully set
  3. Once set, spoon the lemon curd over the top and gently spread it into an even layer
  4. Decorate with thin lemon slices and dollops of whipped cream — or anything else you fancy!
  5. Return to the fridge for at least 15 – 20 minutes to help the curd firm up slightly, this will make it easier to slice
  6. Then simply slice, serve, and enjoy!

How do you remove a no-bake cheesecake from the pan?

Whether you are using a springform or loose bottomed cake pan, the best way to remove your cheesecake from the pan, is to use a small sharp paring knife and run it along the edge of your cheesecake, to release the cheesecake. 

Once released you can unlock the springform pan or, if using a loose bottomed pan, then place a tin underneath the cheesecake and slide the ring of the pan down gently. If you wish to remove the base, simply use the same clean, small sharp paring knife and run it between the base of the cheesecake and the base of the pan to release it. 

Will no-bake cheesecake firm up in the fridge?

Yes! This no-bake lemon curd cheesecake will set up nicely in the fridge, and have a light, soft and almost mousse-like texture. You should allow no bake cheesecake to set up for at least 6 – 8 hours or, for best results, refrigerate overnight. The longer you allow it to sit in the fridge, the better it will taste and the firmer it will be. 

How long does a No Bake Lemon Curd Cheesecake last?

This no bake cheesecake is the perfect dessert to make ahead of time because it stores so well. You can store any leftovers in the fridge, in an airtight container or, on a plate or a tray covered in plastic wrap, for up to 5 days.

Tips and Tricks – No Bake Lemon Curd Cheesecake

  • Chill the cheesecake as long as possible – the cheesecake needs to chill for at least 6 – 8 hours, ideally overnight. Basically the longer it chills the better it will taste.
  • Use room temperature cream cheese – this makes all the difference. Using room temp cream cheese, will ensure the cheesecake filling is super smooth.
  • Don’t overmix the no bake cheesecake filling – overmixing the cheesecake filling will make the cheesecake tough, instead of light and mousse like.
  • Use a sharp + clean knife – helps you get even clean slices, that looks super professional!
  • The recipe video is on my TikTok and IG – please tag me @aceofspoons if you make this recipe!

No Bake Lemon Curd Cheesecake

Hunar Baig
If you love lemon desserts but often find them too sour, too bitter, too sweet or just not quite sweet enough — this no-bake lemon curd cheesecake was made for you. It strikes the perfect balance: between being rich, creamy, and sweet, while still being vibrant, zesty and bright.
Print Recipe Pin Recipe
Prep Time 1 hour hr
Total Time 1 hour hr
Course Dessert
Cuisine American, British
Servings 8 – 12 servings

Equipment

  • 8 – 9 inch loose bottomed or spring form cake tin
  • Stand Mixer / Hand Mixer or Whisk
  • 2 Large bowls
  • Rubber Spatula

Ingredients
  

Cheesecake Crust

  • 250 g digestive biscuits or graham crackers
  • 80 g melted butter
  • 2 tbsp white sugar

Cheesecake Filling

  • 500 g full fat cream cheese
  • 250 ml double cream / heavy cream
  • 50 g white sugar
  • 60 g icing sugar / powdered sugar
  • 2 tbsp lemon juice
  • zest of one lemon (optional)
  • 1/4 tsp salt
  • 2 tsp vanilla extract

Toppings – Decorations

  • 200 – 250 g lemon curd – (about half a jar) You can find the recipe below! 🙂
  • Whipped cream
  • Lemon slices

Instructions
 

Cheesecake Crust

  • Crush the biscuits using a food processor or a rolling pin and food bag, into fine crumbs
  • In a large mixing bowl, combine the crumbs with melted butter and sugar. Mix until the texture resembles wet sand
  • Press the mixture into the base (and slightly up the sides) of a greased 8 or 9-inch springform pan or loose bottomed cake tin
  • Place the crust into the fridge or freezer for 10–20 minutes while preparing the filling

Cheesecake Filling

  • In a large bowl, using a hand-mixer, stand mixer or whisk, beat the softened cream cheese for around 3-5 mins, until smooth and creamy
  • Add in the icing sugar, caster sugar, salt, vanilla extract and lemon zest (optional). Gently combine together until fully combined and well incorporated
  • In a separate bowl, using a hand-mixer, stand mixer or whisk, whip the double cream until stiff peaks form
  • Gently fold ⅓ of the whipped cream into the cream cheese to loosen it, then gently fold in the rest of the cream, until fully combined
  • Pour the lemon juice into the cheesecake mixture and gently fold. You should end up with a mixture that is smooth, light and airy

Assemble and Decorate the Cheesecake

  • Spoon the cheesecake filling onto the chilled base and smooth it out into an even layer
  • Cover and refrigerate for at least 6–8 hours, or ideally overnight, until fully set
  • Once set, spoon the lemon curd over the top and gently spread it into an even layer
  • Decorate with thin lemon slices and dollops of whipped cream — or anything else you fancy!
  • Return to the fridge for at least 15 – 20 minutes to help the curd firm up slightly, this will make it easier to slice
  • Then simply slice, serve, and enjoy!

Notes

  • Chill the cheesecake as long as possible – the cheesecake needs to chill for at least 6 – 8 hours, ideally overnight. Basically the longer it chills the better it will taste.
 
  • Use room temperature cream cheese – this makes all the difference. Using room temp cream cheese, will ensure the cheesecake filling is super smooth.
 
  • Don’t overmix the no bake cheesecake filling – overmixing the cheesecake filling will make the cheesecake tough, instead of light and mousse like.
 
  • Use a sharp + clean knife – helps you get even clean slices, that looks super professional
 
  • The recipe video is on my TikTok and IG – please tag me @aceofspoons if you make this recipe!
Keyword Lemon Cheesecake, Lemon Curd, Lemon Curd Cheesecake, No bake cheesecake

Lemon Curd Recipe

Hunar Baig
This is the only lemon curd recipe you'll ever need! It's zingy, bright, perfectly balanced, and super easy to make – let me show you how!!
Print Recipe
Prep Time 10 minutes mins
Cook Time 10 minutes mins
Total Time 20 minutes mins
Course condiments, Dessert
Cuisine British
Servings 450 g

Equipment

  • Medium saucepan
  • Whisk
  • Large bowl (non metallic) – glass would be perfect
  • Large sieve
  • Glass jar (to store the curd in)

Ingredients
  

  • 2 large or 3 medium lemons (zest and juice)
  • 1 whole egg
  • 1 egg yolk
  • 150 g white sugar (3/4 cup)
  • 100 g cold butter
  • 1 tbsp cornflour
  • pinch of salt (skip if using salted butter)
  • a few drops of yellow food colouring (optional)

Instructions
 

Lemon Curd Recipe

  • Start by zesting and juicing the lemons, keeping the zest and juice separate and setting aside.
  • In a medium to large saucepan, add the sugar and lemon zest. Rub them together using your fingertips, until the sugar is fragrant.
  • Next, add in the cornflour and stir well.
  • Then add the juice of the zested lemons, mixing well to combine.
  • Now, add in the egg, egg yolk and salt, then whisk until fully combined and smooth. There should be no visible streaks of egg white or yolk. Set aside.
  • In a large non-metallic bowl (glass works well), add the cold, cubed butter. Place a fine-mesh sieve over the bowl and set aside.
  • Place the saucepan over medium-low heat and whisk the lemon mixture constantly until it thickens into a glossy, smooth curd. This should around 5-8 mins. Do not stop whisking or it will curdle.
  • Once the lemon mixture has thickened, it should coat the back of a spoon evenly.
    Pour the lemon mixture through the sieve over the bowl with the butter. Strain out the zest, and remove. Then whisk until the butter is fully incorporated and the curd is silky.
  • This step is optional: at this stage, you can add in a few drops of yellow food colouring to make the curd super vibrant!
  • Cover the surface of the curd with cling film (plastic wrap) to prevent a skin from forming. Once at room temp, transfer to a glass jar and store in the fridge for up to two weeks.
  • Serve with desserts, ice cream, pies, or even on toast—enjoy! ☺️🍋✨

Notes

– Always use a non-metallic bowl for mixing and a non-metallic jar for storage to prevent any metallic aftertaste or reaction with the acid in the lemons.
Keyword Lemon Curd
20th August 2025 0 comments
0 FacebookTwitterPinterestPocketThreadsBlueskyEmail
Drinks and smoothiesMatcha & Lattes

 Cherry Vanilla Matcha Latte

by Hunar Baig 3rd April 2025
written by Hunar Baig

Cherry Vanilla Matcha Latte

If you love matcha, then this Cherry Vanilla Matcha Latte is about to be your new obsession. It’s creamy, refreshing, and perfectly balanced between sweet, tart, and earthy. The combination of fruity cherries, rich vanilla, and fresh matcha makes for a drink that’s not only delicious but also stunningly beautiful—and just as good as the coffee shop version.

What is in a Cherry Vanilla Matcha Latte?

Think of it as the perfect blend of floral, fruity, and creamy goodness. The vibrant, grassy notes of matcha meet the rich depth of homemade cherry vanilla syrup, all rounded out with silky milk. It’s a matcha latte with an upgrade—elevated, indulgent, and utterly delicious.

At the heart of a Cherry Vanilla Matcha Latte is the cherry vanilla syrup. It’s perfectly sweet, rich, vibrant in both colour and flavour, and incredibly easy to make

What Does a Cherry Vanilla Matcha Latte Taste Like?

This drink is an experience. The sweet-tart cherries bring a pop of fruity brightness, while the vanilla adds a comforting, aromatic depth. The matcha keeps things fresh and slightly earthy, and the milk ties everything together into a creamy, dreamy sip.

Ingredient Notes – Cherry Vanilla Matcha Latte

The key players in this drink:

  • Cherries – Fresh or frozen both work great. They give this latte its signature fruitiness.
  • Sugar – Adds just the right amount of sweetness to balance the tart cherries.
  • Vanilla Extract (Taylor & Colledge recommended!) – A game-changer for depth and richness.
  • Water – Needed for making the syrup and whisking the matcha.
  • Matcha – The star of the show! Go for a high-quality ceremonial-grade matcha if possible.
  • Milk – Any milk works! Oat milk is especially good for creaminess, while almond milk keeps it light.

How to make a Cherry Vanilla Syrup

  1. In a saucepan, combine the cherries, sugar and water. Stir well.
  2. Bring to a boil, then reduce to low heat.
  3. Simmer on low for about 15 minutes, stirring frequently, until the cherries soften, break down and the sugar fully dissolves.
  4. Once you have a vibrant red syrup, remove from heat and stir in the Taylor & Colledge Vanilla Extract—adding it at the end enhances the flavour and prevents evaporation.
  5. Strain the syrup through a sieve and it’s ready to use!

How to Make a Cherry Vanilla Matcha Latte

Ingredients:

  • 2–4 tbsp cherry vanilla syrup (adjust to taste)
  • 2g matcha, prepared according to package instructions
  • 100–150ml milk of choice
  • Ice (for iced version)

Method:

  1. Prepare your matcha according to package instructions.
  2. In a glass, add ice (if making an iced latte) and 2–4 tbsp of cherry vanilla syrup.
  3. Pour the milk over the syrup.
  4. Top with your matcha and enjoy!

Can You Add Coffee to a Cherry Vanilla Matcha Latte?

Absolutely! If you want an extra caffeine kick, turn this into a dirty matcha latte by adding a shot of espresso. The deep, bold coffee flavour blends beautifully with the sweet cherry and creamy vanilla notes.

How to Make a Dirty Cherry Vanilla Matcha Latte:

  1. Prepare your matcha as usual.
  2. Add a shot of espresso instead of (or alongside) the matcha.
  3. Stir, sip, and fall in love with this bold, flavourful combo.

Tips and Tricks – Cherry Vanilla Matcha Latte

  • Customize the Sweetness – Adjust the amount of cherry vanilla syrup to suit your taste.
  • Experiment with Milk – Different milks will change the texture and taste. Try oat milk for extra creaminess or coconut milk for a tropical twist.
  • Go “Dirty” – If you love coffee, add a shot of espresso for a bold flavour boost.

Enjoy Your Homemade Cherry Vanilla Matcha Latte!

Now you’re ready to whip up this dreamy drink at home, and I guarantee it’ll become a new favourite. If you try it, don’t forget to tag me on Instagram or TikTok (@aceofspoons)—I’d love to see your creations!

Cherry Vanilla Matcha Latte

Hunar Baig
If you love matcha, then this Cherry Vanilla Matcha Latte is about to be your new obsession. It's creamy, refreshing, and perfectly balanced between sweet, tart, and earthy. The combination of fruity cherries, rich vanilla, and fresh matcha makes for a drink that’s not only delicious but also stunningly beautiful—and just as good as the coffee shop version.
Print Recipe Pin Recipe
Prep Time 5 minutes mins
Cook Time 15 minutes mins
Total Time 20 minutes mins
Course Drinks
Cuisine Japanese
Servings 6 matchas

Equipment

  • Saucepan
  • Strainer or Sieve
  • Glass Jar or Bottle

Ingredients
  

Cherry Vanilla Syrup

  • 150 g fresh or frozen pitted cherries (1 cup)
  • 150 g white sugar (3/4 cup)
  • 3 tsp Taylor & Colledge Organic & Fairtrade Vanilla Extract
  • 250 ml water (1 cup)

Cherry Vanilla Matcha Latte

  • 2 – 4 tbsp cherry vanilla syrup (adjust to taste)
  • 2 g matcha – prepared according to package instructions (adjust to taste)
  • 100 – 150 ml milk of choice
  • Ice

Instructions
 

Cherry Vanilla Syrup

  • In a saucepan, combine the cherries, sugar and water. Stir well.
  • Bring to a boil, then reduce to low heat.
  • Simmer on low for about 15 minutes, stirring frequently, until the cherries soften, break down and the sugar fully dissolves.
  • Once you have a vibrant red syrup, remove from heat and stir in the Taylor & Colledge Vanilla Extract—adding it at the end enhances the flavour and prevents evaporation.
  • Strain the syrup through a sieve and it's ready to use!

Cherry Vanilla Matcha Latte

  • Prepare your matcha according to package instructions.
  • In a glass, add ice and 2–4 tbsp of cherry vanilla syrup.
  • Pour the milk over the syrup.
  • Top with your matcha and enjoy!

Notes

  • Customize the Sweetness – Adjust the amount of cherry vanilla syrup to suit your taste.
 
  • Experiment with Milk – Different milks will change the texture and taste. Try oat milk for extra creaminess or coconut milk for a tropical twist.
 
  • Go “Dirty” – If you love coffee, add a shot of espresso for a bold flavor boost.
 
  • If you try it – don’t forget to tag me on Instagram or TikTok (@aceofspoons)—I’d love to see your creations!
Keyword Cherry Vanilla, Cherry Vanilla Matcha, Matcha, Matcha Latte

3rd April 2025 0 comments
0 FacebookTwitterPinterestPocketThreadsBlueskyEmail
BreakfastPancakes

Tiramisu Pancakes 

by Hunar Baig 2nd March 2025
written by Hunar Baig

Tiramisu Pancakes 

Imagine all the rich and indulgent flavors of a classic tiramisu combined with a perfectly fluffy stack of pancakes. Tiramisu is one of the most beloved desserts, so naturally, tiramisu pancakes are nothing short of heavenly! Complete with a bold coffee syrup and a homemade mascarpone cream topping, this breakfast is pure decadence.

What Do Tiramisu Pancakes Taste Like?

These pancakes are rich, indulgent, and almost dessert-like. They have all the layered flavors of tiramisu—bold coffee syrup, creamy mascarpone topping, and soft, fluffy pancakes that soak up all that goodness. Each bite is a perfect balance of sweetness, coffee-infused depth, and velvety texture.

Coffee, Coffee, Coffee…

Tiramisu wouldn’t be tiramisu without coffee, and these pancakes are no exception! I use instant coffee in this recipe because it’s convenient and readily available. However, if you have an espresso machine, you can absolutely use freshly brewed espresso for an even richer flavor. Either way, the coffee syrup will be bold, flavorful, and the perfect pick-me-up for your morning.


Ingredients for Tiramisu Pancakes

These simple ingredients come together to create the most indulgent tiramisu pancakes:

For the Pancakes:

  • Plain Flour – The perfect base for light, delicate pancakes.
  • Eggs – Bind the batter and add moisture.
  • Oil – Adds much-needed fat and helps achieve crispy edges.
  • Caster Sugar – Sweetens the pancakes while maintaining their softness.
  • Buttermilk – Thins out the batter for a smooth, pourable consistency.
  • Salt – Enhances and balances the flavors.
  • Vanilla Extract – Adds depth and a subtle vanilla aroma.

For the Mascarpone Cream:

  • Mascarpone – To make that classic tiramisu-style mascarpone cream filling.
  • Double Cream / Heavy Cream – Helps make the mascarpone cream light and fluffy.
  • Icing Sugar – Sweetens the mascarpone cream.
  • Vanilla Extract – Enhances the flavor.

For the Coffee Syrup:

  • Coffee – Essential for soaking the pancakes in rich coffee flavor.
  • Maple Syrup – Helps sweeten the coffee syrup.
  • Brown Sugar – Adds sweetness and depth to the syrup.
  • Hot Water – Dissolves the coffee and sugar.

For Garnish:

  • Cocoa Powder – A dusting on top gives the pancakes that classic tiramisu finish.

How to Make Tiramisu Pancakes – Step by Step

Follow these simple steps to make perfect tiramisu pancakes every time:

Step 1: Prepare the Pancake Batter

  1. In a large bowl, whisk together the flour, baking powder, salt, and caster sugar.
  2. Create a well in the center and add the eggs, buttermilk, oil, and vanilla extract.
  3. Whisk until the batter is smooth and lump-free.
  4. Let the batter rest for 10 minutes for softer, fluffier pancakes.

Step 2: Make the Coffee Syrup

  1. In a small bowl, mix the instant coffee, brown sugar, and maple syrup.
  2. Add the hot water and stir until everything is fully dissolved.
  3. Set aside to cool completely.

Step 3: Prepare the Mascarpone Cream

  1. In a bowl, whisk together the mascarpone, icing sugar, and vanilla extract until smooth.
  2. Add the double cream and whisk again until thick, fluffy, and fully combined.
  3. Set aside.

Step 4: Cook the Pancakes

  1. Heat a non-stick pancake or crepe pan over low-medium heat.
  2. Pour ¼ cup of batter onto the pan and cook until small bubbles appear on the surface.
  3. Flip and cook for another 1-2 minutes until golden brown.
  4. Repeat with the remaining batter.

Step 5: Assemble the Tiramisu Pancakes

  1. Brush or spoon the coffee syrup over each pancake.
  2. Spread or pipe a layer of mascarpone cream on top.
  3. Stack the pancakes, repeating the layers until you have a tall, delicious stack.
  4. Dust generously with cocoa powder for that authentic tiramisu finish, and enjoy!

Tips and Tricks for the Best Tiramisu Pancakes

  • Use a non-stick pan – This ensures even cooking and easy flipping.
  • Let the batter rest – Allowing the batter to sit for 10 minutes results in fluffier pancakes.
  • If you don’t have buttermilk – use can make buttermilk by mixing 1 cup of milk, 2 tbsp of lemon, lime juice or even vinegar,  let it sit for 10 minutes and you have homemade buttermilk
  • Cool the coffee syrup – If it’s too warm, it can make the pancakes soggy.

Want to Share Your Tiramisu Pancakes?

Tag @aceofspoons_ on TikTok and Instagram if you make this recipe! I’d love to see your creations.

Enjoy your indulgent tiramisu pancakes!

Tiramisu Pancakes

Hunar Baig
Imagine all the rich and indulgent flavours of a classic tiramisu combined with a perfectly fluffy stack of pancakes. Complete with a bold coffee syrup and a homemade mascarpone cream topping, this breakfast is pure decadence.
Print Recipe Pin Recipe
Prep Time 20 minutes mins
Cook Time 25 minutes mins
Total Time 45 minutes mins
Course Breakfast, Brunch, Dessert
Cuisine Italian
Servings 4 – 5 servings

Equipment

  • Large bowl
  • Whisk
  • Pancake or Non-stick pan

Ingredients
  

Pancake Ingredients

  • 240 g flour
  • 2 tbsp sugar
  • 1/4 tsp salt
  • 3 tsp baking powder
  • 2 eggs
  • 250 ml buttermilk (or 240ml milk and 10ml of vinegar or lemon juice)
  • 2 tbsp oil (any flavourless oil will work)
  • 1/2 tsp vanilla extract

Coffee Syrup Ingredients

  • 2 tsp instant coffee (in 100ml of hot water) or 2 shots of espresso
  • 2 tbsp maple syrup
  • 1 tbsp light brown sugar

Mascarpone Cream Ingredients

  • 125 g mascarpone cheese
  • 250 ml double cream / heavy cream
  • 60 g icing sugar
  • 1 tsp vanilla extract

Toppings

  • Cocoa Powder

Instructions
 

Step 1: Prepare the Pancake Batter

  • In a large bowl, whisk together the flour, baking powder, salt, and sugar.
  • Create a well in the centre and add the eggs, buttermilk, oil, and vanilla extract.
  • Whisk until the batter is smooth and lump-free.
  • Let the batter rest for 10 minutes for softer, fluffier pancakes.

Step 2: Make the Coffee Syrup

  • In a small bowl or mug, mix the instant coffee, brown sugar, and maple syrup.
  • Add the hot water and stir until everything is fully dissolved.
  • Set aside to cool completely.

Step 3: Prepare the Mascarpone Cream

  • In a bowl, whisk together the mascarpone, icing sugar, and vanilla extract until smooth.
  • Add the double cream / heavy cream and whisk again until thick, fluffy, and fully combined.
  • Set aside.

Step 4: Cook the Pancakes

  • Heat a non-stick pancake or crepe pan over low-medium heat.
  • Pour ¼ cup of batter onto the pan and cook until small bubbles appear on the surface.
  • Flip and cook for another 1-2 minutes until golden brown.
  • Repeat with the remaining batter.

Step 5: Assemble the Tiramisu Pancakes

  • Brush or spoon the coffee syrup over each pancake.
  • Spread or pipe a layer of mascarpone cream on top.
  • Stack the pancakes, repeating the layers until you have a tall, delicious pancake stack.
  • Dust generously with cocoa powder for that authentic tiramisu finish, and enjoy!

Notes

  • Use a non-stick pan – This ensures even cooking and easy flipping.
  • Let the batter rest – Allowing the batter to sit for 10 minutes results in fluffier pancakes.
  • If you don’t have buttermilk – use can make buttermilk by mixing 1 cup of milk, 2 tbsp of lemon, lime juice or even vinegar,  let it sit for 10 minutes and you have homemade buttermilk
  • Cool the coffee syrup – If it’s too warm, it can make the pancakes soggy.
Keyword Pancakes, TIramisu, Tiramisu Pancakes
2nd March 2025 0 comments
0 FacebookTwitterPinterestPocketThreadsBlueskyEmail
BasicsBreakfastPancakes

Easy English Pancakes (Crepes)

by Hunar Baig 27th February 2025
written by Hunar Baig

If you love soft, thin pancakes with crispy edges, then you’ve found the perfect recipe! These easy English pancakes are light, delicate, and beautifully crisp on the edges while remaining soft in the centre. Best served the classic way with a generous sprinkle of sugar and a squeeze of fresh lemon juice.

What Are Traditional English Pancakes?

English pancakes are typically made with flour, sugar, eggs, milk, and a little water, with no leavening agents. This gives them a thin texture, crispy edges, and a wonderfully soft, slightly chewy centre.

What Is the Difference Between Crepes and English Pancakes?

While both are thin and have those perfect lacy edges, English pancakes are slightly thicker, softer, and have a richer taste compared to French crepes, which are ultra-thin, crispier, and often sweeter. Both are incredibly versatile and delicious in their own way!


Ingredient Notes for English Pancakes

These simple ingredients come together to create the most delicious English pancakes:

  • Plain Flour – The perfect base for light, delicate pancakes.
  • Eggs – Bind the batter and add moisture.
  • Melted Butter – Adds richness and helps achieve crispy edges.
  • Caster Sugar – Sweetens the pancakes while maintaining their softness.
  • Milk – Thins out the batter for a smooth, pourable consistency.
  • Salt – Enhances and balances the flavors.
  • Vanilla Extract – Adds depth and a subtle vanilla aroma.

How to Make English Pancakes – Step by Step

Follow these simple steps to make perfect English pancakes every time:

  1. Prepare the Dry Ingredients: Sift the flour into a large mixing bowl, then stir in the salt and sugar.
  2. Add the Wet Ingredients: Create a well in the center of the dry ingredients. Crack in the eggs, pour in the milk, water, and vanilla extract, then whisk until the batter is smooth and lump-free.
  3. Incorporate the Butter: Stir in half of the melted, cooled butter and mix well. Let the batter rest for 10 minutes—this helps it thicken. It should be consistency of slightly thick single cream.
  4. Heat the Pan: Place a non-stick crepe or pancake pan over low heat.
  5. Cook the Pancakes: Use a tissue or brush to coat the pan with the remaining melted butter. Pour about half a ladle of batter into the pan, swirling it to cover the base evenly. Fill any gaps with extra batter if needed.
  6. Flip and Finish Cooking: Cook for 30-60 seconds until the edges start to lift and turn golden. Flip using a palette knife or thin spatula, then cook for another 30-60 seconds until fully cooked and golden brown.
  7. Serve & Enjoy: Repeat with the remaining batter. Serve warm with caster sugar and a squeeze of fresh lemon juice. Enjoy!

The Best Toppings for English Pancakes

If you’re looking for topping inspiration beyond the classic sugar and lemon, here are some delicious options:

  • Nutella
  • Biscoff
  • Fresh berries
  • Chopped nuts
  • Golden syrup
  • Chocolate sauce
  • Greek yogurt & honey
  • Sliced bananas
  • Whipped cream
  • Peanut butter
  • Ice cream, etc.

Tips and Tricks for Perfect English Pancakes

  • Use a non-stick crepe or pancake pan – This makes flipping easier and ensures even cooking.
  • Let the batter rest for 10 minutes – This helps the pancakes become softer and slightly thicker.
  • Tag @aceofspoons_ on TikTok and Instagram – If you make this recipe, share your results!

These easy English pancakes are a must-try! Whether you go for the classic sugar and lemon or experiment with fun toppings, they’re guaranteed to be a hit. Happy flipping! 🥞✨

Easy English Pancakes (Crepes)

Hunar Baig
These easy English pancakes are light, delicate, and beautifully crisp on the edges while remaining soft in the center. Best served the classic way with a generous sprinkle of sugar and a squeeze of fresh lemon juice.
Print Recipe Pin Recipe
Prep Time 20 minutes mins
Cook Time 15 minutes mins
Total Time 35 minutes mins
Course Breakfast, Brunch
Cuisine British
Servings 4 – 6 servings

Equipment

  • Large bowl
  • Whisk
  • Non-stick pan / Pancake pan

Ingredients
  

  • 120 g plain flour
  • 1/2 tsp salt
  • 2 tbsp sugar
  • 2 eggs
  • 200 ml whole milk
  • 50 ml water
  • 1 tsp vanilla extract
  • 30 g melted butter

Instructions
 

  • Sift the flour into a large mixing bowl, then stir in the salt and sugar.
  • Create a well in the centre of the dry ingredients. Crack in the eggs, pour in the milk, water, and vanilla extract, then whisk until the batter is smooth and lump-free.
  • Stir in half of the melted, cooled butter and mix well. Let the batter rest for 10 minutes—this helps it thicken. It should be consistency of slightly thick single cream.
  • Place a non-stick crepe or pancake pan over low heat.
  • Use a tissue or brush to coat the pan with remaining melted butter. Pour about half a ladle of batter into the pan, swirling it to cover the base evenly. Fill any gaps with extra batter if needed.
  • Cook for 30-60 seconds until the edges start to lift and turn golden. Flip using a palette knife or thin spatula, then cook for another 30-60 seconds until fully cooked and golden brown.
  • Repeat with the remaining batter. Serve warm with caster sugar and a squeeze of fresh lemon juice. Enjoy!

Notes

  • Use a non-stick crepe or pancake pan – This makes flipping easier and ensures even cooking.
  • Let the batter rest for 10 minutes – This helps the pancakes become softer and slightly thicker.
Tag @aceofspoons_ on TikTok and Instagram – If you make this recipe, share your results! 🥞✨
Keyword American Buttermilk Pancakes, Crepes, Easy Pancake Recipe, English Pancakes, Pancakes
27th February 2025 0 comments
0 FacebookTwitterPinterestPocketThreadsBlueskyEmail
BasicsBreakfast

Best American Buttermilk Pancakes

by Hunar Baig 24th February 2025
written by Hunar Baig

Best American Buttermilk Pancakes

These american buttermilk pancakes are stacked tall, fluffy, soft, and super easy to make! With the help of baking powder for leavening instead of whipping egg whites, these pancakes come together quickly—ready in less than an hour! I was inspired to make these from that scene in Matilda where she makes pancakes which, at this point, is a core memory for me.

What is the difference between buttermilk pancakes and regular pancakes?

Buttermilk pancakes are taller and lighter, plus the acid in the buttermilk breaks down the glutens making the pancakes more tender and soft. Regular pancakes normally call for regular milk, making thinner pancakes that aren’t as tender.

What does buttermilk do to pancakes?

Buttermilk is the secret to the softest fluffiest pancakes! The acid in the buttermilk reacts with the baking powder to add height and lightness and the buttermilk also breaks down the glutens in the flour making the pancakes softer and more tender. The result is a tall and light pancake that is moist and pillowy!

Ingredient Notes – American Buttermilk Pancakes

Here are the ingredients that come together to make these pancakes so delicious:

Buttermilk – Essential for height and tenderness.

Eggs – Help bind the pancakes together while adding moisture.

Melted Butter – Adds moisture, richness, and softens the pancakes.

Caster Sugar – Sweetens the pancakes and helps maintain their softness.

Plain Flour – The perfect base for tender, fluffy pancakes.

Baking Powder – Provides lightness and lift, so there’s no need to whip egg whites.

Salt – Balances and enhances all the flavors.

Vanilla Extract – Adds depth and that signature vanilla aroma.

How to make American Buttermilk Pancakes  – step by step

Making American buttermilk pancakes is so easy—just follow these steps:

  1. Prep the Dry Ingredients: Sift together flour, salt, and baking powder in a large bowl. Then, stir in the sugar.
  2. Add the Wet Ingredients: Create a well in the center of the dry ingredients. Crack the eggs into the well and pour in the cooled melted butter and buttermilk. Whisk everything together until smooth, ensuring there are no large lumps or clumps. Let the batter rest for 10 minutes to thicken.
  3. Heat the Pan: Place a non-stick pan or pancake pan on a low heat.
  4. Cook the Pancakes: Pour about 1/3 cup of batter per pancake into the pan. When bubbles start to form on the surface and most have popped, flip the pancake. Cook for an additional 1-2 minutes on the other side until golden brown.
  5. Serve & Enjoy: Continue cooking the remaining batter, yielding around 8 large pancakes or 12 smaller ones. Serve with butter and your favorite syrup. Enjoy!

The best toppings for American Buttermilk Pancakes:

These are a couple of options if you’re bored of the classic butter and maple syrup, here are some of my favourites:

  • Chocolate chips
  • Fresh Berries
  • Chopped nuts
  • Golden syrup (instead of maple syrup)
  • Chocolate sauce
  • Greek yogurt & runny honey
  • Fresh bananas
  • Nutella
  • Whipped cream
  • Peanut butter
  • Ice cream 

The 3 BEST ways to customise these fluffy American Buttermilk Pancakes: 

1. Add in a couple handfuls of chocolate chips into the batter before cooking and you’ll have delicious chocolate chip pancakes

2. To make these into zesty lemon pancakes rub the zest of one lemon into the sugar before mixing into the flour. Once the pancakes are done cooking, top with butter and lemon or regular syrup.

3. Coat ½ cup of frozen blueberries in 1 tbsp of sugar, let it sit for 10 minutes and then fold the berries into the batter before cooking and you’ll have fluffy and flavourful blueberry pancakes! 

How to make your own buttermilk

If you don’t have buttermilk to hand, this simple trick is a life saver!

Basically you add 2 tbsp of any acid into milk and let it sit at room temp for 10 minutes and voila you have fresh buttermilk, ready to cook with.

You will need:

  • 1 cup of milk
  • 2 tbsp of either, lemon juice, lime juice or white vinegar

Mix these together and allow it to sit for 10 minutes and your buttermilk is ready! The buttermilk will look slightly curdled, but don’t worry that is how it’s supposed to look.

Tips and Tricks – Best American Buttermilk Pancakes

  • Use a non stick crepe or pancake pan –  this will give you best results and make sure the outside of the pancake is really soft
  • Let the batter sit for 10 minutes – this makes the pancakes even softer and thicker
  • If you don’t have buttermilk – use can make buttermilk by mixing 1 cup of milk, 2 tbsp of lemon, lime juice or even vinegar,  let it sit for 10 minutes and you have homemade buttermilk
  • The recipe video is on my TikTok and IG – please tag @aceofspoons if you make this recipe

Best American Buttermilk Pancakes

Hunar Baig
These American buttermilk pancakes are stacked tall, fluffy, soft, and super easy to make! With the help of baking powder for leavening instead of whipping egg whites, these pancakes come together quickly—ready in less than an hour!
Print Recipe Pin Recipe
Prep Time 10 minutes mins
Cook Time 20 minutes mins
Total Time 30 minutes mins
Course Breakfast, Brunch
Cuisine American
Servings 8 – 12 pancakes

Equipment

  • Large bowl
  • Whisk
  • Pancake pan (or any non stick pan)

Ingredients
  

  • 300 g plain flour
  • 6 tsp baking powder
  • 4 tbsp white sugar
  • 1/4 tsp salt
  • 3 eggs
  • 1 tsp vanilla
  • 250 ml buttermilk
  • 50 g melted and cooled butter

Instructions
 

  • Sift together flour, salt, and baking powder in a large bowl. Then, stir in the sugar.
  • Create a well in the center of the dry ingredients. Crack the eggs into the well and pour in the cooled melted butter and buttermilk. Whisk everything together until smooth, ensuring there are no large lumps or clumps. Let the batter rest for 10 minutes to thicken.
  • Place a non-stick pan or pancake pan on a low heat.
  • Pour about 1/3 cup of batter per pancake into the pan. When bubbles start to form on the surface and most have popped, flip the pancake. Cook for an additional 1-2 minutes on the other side until golden brown.
  • Continue cooking the remaining batter, yielding around 8 large pancakes or 12 smaller ones. Serve with butter and your favorite syrup. Enjoy!

Notes

  • Use a non stick crepe or pancake pan –  this will give you best results and make sure the outside of the pancake is really soft
  • Let the batter sit for 10 minutes – this makes the pancakes even softer and thicker
  • If you don’t have buttermilk – use can make buttermilk by mixing 1 cup of milk, 2 tbsp of lemon, lime juice or even vinegar,  let it sit for 10 minutes and you have homemade buttermilk
  • The recipe video is on my TikTok and IG – please tag @aceofspoons  if you make this recipe
Keyword American Buttermilk Pancakes, American Pancakes, Buttermilk Pancakes
24th February 2025 0 comments
0 FacebookTwitterPinterestPocketThreadsBlueskyEmail
BasicsBreadBreakfast

Easy High-Protein Bagels 

by Hunar Baig 22nd February 2025
written by Hunar Baig 4 read

Easy High-Protein Bagels 

If you’ve ever wanted to make bagels at home, you need to try these Easy High-Protein Bagels! With just a few simple ingredients, you’ll get soft, chewy bagels with a crispy exterior—so good you’ll never want store-bought again. 

They’re perfect for a high-protein breakfast, a satisfying snack, or even a base for sandwiches. Plus, they come together without yeast and in half the time of traditional bagels—so you can enjoy fresh, homemade bagels whenever you want!

The Secret to Perfect High-Protein Bagels

After a lot of testing, I’ve found that using 0% Greek yogurt with a bit of sour cream gives the absolute best texture. It prevents the bagels from becoming gummy and helps them stay fresher for longer. You can skip the sour cream, but trust me—it makes all the difference!

What Makes These Bagels High in Protein?

Unlike traditional bagels, these are made with Greek yogurt, which adds a hefty protein boost, plus bread flour, which has more protein than regular plain flour. Each bagel packs around 10g of protein, but you’d honestly never know it! 

Best Flour for Protein Bagels

The key to a non-gummy, truly bagel-like texture is using strong white bread flour. It adds a slight chew—not quite as much as a classic New York bagel, but it gives these their own divine texture.

What Do These Protein Bagels Taste Like?

These bagels taste just like regular ones, but with a slight tang from the Greek yogurt and sour cream. The crisp exterior gives way to a beautifully soft, chewy center, making them the perfect blank canvas for any toppings you like!

Ingredients for Easy High-Protein Bagels

Here’s what you’ll need to make these homemade bagels:

  • Strong White Bread Flour – Gives the bagels structure and chewiness without needing yeast.
  • Greek Yogurt – Adds moisture and a protein boost.
  • Sour Cream – Enhances texture and keeps the bagels soft.
  • Salt – Brings out the flavor.
  • Baking Powder – Helps the bagels rise.
  • Olive Oil – Adds softness and a hint of flavor.
  • Egg Wash – Creates a golden, glossy crust.
  • Toppings (Optional) – Try sesame seeds, everything bagel seasoning, or shredded cheese for extra flavor!

How to Make Easy High-Protein Bagels

These bagels are crispy on the outside and soft, chewy on the inside. Follow these simple steps for bagel perfection:

1. Make the Dough

In a large bowl, combine the bread flour, baking powder, and salt. Mix well, then add the Greek yogurt, olive oil, and sour cream. Stir until a dough forms. Knead for 3–5 minutes until smooth.

2. Rest the Dough

Cover the dough with cling film (plastic wrap) and let it rest for 15 minutes.

3. Preheat the Oven

Preheat your oven to 375°F (190°C) and line a baking sheet with parchment paper.

4. Knead & Shape

Lightly flour a surface and divide it into 4 equal portions (or 6, to make 6 mini bagels) and shape each into a bagel.

5. Egg Wash & Toppings

Brush each bagel with egg wash and sprinkle with your favorite toppings. (I love using everything bagel seasoning—recipe below if you don’t have any!)

6. Bake

Place the bagels on the prepared baking sheet and bake for 25–30 minutes or until golden brown.

7. Cool & Enjoy

Let the bagels cool before slicing. Serve with cream cheese, smoked salmon, or just a smear of butter.

How Long Do These Bagels Last?

  • Room Temperature – Store in an airtight container or ziplock bag for up to 3 days.
  • Fridge – Store in an airtight container or ziplock bag in the fridge for 1 week.
  • Freezer – Freeze for up to 2 months and simply toast before serving!

Tips & Tricks for the Best High-Protein Bagels

💡 Use real Greek yogurt – Not Greek-style yogurt, as it has a different consistency.
💡 Rest the dough – Helps make the bagels softer and chewier.
💡 Add sour cream – Keeps the bagels moist and fresh for days.
💡 Experiment with flavors – Try cinnamon & raisins for a sweet version or garlic & herbs for a savory twist.


Try This Easy High-Protein Bagel Recipe Today!

These Easy High-Protein Bagels are a game-changer for anyone looking for a homemade, protein-packed version of a classic breakfast staple. Whether you enjoy them plain, with cream cheese, or as a sandwich, you’ll never go back to store-bought again!

Tag me on TikTok or Instagram [@aceofspoons] if you make this recipe—I’d love to see your recreations! 🍩✨

Easy High-Protein Bagels

Hunar Baig
If you’ve ever wanted to make bagels at home, you need to try these Easy High-Protein Bagels! With just a few simple ingredients, you’ll get soft, chewy bagels with a crispy exterior—so good you’ll never want store-bought again.
Print Recipe Pin Recipe
Prep Time 15 minutes mins
Cook Time 25 minutes mins
Total Time 40 minutes mins
Course Bread, Breakfast, Brunch
Servings 4 bagels

Equipment

  • Large bowl

Ingredients
  

Bagel Dough Recipe

  • 200 g bread flour
  • 150 g greek yogurt
  • 50 g sour cream
  • 1 tbsp olive oil
  • 2 tsp baking powder
  • 1/2 tsp salt

Egg Wash

  • 1 medium egg
  • 1 tsp water

Instructions
 

  • In a large bowl, combine the bread flour, baking powder, and salt. Mix well, then add the Greek yogurt, olive oil, and sour cream. Stir until a dough forms. Knead for 3–5 minutes until smooth.
  • Cover the dough with cling film (plastic wrap) and let it rest for 15 minutes.
  • Preheat your oven to 375°F (190°C) and line a baking sheet with parchment paper.
  • Lightly flour a surface and divide it into 4 equal portions (or 6, to make 6 mini bagels) and shape each into a bagel.
  • Brush each bagel with egg wash and sprinkle with your favourite toppings. (I love using everything bagel seasoning—recipe below if you don’t have any!)
  • Place the bagels on the prepared baking sheet and bake for 25-30 minutes or until golden brown.
  • Let the bagels cool before slicing. Serve with cream cheese, smoked salmon, or just a smear of butter.

Notes

💡 Use real Greek yogurt – Not Greek-style yogurt, as it has a different consistency.
💡 Rest the dough – Helps make the bagels softer and chewier.
💡 Add sour cream – Keeps the bagels moist and fresh for days.
💡 Experiment with flavors – Try cinnamon & raisins for a sweet version or garlic & herbs for a savory twist.
Keyword Easy Bagel Recipe, Everything bagels, High Protein Bagel, Protein Bagel

Everything Bagel Seasoning

Hunar Baig
A bold and flavorful blend of sesame seeds, poppy seeds, dried garlic, dried onion, and flaky salt, this homemade Everything Bagel Seasoning adds a perfect crunchy, savory kick to bagels, avocado toast, eggs, and more!
Print Recipe Pin Recipe
Prep Time 5 minutes mins
Total Time 5 minutes mins
Course Seasoning, Spices

Equipment

  • Small Bowl
  • Small jar (to store the seasoning in)

Ingredients
  

  • 2 tbsp white sesame seeds
  • 2 tbsp black sesame seeds
  • 2 tbsp poppy seeds
  • 2 tbsp dried minced onions
  • 1 tbsp garlic granules
  • 1 1/2 tbsp flaky salt (maldon salt works best)

Instructions
 

  • In a small bowl, combine all of the ingredients and mix well.
  • Pour into a small jar or container and the everything bagel seasoning is ready!
Keyword Everything Bagel Seasoning, Everything bagels
22nd February 2025 0 comments
0 FacebookTwitterPinterestPocketThreadsBlueskyEmail
Uncategorised

Rachels’ Iconic Thanksgiving Trifle: A ‘Friends’ Classic

by Hunar Baig 21st December 2024
written by Hunar Baig

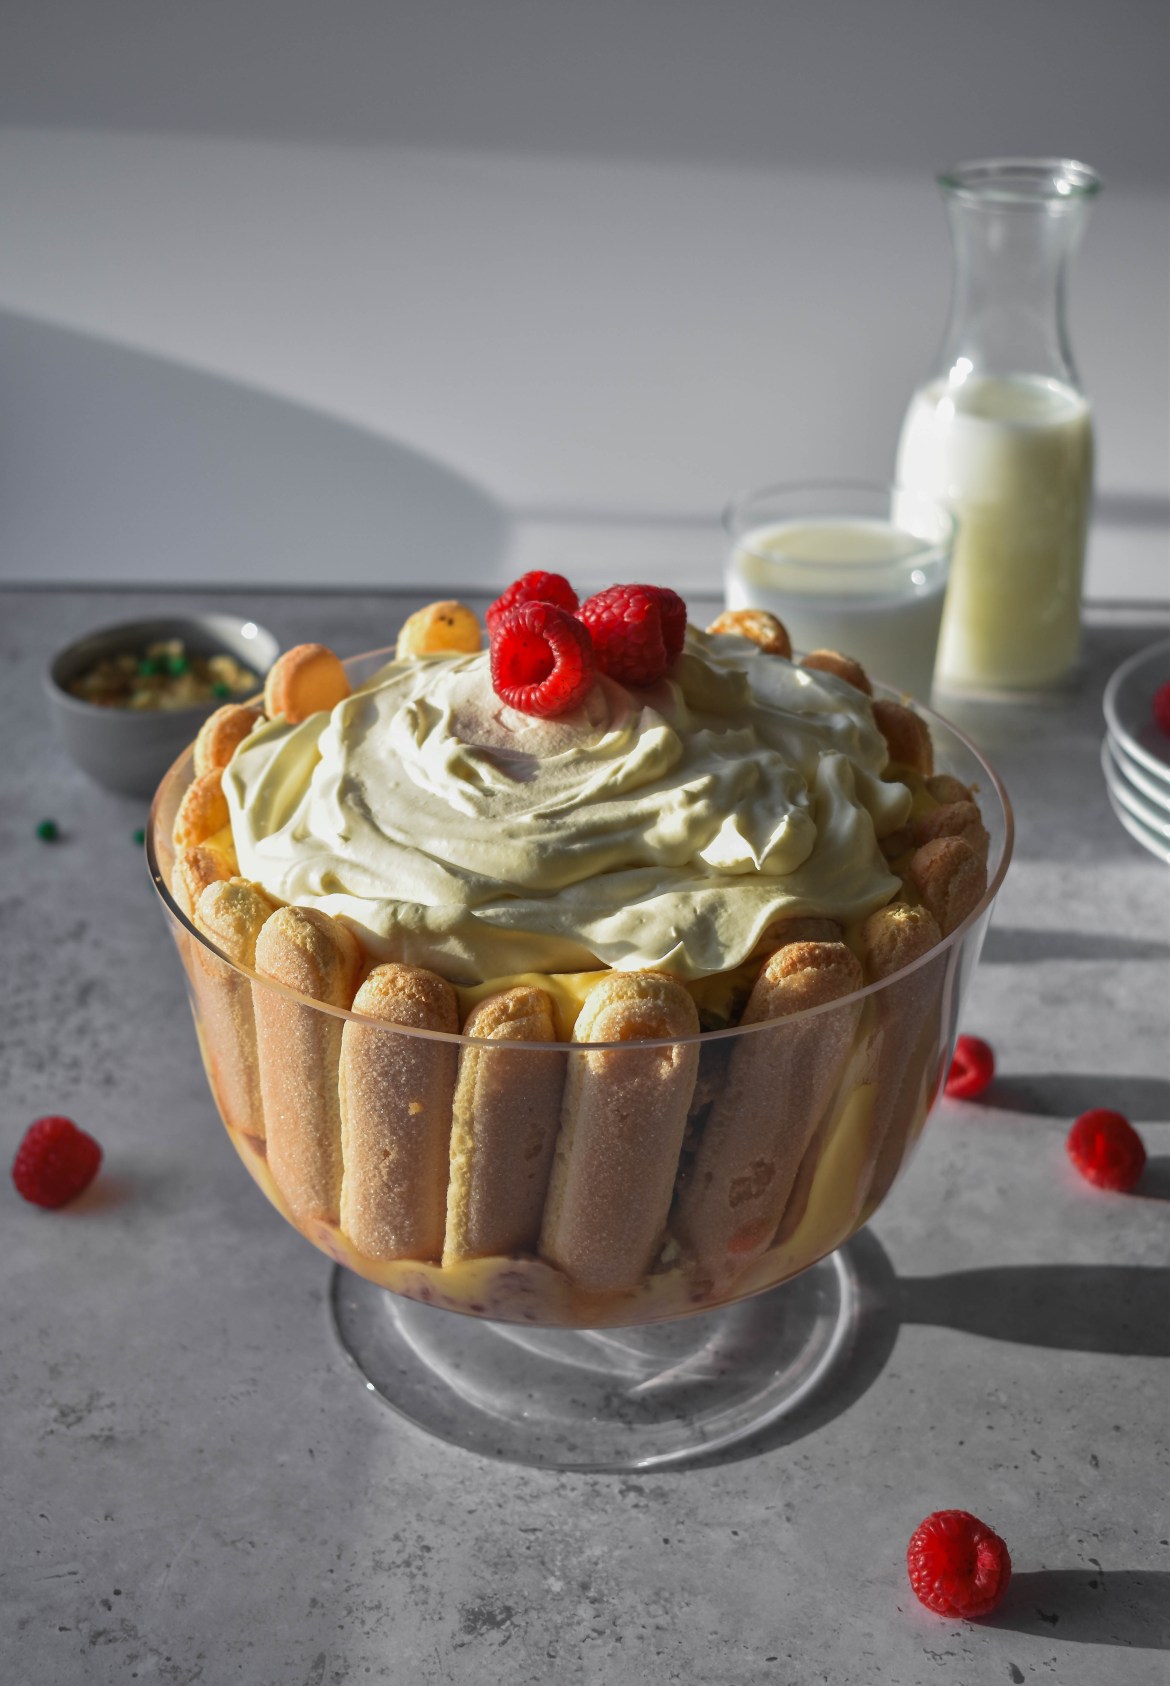
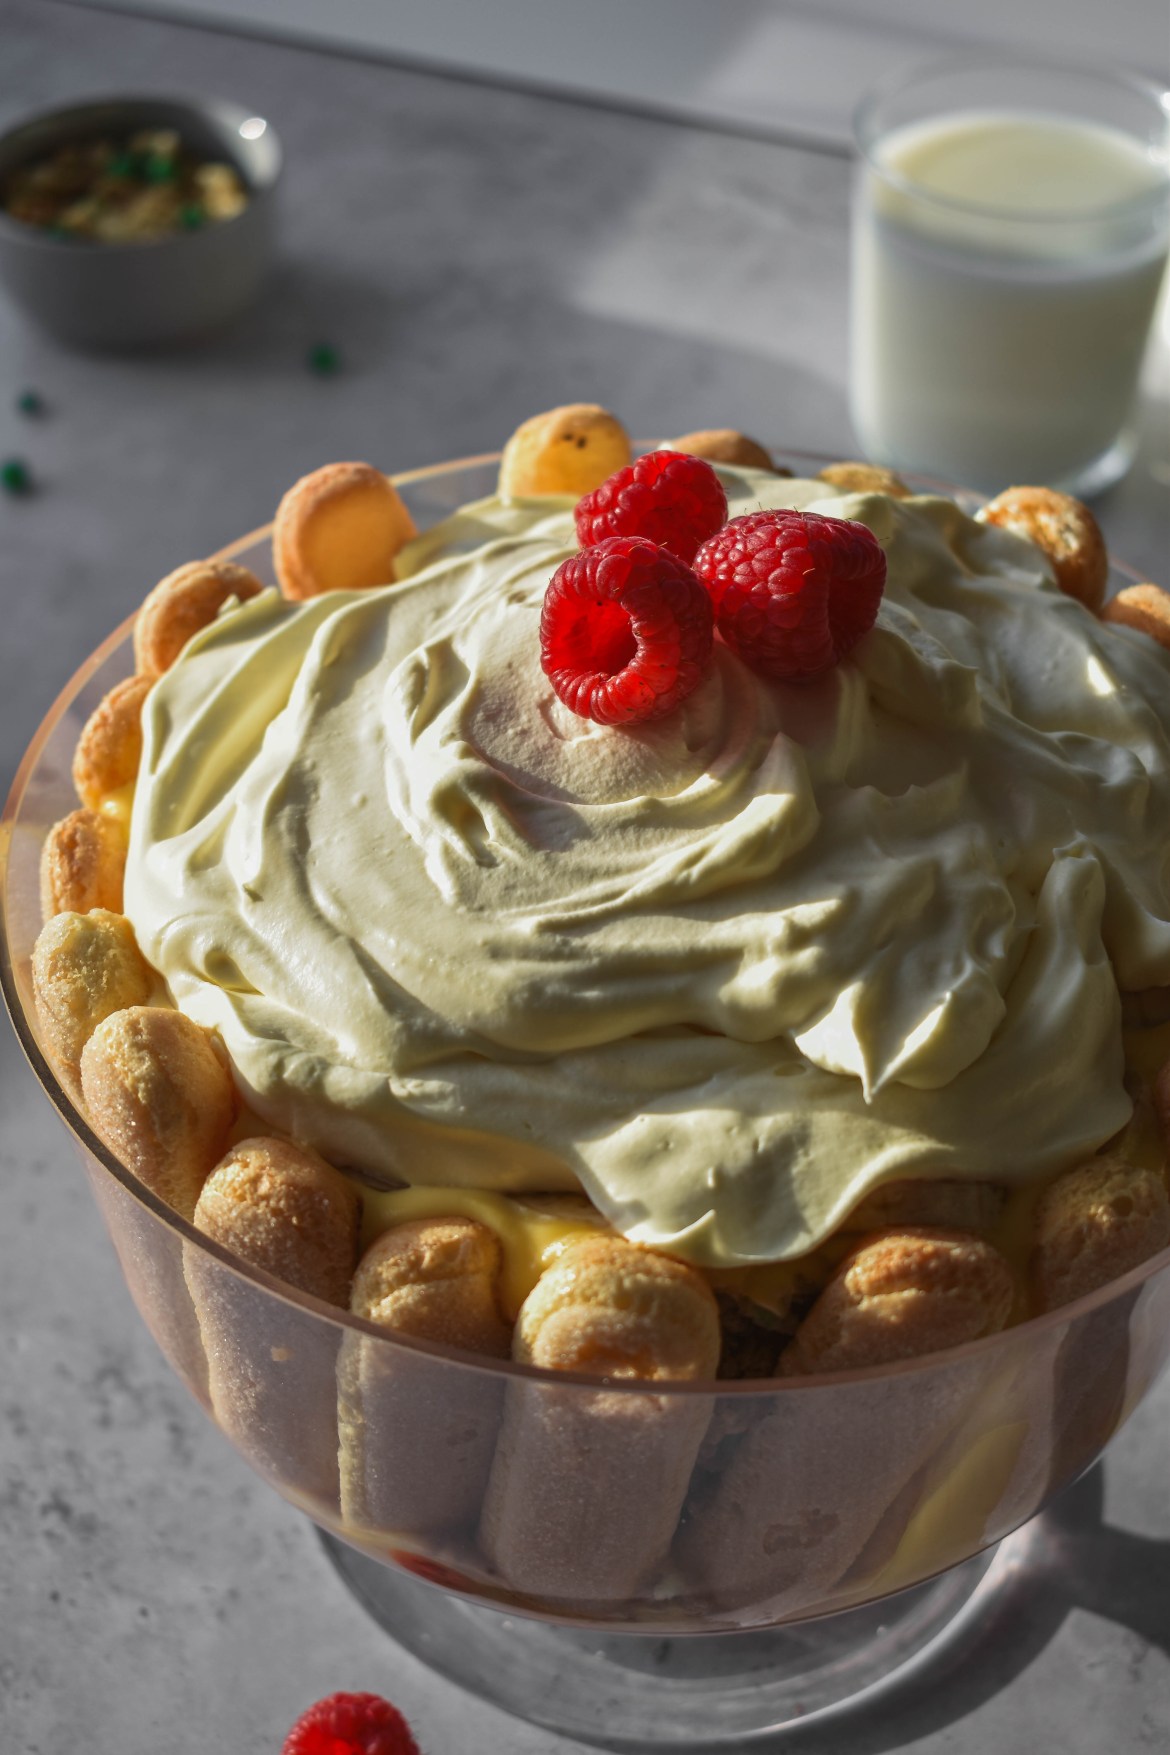
Rachels’ Iconic Thanksgiving Trifle

If you know me, you know I’m a die-hard Friends fan. I’ve watched the show so many times that I practically have it memorized. Honestly, it’s my ultimate comfort show. Being from the UK, Thanksgiving was never really on my radar—unless, of course, it was Friends related. And Rachel’s trifle? It’s the perfect Thanksgiving (or honestly, any holiday) dessert to both impress and freak out your guests at the same time.

What is Rachel’s Iconic Thanksgiving Trifle?

In Friends Season 6, Episode 9 (“The One Where Ross Got High”), the gang gathers for another chaotic Thanksgiving dinner at Monica’s. Monica assigns Rachel the task of making dessert, and let’s just say it didn’t go as planned. Due to a cookbook mishap, Rachel accidentally combines two recipes—a traditional English trifle and shepherd’s pie. The result? A dessert disaster that leaves everyone laughing (and gagging).

Honestly, this is my favorite Thanksgiving episode of Friends. From the witty dialogue to the overall chaos—and, of course, the iconic ruined trifle—it’s TV gold.

Here’s how Rachel made hers:

  1. A layer of ladyfingers
  2. A layer of jam
  3. Custard made from scratch
  4. Fresh Raspberries
  5. Another layer of ladyfingers
  6. Beef sautéed with peas and onions
  7. More Custard
  8. A layer of bananas
  9. Whipped cream on top

The Million Dollar Question: Are We Using Beef?

The answer is a resounding NO! However, I’ve managed to fool many people with this recipe. My family, friends, and millions on social media couldn’t believe I didn’t actually use beef. Could it BE any more realistic?

Beef Sautéed with Peas and Onions… Really?

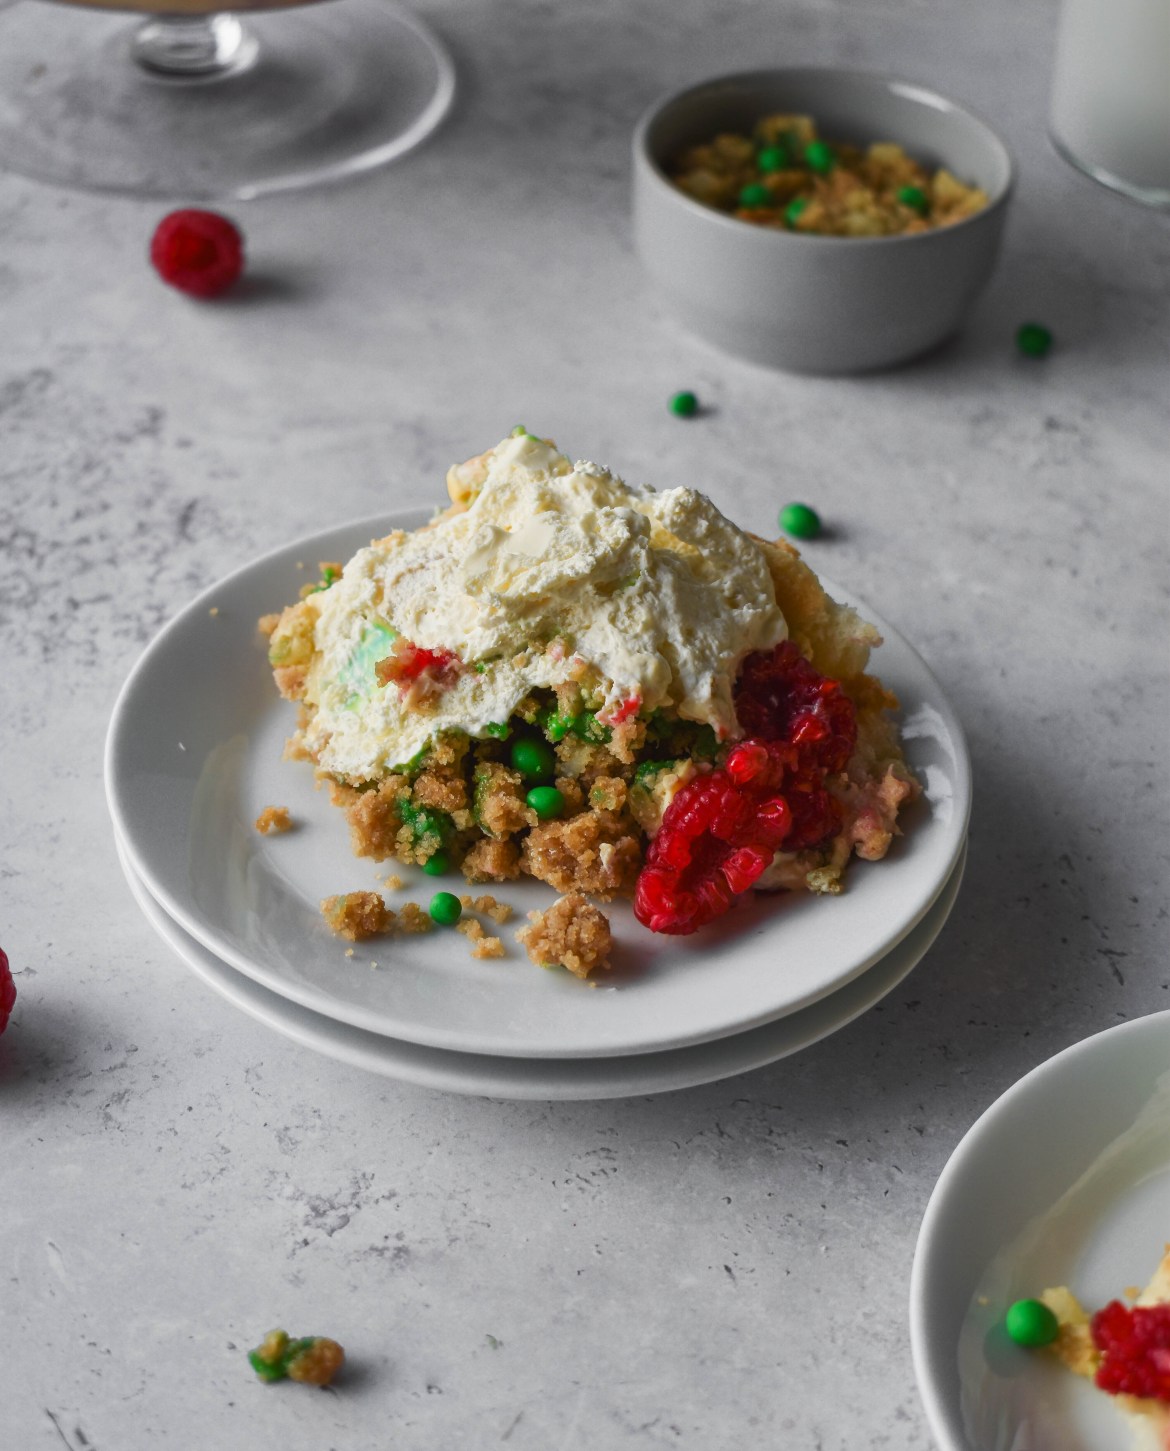
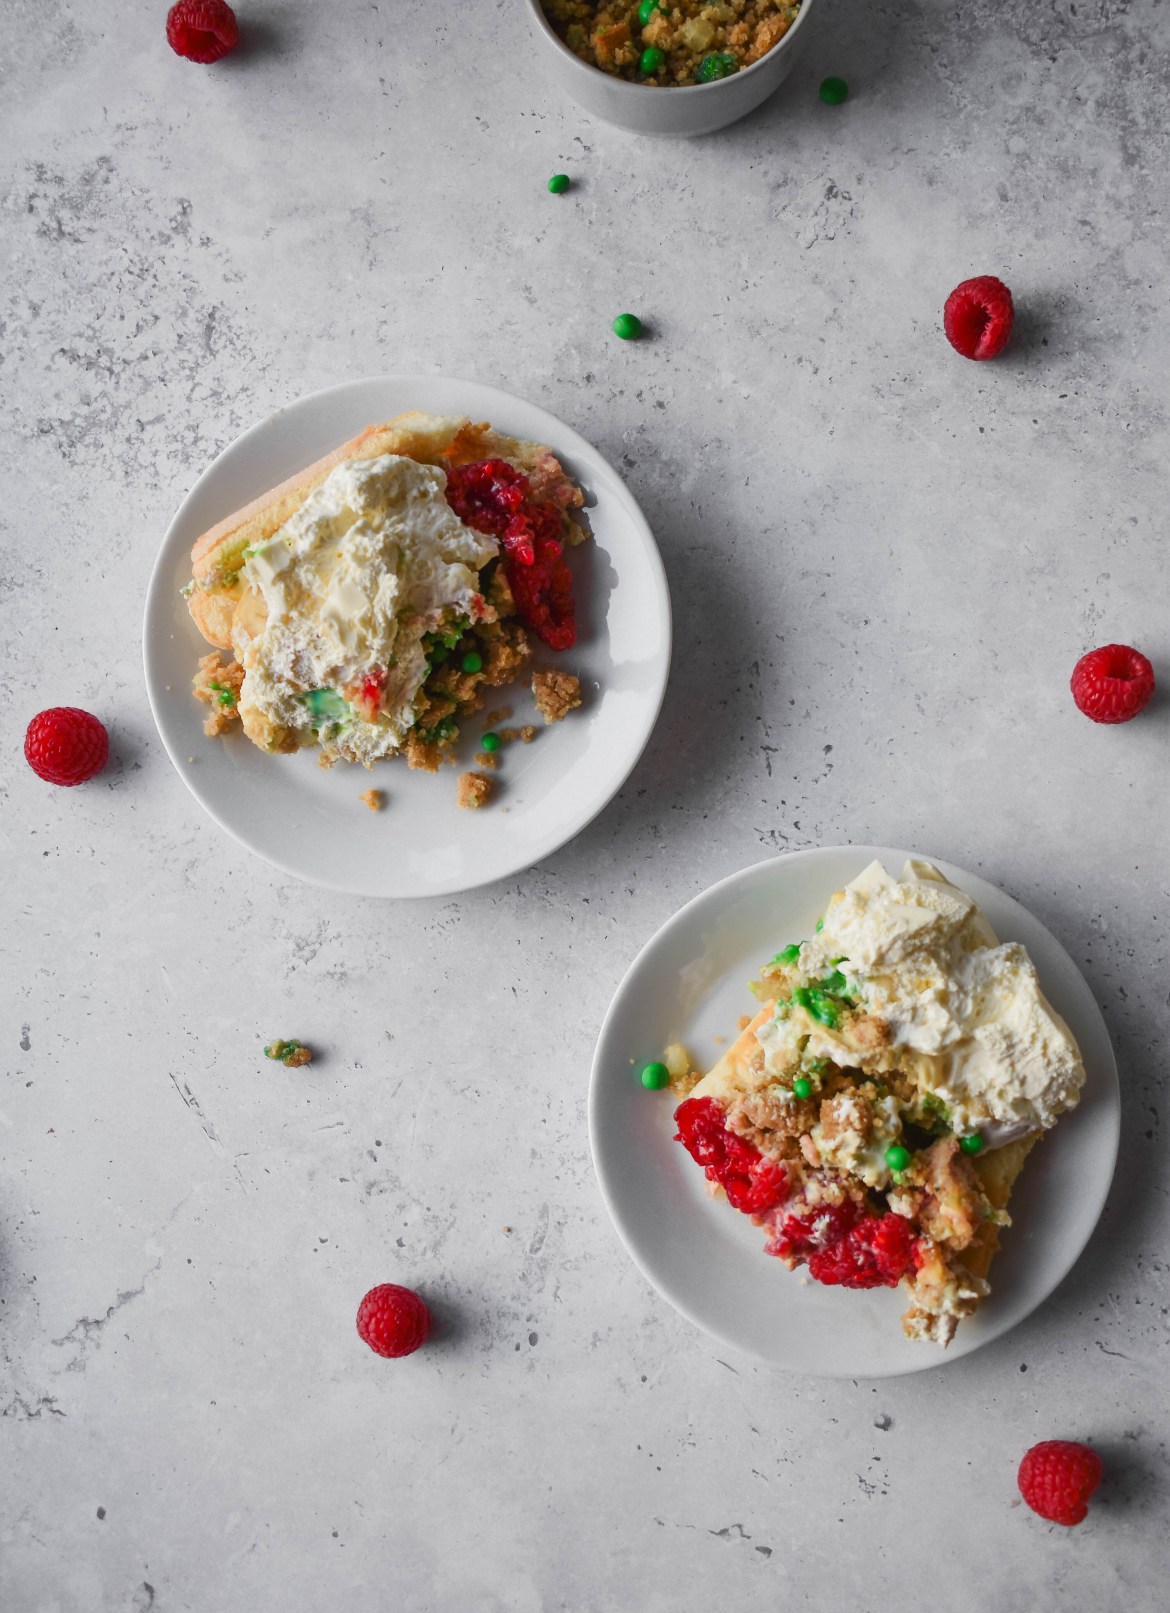
So, what are we using instead of the infamous beef sautéed with peas and onions? After plenty of testing, I’ve found a substitute that looks the part, tastes delicious, and will still freak out your guests!

  • For the “beef,” I use vanilla cake, lightly dyed brown with food coloring.
  • For the “peas,” I roll small pieces of green fondant.
  • For the “onions,” I finely chop tinned pears to mimic the texture of sautéed onions.

These substitutions blend perfectly with the trifle’s flavors. Plus, traditional English trifles almost always include cake, so it’s a win-win!

Ingredient Notes – Rachels’ Iconic Thanksgiving Trifle

The ingredients that go into Rachels’ Iconic Thanksgiving Trifle

Cake – is the base for the “beef” part of the trifle you could also use cake mix.

Green Fondant – rolled into small balls, for the peas.

Tinned Pears – chopped super small to imitate sauteed onions.

Double Cream / Heavy Cream – for the custard and whipped cream topping.

Raspberry – perfect to add sweetness and flavour to the trifle.

Lady Fingers – to add some much needed structure to this classic trifle.

Fresh Raspberries – will add so much more flavour, texture and sweetness.

Egg Yolks – for the classic custard.

Sugar – to sweeten the custard.

Cornflour – helps set the custard without gelatine

How to make Rachels’ Iconic Thanksgiving Trifle

Make the “beef sautéed with peas and onions”:

Original Recipe:

  1. In a large mixing bowl, cream the butter and sugar together until the mixture is pale, light, and fluffy.
  2. Crack in the egg and whisk until fully combined.
  3. Add the vanilla extract and mix well.
  4. Add a few drops of brown food coloring (or about ⅛ tsp of brown gel food coloring) and mix until the color is evenly distributed.
  5. Pour in half of the milk and mix thoroughly to incorporate it into the batter.
  6. Sift in half of the flour and mix until the batter is smooth and lump-free.
  7. Repeat the process by adding the remaining milk, mixing well, then sifting in the rest of the flour along with the baking powder and salt. Mix thoroughly until you have a smooth and even cake batter.
  8. Pour the batter into a greased and lined 6-inch cake tin, ensuring the surface is leveled.
  9. Bake at 170°C (340°F) for 18–22 minutes, or until the cake is golden brown, fully baked, and a toothpick inserted into the center comes out clean.
  10. While the cake is baking, prepare the fondant “peas.” Roll the green fondant into small balls roughly the size of peas. Make them slightly varied in size to give a realistic appearance. Place the fondant peas on a plate or tray and refrigerate them for a few minutes to firm up. This helps them maintain their shape and prevents them from being crushed when mixed into the cake later.
  11. Once the cake is baked and slightly cooled, crumble it into a mixing bowl using your hands.
  12. Take one pear from the can, finely chop it to resemble onions, and add it to the crumbled cake.
  13. Drizzle 2–3 tablespoons of pear juice over the cake crumbs to moisten them and enhance the flavour. Mix until combined.
  14. Gently fold in the prepared fondant peas, being careful not to crush them.

If Using Cake Mix:

  1. Prepare the boxed vanilla cake mix according to the package instructions. Add a few drops of brown food coloring to the batter and mix well until the color is evenly distributed. Bake the cake as directed on the package.
  2. While the cake is baking, prepare the fondant “peas.” Roll the green fondant into small balls roughly the size of peas. Make them slightly varied in size to give a realistic appearance. Place the fondant peas on a plate or tray and refrigerate them for a few minutes to firm up. This helps them maintain their shape and prevents them from being crushed when mixed into the cake later.
  3. Once the cake is baked and slightly cooled, crumble it into a mixing bowl using your hands.
  4. Take one pear from the can, finely chop it to resemble onions, and add it to the crumbled cake.
  5. Drizzle 2–3 tablespoons of pear juice over the cake crumbs to moisten them and enhance the flavour. Mix until combined.
  6. Gently fold in the prepared fondant peas, being careful not to crush them.

Make the Custard:

  1. Mix together the sugar and cornflour until there are no lumps.
  2. In a large mixing bowl, add the egg yolks, vanilla, and sugar-cornflour mixture, and whisk until pale and fully combined. Set aside.
  3. In a large saucepan, pour in the milk and cream and place over low heat, whisking constantly until you see a few small bubbles around the edge and the milk mixture is just warm.
  4. Gently pour a ladle of warm milk at a time in a constant stream into the egg mixture, whisking constantly until smooth and thin.
  5. Return the custard mixture to the pan and place over gentle heat. Whisk constantly until the custard thickens and becomes smooth.

Make the Whipped Cream:

  1. In a large mixing bowl or stand mixer, whip together the double cream, vanilla, and icing sugar until light, fluffy, and whipped to soft peaks.

Assemble Rachel’s Iconic Thanksgiving Trifle:

  1. Line your trifle dish with the ladyfingers.
  2. Cover the ladyfingers with a layer of raspberry jam (or any jam of your choice).
  3. Pour over half of the custard.
  4. Add a layer of fresh raspberries.
  5. Add another layer of ladyfingers, then the “beef” mixture on top of the ladyfingers.
  6. Pour over the rest of the custard and smooth it out.
  7. Add a layer of sliced bananas.
  8. Finish with the whipped cream, decorate, and allow to set in the fridge for at least 2 hours.
  9. Serve and enjoy!

How Long Will Rachel’s Iconic Thanksgiving Trifle Last?

If Joey’s around, it won’t last more than a day! But generally, the trifle should keep for about three days if stored properly. Simply cover it tightly and refrigerate. Be aware that the layers will get soggy over time, so it’s best enjoyed fresh.

Best tips and tricks for making Rachels’ Iconic Thanksgiving Trifle:

  • Use Cake Mix: Save time by using a store-bought mix.
  • Pre-made Custard: An easy alternative for faster prep.
  • Chill It: Letting the trifle set in the fridge enhances the flavors and helps the layers firm up

Rachels’ Iconic Thanksgiving Trifle

Hunar Baig
Rachel’s Friends Trifle Recipe is a fun and nostalgic take on the iconic dessert from Friends. With layers of ladyfingers, jam, custard, raspberries, bananas, whipped cream, and a creative “beef” substitute made from cake, fondant peas, and chopped pears, it’s the perfect mix of delicious and hilariously authentic to the show.
Print Recipe Pin Recipe
Prep Time 1 hour hr
Total Time 1 hour hr
Course Dessert
Cuisine English
Servings 18 servings

Equipment

  • Large Trifle Bowl
  • Stand mixer or hand mixer
  • 6-inch cake pan

Ingredients
  

"Beef" Ingredients

  • 75 g melted butter (1/3 cup)
  • 70 g sugar (1/3 cup)
  • 1 egg
  • 1/2 tsp vanilla extract
  • 1/2 tsp baking powder
  • pinch of salt
  • 80 ml milk (3/4 cup)
  • 120 g plain flour (1 cup)

"Peas" and "Onions" Ingredients

  • Green Fondant (about 50g)
  • 1 tinned pear (plus 2-3 tbsp of pear juice for the cake)

Custard Ingredients

  • 250 ml whole milk
  • 250 ml double cream / heavy cream
  • 4 egg yolks
  • 50 g sugar (1/4 cup)
  • 2 tbsp cornflour
  • 2 tsp vanilla extract

Whipped Cream Topping Ingredients

  • 300 ml double cream / heavy cream
  • 2 tbsp icing sugar
  • 1/2 tsp vanilla extract

Trifle Ingredients

  • Lady Fingers (about 30 – 40)
  • 150 – 200 g fresh raspberries
  • 100 g raspberry jam
  • 2 medium bananas (thinly sliced)

Instructions
 

If making the cake from scratch:

  • In a large mixing bowl, cream the butter and sugar together until the mixture is pale, light, and fluffy.
  • Crack in the egg and whisk until fully combined.
  • Add the vanilla extract and mix well.
  • Add a few drops of brown food coloring (or about ⅛ tsp of brown gel food coloring) and mix until the color is evenly distributed.
  • Pour in half of the milk and mix thoroughly to incorporate it into the batter.
  • Sift in half of the flour and mix until the batter is smooth and lump-free.
  • Repeat the process by adding the remaining milk, mixing well, then sifting in the rest of the flour along with the baking powder and salt. Mix thoroughly until you have a smooth and even cake batter.
  • Pour the batter into a greased and lined 6-inch cake tin, ensuring the surface is leveled.
  • Bake at 170°C (340°F) for 18–22 minutes, or until the cake is golden brown, fully baked, and a toothpick inserted into the center comes out clean.

If Using Cake Mix:

  • Prepare the boxed vanilla cake mix according to the package instructions. Add a few drops of brown food coloring to the batter and mix well until the color is evenly distributed. Bake the cake as directed on the package.

Make the “beef sautéed with peas and onions”:

  • While the cake is baking, prepare the fondant “peas.” Roll the green fondant into small balls roughly the size of peas. Make them slightly varied in size to give a realistic appearance. Place the fondant peas on a plate or tray and refrigerate them for a few minutes to firm up. This helps them maintain their shape and prevents them from being crushed when mixed into the cake later.
  • Once the cake is baked and slightly cooled, crumble it into a mixing bowl using your hands.
  • Take one pear from the can, finely chop it to resemble onions, and add it to the crumbled cake.
  • Drizzle 2–3 tablespoons of pear juice over the cake crumbs to moisten them and enhance the flavour. Mix until combined.
  • Gently fold in the prepared fondant peas, being careful not to crush them.

Make the Custard:

  • Mix together the sugar and cornflour until there are no lumps.
  • In a large mixing bowl, add the egg yolks, vanilla, and sugar-cornflour mixture, and whisk until pale and fully combined. Set aside.
  • In a large saucepan, pour in the milk and cream and place over low heat, whisking constantly until you see a few small bubbles around the edge and the milk mixture is just warm.
  • Gently pour a ladle of warm milk at a time in a constant stream into the egg mixture, whisking constantly until smooth and thin.
  • Return the custard mixture to the pan and place over gentle heat. Whisk constantly until the custard thickens and becomes smooth.

Make the Whipped Cream:

  • In a large mixing bowl or stand mixer, whip together the double cream, vanilla, and icing sugar until light, fluffy, and whipped to soft peaks.

Assemble Rachel’s Iconic Thanksgiving Trifle:

  • Line your trifle dish with the ladyfingers.
  • Cover the ladyfingers with a layer of raspberry jam (or any jam of your choice).
  • Pour over half of the custard.
  • Add a layer of fresh raspberries.
  • Add another layer of ladyfingers, then the “beef” mixture on top of the ladyfingers.
  • Pour over the rest of the custard and smooth it out.
  • Add a layer of sliced bananas.
  • Finish with the whipped cream, decorate, and allow to set in the fridge for at least 2 hours.
  • Serve and enjoy!

Notes

Best tips and tricks for making Rachels’ Iconic Thanksgiving Trifle:

  • Use Cake Mix: Save time by using a store-bought mix.
  • Pre-made Custard: An easy alternative for faster prep.
  • Chill It: Letting the trifle set in the fridge enhances the flavors and helps the layers firm up
Keyword Friends Trifle, Trifle, Trifle Recipe

21st December 2024 0 comments
0 FacebookTwitterPinterestPocketThreadsBlueskyEmail
DessertsNo Bake

Viral Dubai Chocolate Cheesecake

by Hunar Baig 12th December 2024
written by Hunar Baig

Viral Dubai Chocolate Cheesecake

This Viral Dubai Chocolate Cheesecake is quite literally everything: creamy, chocolatey, pistachio-packed, and insanely easy to make. Inspired by the famous Dubai chocolate bar that’s been taking over social media, this no-bake cheesecake will have everyone asking for the recipe. Get ready for a dessert that’s both indulgent and fuss-free.

Why You’ll Love It – Viral Dubai Chocolate Cheesecake

  • Inspired by the Viral Chocolate Bar: Pistachio and chocolate are a match made in dessert heaven and this cheesecake even has that viral Dubai pistachio crunch.
  • No Oven Needed: This cheesecake is a no bake cheesecake, so all you need to do is set it in the fridge to set!
  • Impressively Easy: Perfect for gatherings or when you just feel like treating yourself, yet surprisingly easy to make.

Ingredient Notes – Viral Dubai Chocolate Cheesecake

The ingredients that go into this Viral Dubai Chocolate Cheesecake

Digestive biscuits or Graham crackers – of course we need biscuits for the biscuit base! But feel free to use any dry, sweet biscuits of your choice.

Melted Butter – for the crisp buttery base.

Cream Cheese – will be the base for the cheesecake. 

Mascarpone Cheese – makes the cheesecake filling thicker and adds so much flavour.

Double Cream / Heavy Cream – for the cheesecake filling and ganache topping.

PIstachio Cream – provides that classic pistachio flavour and creamy texture.

Kataifi Pastry or Shredded Wheat Cereal – to create that viral dubai chocolate crunch.

White Chocolate – will add so much more flavour and sweetness.

Vanilla Extract – adds that classic vanilla flavour.

Salt – to balance everything out.

Lemon Juice – helps set the cheesecake without gelatine.

Icing Sugar + Sugar – to sweeten the cheesecake filling with.

Chocolate – for the perfect glossy ganache topping.

Chopped Pistachios – is used as the topping for this viral dubai chocolate cheesecake.

What is no bake cheesecake? 

No bake cheesecake is a simpler, creamier, softer version of a regular cheesecake. Since there is no baking required it also means that is A LOT easier than a standard baked cheesecake. Baked cheesecakes have a silky texture that is quite firm, while no bake cheesecakes are soft, and super light. Personally, I am a big fan of both!

How do you remove a no-bake cheesecake from the pan?

Whether you are using a springform or loose bottomed cake pan, the best way to remove your cheesecake from the pan. Is to use a small sharp paring knife and run it along the edge of your cheesecake, to release the cheesecake. 

Once released you can unlock the springform pan or, if using a loose bottomed pan, then place a tin underneath the cheesecake and slide the ring of the pan down gently. If you wish to remove the base, simply use the same clean, small sharp paring knife and run it between the base of the cheesecake and the base of the pan to release it. 

Will no-bake cheesecake firm up in the fridge?

Yes! This no-bake pistachio and chocolate cheesecake will set up nicely in the fridge, and have a light, soft and almost mousse-like texture. You should allow no bake cheesecake to set up for at least 6 – 8 hours or, for best results, refrigerate overnight. The longer you allow it to sit in the fridge, the better it will taste and the firmer it will be. 

How long does this no-bake cheesecake last?

This no bake cheesecake is the perfect dessert to make ahead of time because it stores so well. You can store any leftovers in the fridge, in an airtight container or, on a plate or a tray covered in plastic wrap, for up to 5 days.

How to make the Viral Dubai Chocolate Cheesecake

Prepare the Crust:

  1. In a food bag with a rolling pin, crush the biscuits into a fine crumb. Alternatively, you can use a food processor.
  2. Combine the crumbs with melted butter and mix until it resembles wet sand.
  3. Press the crumb mixture into the bottom and slightly up the sides of a greased and 8-inch or 9-inch springform pan.
  4. Freeze the crust for 10 – 20 minutes while preparing the rest of the recipe.

Make the Pistachio Crunch Mixture:

Using Kataifi Pastry:

  1. Chop the kataifi pastry into small pieces.
  2. Toast the pastry in 1 tablespoon of butter over medium heat until golden and crunchy. Let it cool completely.
  3. In a bowl, combine the cooled pastry with pistachio cream, mixing until you achieve a thick and crunchy consistency. Set aside.

Using Shredded Wheat Cereal:

  1. Crush the shredded wheat into small pieces using your hands or by placing it in a ziplock bag and crushing with a rolling pin.
  2. In a bowl, combine the crushed cereal with pistachio cream, mixing until it forms a thick, crunchy paste. Set aside.

Prepare the Cheesecake Filling:

  1. In a large bowl or stand mixer, beat the softened cream cheese and mascarpone until smooth and creamy.
  2. Add the icing sugar, caster sugar, salt, and vanilla extract, and mix until fully combined.
  3. In a separate bowl, whip the double cream or heavy cream until stiff peaks form.
  4. Gently fold one-third of the whipped cream into the cream cheese mixture to lighten it.
  5. Gradually fold in the remaining whipped cream, ensuring the mixture stays light and airy.
  6. Add the lemon juice and mix gently.
  7. Finally, fold in the melted white chocolate until evenly incorporated.

Assemble the Cheesecake

  1. Remove the crust from the freezer and pour half of the cheesecake filling over it, spreading it evenly with a spatula.
  2. Layer the pistachio crunch mixture on top of the filling, spreading it evenly but leaving about ½ inch from the edge.
  3. Add the remaining cheesecake filling, spreading it evenly over the pistachio layer.
  4. Cover the pan tightly with plastic wrap or foil and refrigerate for at least 6–8 hours, or ideally overnight, to allow the cheesecake to set.
  5. Once the cheesecake has set, prepare the ganache by combining the chopped chocolate and double cream (heavy cream)  in a microwave-safe bowl. Heat in 30-second increments, stirring after each, until the mixture is fully melted, thick, and glossy.
  6. Pour the ganache over the cheesecake, spreading it evenly across the top.
  7. Sprinkle chopped pistachios over the ganache for garnish.
  8. Return the cheesecake to the fridge for at least 30 minutes to allow the ganache to firm up.
  9. Then simply slice, serve and enjoy!

Best tips and tricks for making the Viral Dubai Chocolate Cheesecake:

  • Chill the cheesecake as long as possible – the cheesecake needs to chill for at least 6 – 8 hours, ideally overnight. Basically the longer it chills the better the cheesecake will taste.
  • Use room temperature cream cheese and mascarpone – this makes all the difference. Using the room temperature cream cheese, will ensure the cheesecake filling is super smooth.
  • Don’t overmix the no bake cheesecake filling – overmixing the cheesecake filling will make the cheesecake tough, instead of light and mousse like.
  • Use a sharp + clean knife – helps you get even clean slices, that looks super professional!

Viral Dubai Chocolate Cheesecake

Hunar Baig
This Viral Dubai Chocolate Cheesecake is quite literally everything: creamy, chocolatey, pistachio-packed, and insanely easy to make. Inspired by the famous Dubai chocolate bar that’s been taking over social media, this no-bake cheesecake will have everyone asking for the recipe. Get ready for a dessert that’s both indulgent and fuss-free.
Print Recipe Pin Recipe
Prep Time 30 minutes mins
Chill Time 6 hours hrs
Total Time 6 hours hrs 30 minutes mins
Course Dessert
Servings 12 servings

Equipment

  • 8 – 9 inch springform or loose bottomed cake pan
  • Large Mixing Bowl
  • Stand mixer or hand mixer
  • Rubber Spatula

Ingredients
  

Biscuit Base

  • 250 g digestive biscuits or graham crackers
  • 80 g melted butter

Cheesecake Filling

  • 250 g cream cheese
  • 250 g mascarpone cheese
  • 250 ml double cream / heavy cream
  • 50 g white sugar (1/4 cup)
  • 60 g icing sugar / powdered sugar (1/2 cup)
  • 100 g melted white chocolate
  • 2 tsp vanilla extract or paste
  • 1/4 tsp salt
  • 1 tbsp lemon juice

Pistachio Crunch Filling

  • 90 – 100 g shredded wheat or kataifi pastry
  • 100 g pistachio cream

Chocolate Ganache + Topping

  • 50 g dark chocolate
  • 50 g milk chocolate
  • 50 ml double cream / heavy cream (1 cup)
  • chopped pistachios for decoration

Instructions
 

  • Prepare the Crust:
  • In a food bag with a rolling pin, crush the biscuits into a fine crumb. Alternatively, you can use a food processor.
  • Combine the crumbs with melted butter and mix until it resembles wet sand.
  • Press the crumb mixture into the bottom and slightly up the sides of a greased and 8-inch or 9-inch springform pan.
  • Freeze the crust for 10 – 20 minutes while preparing the rest of the recipe.

Make the Pistachio Crunch Mixture:

    If using Kataifi Pastry:

    • Chop the kataifi pastry into small pieces.
    • Toast the pastry in 1 tablespoon of butter over medium heat until golden and crunchy. Let it cool completely.
    • In a bowl, combine the cooled pastry with pistachio cream, mixing until you achieve a thick and crunchy consistency. Set aside.

    If using Shredded Wheat Cereal:

    • Crush the shredded wheat into small pieces using your hands or by placing it in a ziplock bag and crushing with a rolling pin.
    • In a bowl, combine the crushed cereal with pistachio cream, mixing until it forms a thick, crunchy paste. Set aside.

    Prepare the Cheesecake Filling:

    • In a large bowl or stand mixer, beat the softened cream cheese and mascarpone until smooth and creamy.
    • Add the icing sugar, caster sugar, salt, and vanilla extract, and mix until fully combined.
    • In a separate bowl, whip the double cream or heavy cream until stiff peaks form.
    • Gently fold one-third of the whipped cream into the cream cheese mixture to lighten it.
    • Gradually fold in the remaining whipped cream, ensuring the mixture stays light and airy.
    • Add the lemon juice and mix gently.
    • Finally, fold in the melted white chocolate until evenly incorporated.

    Assemble the Cheesecake

    • Remove the crust from the freezer and pour half of the cheesecake filling over it, spreading it evenly with a spatula.
    • Layer the pistachio crunch mixture on top of the filling, spreading it evenly but leaving about ½ inch from the edge.
    • Add the remaining cheesecake filling, spreading it evenly over the pistachio layer.
    • Cover the pan tightly with plastic wrap or foil and refrigerate for at least 6–8 hours, or ideally overnight, to allow the cheesecake to set.
    • Once the cheesecake has set, prepare the ganache by combining the chopped chocolate and double cream (heavy cream) in a microwave-safe bowl. Heat in 30-second increments, stirring after each, until the mixture is fully melted, thick, and glossy.
    • Pour the ganache over the cheesecake, spreading it evenly across the top.
    • Sprinkle chopped pistachios over the ganache for garnish.
    • Return the cheesecake to the fridge for at least 30 minutes to allow the ganache to firm up.
    • Then simply slice, serve and enjoy!

    Notes

    • Chill the cheesecake as long as possible – the cheesecake needs to chill for at least 6 – 8 hours, ideally overnight. Basically the longer it chills the better the cheesecake will taste.
     
    • Use room temperature cream cheese and mascarpone – this makes all the difference. Using the room temperature cream cheese, will ensure the cheesecake filling is super smooth.
     
    • Don’t overmix the no bake cheesecake filling – overmixing the cheesecake filling will make the cheesecake tough, instead of light and mousse like.
     
    • Use a sharp + clean knife – helps you get even clean slices, that looks super professional!
    Keyword Cheesecake, Dubai Chocolate, No bake cheesecake, Pistachio and chocolate cheesecake, PIstachio Cheesecake

    Enjoy Your Homemade Viral Dubai Chocolate Cheesecake!

    Now you’re ready to indulge in your very own Viral Dubai Chocolate Cheesecake—a show stopping dessert perfect for any occasion! With its layers of buttery crust, creamy filling, and decadent pistachio crunch topped with a glossy ganache, this cheesecake is sure to wow everyone at the table.

    Don’t forget to tag me on Instagram or TikTok (@aceofspoons) if you give this recipe a try. I’d love to see your creations!

    12th December 2024 0 comments
    0 FacebookTwitterPinterestPocketThreadsBlueskyEmail
    BreakfastCoffee

    Vanilla Chai Latte

    by Hunar Baig 11th November 2024
    written by Hunar Baig

    Vanilla Chai Latte

    A Vanilla Chai Latte is the perfect combination of warm spices, creamy sweetness, and a touch of vanilla that makes every sip feel like a cosy hug in a cup. Whether you’re sipping it on a crisp autumn morning or enjoying it as an afternoon pick-me-up, this drink is one you’ll want to keep in your rotation all year round. And the best part? You can make it at home in just a few simple steps!

    What is in a Vanilla Chai Latte?

    A Vanilla Chai Latte is essentially a chai tea latte with an added twist of vanilla sweetness. It combines the bold, warming spices of chai tea (usually cinnamon, cardamom, ginger, and cloves) with steamed milk and a touch of vanilla. The vanilla softens the spiciness of the chai, adding a comforting sweetness that makes this drink extra special.

    At the heart of a classic chai latte, you have chai concentrate—a spiced tea base that’s typically mixed with milk for a smooth, flavorful drink. But by adding vanilla extract or vanilla bean paste, you bring an aromatic richness that makes every sip indulgent.

    How to make Chai Concentrate

    1. In a medium saucepan, combine the tea bags, whole spices, sugar, and water. Stir well.
    2. Place the saucepan over high heat and bring the mixture to a vigorous boil. Keep an eye on it, as it can foam up quickly. Once it reaches a boil, reduce the heat to a simmer.
    3. Then allow to simmer for 5 mins, and take off the heat.
    4. Allow the mixture to simmer gently for about 5-7 minutes, letting the spices fully infuse the liquid. The longer it simmers, the more intense the spice flavour will be. Stir occasionally. 
    5. After simmering, remove the saucepan from the heat. Let it cool slightly for a couple of minutes, then carefully strain the chai concentrate to remove the tea bags and spices.
    6. Stir in vanilla bean paste or vanilla extract to the strained chai concentrate. Mix well to ensure the vanilla flavour is evenly distributed throughout the concentrate.
    7. Pour the chai concentrate into a clean jar or bottle. Let it cool to room temperature before sealing the container. Store it in the refrigerator for about 2 weeks. You can also pour it into an ice tray to make chai ice cubes.

    How to make a Vanilla Chai Latte

    1. For a Hot Vanilla Chai Latte
      Pour 1/4 cup of chai concentrate into your mug. Heat 1 cup of milk (or your preferred non-dairy milk) on the stove or in the microwave until warm and frothy. Pour the steamed milk over the chai concentrate and stir to combine. Optional: Top with a sprinkle of cinnamon or nutmeg for extra flavour.
    2. For an Iced Vanilla Chai Latte
      Fill a glass with ice. Pour 1/4 cup of chilled chai concentrate over the ice and top with cold milk (about 3/4 cup, or to taste). Stir well and enjoy a refreshing, chilled latte.

    Can you add coffee to a Vanilla Chai Latte?

    Absolutely! If you love coffee and want to give your vanilla chai latte a caffeine boost, you can easily turn it into a dirty chai latte by adding a shot of espresso. The bold coffee flavour complements the spices in the chai, making for a deep, rich, and aromatic drink. Here’s how to do it:

    • Brew a shot of espresso or use strong coffee (about ¼ cup).
    • Add the espresso directly to your chai concentrate before combining with your milk of choice

    This simple tweak takes your vanilla chai latte to a whole new level, giving you the perfect balance of warm spices and energising coffee.

    What does a Vanilla Chai Latte taste like?

    The flavour profile of a vanilla chai latte is the ultimate balance of sweet and spiced. The chai spices (cinnamon, ginger, cardamom, and cloves) provide a warm, earthy foundation, while the vanilla adds a smooth sweetness that perfectly complements the bold spices. The milk brings everything together, making the drink creamy and comforting.

    Ingredient Notes – Vanilla Chai Latte

    The ingredients that go into this Vanilla Chai Latte

    Tea Bags – of course! You need tea to make a chai latte

    Spices – will add so much flavour and richness to the chai

    Vanilla Paste – adds so much flavour, depth and that classic vanilla smell 

    Light Brown Sugar – to add some much needed sweetness to the chai concentrate 

    Water – will be the base of the chai concentrate 

    Milk – any milk of choice will be the perfect match to the chai concentrate

    Tips and Tricks – Vanilla Chai Latte

    • Experiment with Milk: The type of milk you use can drastically change the flavour and texture of your latte. For a creamier result, use whole milk or oat milk. If you prefer a lighter drink, opt for almond milk or soy milk.
    • Go “Dirty”: Add a shot of espresso to your vanilla chai latte to make it a dirty chai—a great option if you want a stronger caffeine boost while enjoying the spiced chai flavours.
    • Customise the Sweetness: Adjust the amount of sugar in the concentrate to your taste. If you prefer a less sweet drink, reduce the sugar.

    Enjoy Your Homemade Vanilla Chai Latte!

    Now you’re ready to enjoy your very own homemade Vanilla Chai Latte—a perfect drink for any season! Whether you’re craving a warm, comforting cup or a chilled iced latte, this recipe is sure to become a favourite in your kitchen. Don’t forget to tag me on Instagram or TikTok (@aceofspoons) if you give this recipe a try. I’d love to see your creations!

    Vanilla Chai Latte

    Hunar Baig
    A Vanilla Chai Latte is the perfect combination of warm spices, creamy sweetness, and a touch of vanilla that makes every sip feel like a cosy hug in a cup. And the best part? You can make it at home in just a few simple steps!
    Print Recipe Pin Recipe
    Prep Time 5 minutes mins
    Cook Time 10 minutes mins
    Total Time 15 minutes mins
    Course Breakfast, Coffee, Tea
    Servings 4 – 6 servings

    Equipment

    • Saucepan

    Ingredients
      

    • 3 black tea bags
    • 1 cinnamon stick
    • 2 whole cloves
    • 4 whole black peppercorns
    • 1 star anise
    • 4 whole green cardamom
    • 1/4 tsp ground nutmeg
    • 100 g light brown sugar (1/2 cup)
    • 1 1/2 cup water
    • 1 tsp vanilla bean paste or extract

    Instructions
     

    Chai Concentrate

    • In a medium saucepan, combine the tea bags, whole spices, sugar, and water. Stir well.
    • Place the saucepan over high heat and bring the mixture to a vigorous boil. Keep an eye on it, as it can foam up quickly. Once it reaches a boil, reduce the heat to a simmer.
    • Allow the mixture to simmer gently for about 5-7 minutes, letting the spices fully infuse the liquid. The longer it simmers, the more intense the spice flavour will be. Stir occasionally.
    • After simmering, remove the saucepan from the heat. Let it cool slightly for a couple of minutes, then carefully strain the chai concentrate to remove the tea bags and spices.
    • Stir in vanilla bean paste or vanilla extract to the strained chai concentrate. Mix well to ensure the vanilla flavour is evenly distributed throughout the concentrate.
    • Pour the chai concentrate into a clean jar or bottle. Let it cool to room temperature before sealing the container. Store it in the refrigerator for about 2 weeks. You can also pour it into an ice tray to make chai ice cubes.

    Vanilla Chai Latte

    • For a Hot Vanilla Chai Latte:
      Pour 1/4 cup of chai concentrate into your mug. Heat 1 cup of milk (or your preferred non-dairy milk) on the stove or in the microwave until warm and frothy. Pour the steamed milk over the chai concentrate and stir to combine. Optional: Top with a sprinkle of cinnamon or nutmeg for extra flavour.
    • For an Iced Vanilla Chai Latte:
      Fill a glass with ice. Pour 1/4 cup of chilled chai concentrate over the ice and top with cold milk (about 3/4 cup, or to taste). Stir well and enjoy a refreshing, chilled latte.

    Notes

     
    • Experiment with Milk: The type of milk you use can drastically change the flavour and texture of your latte. For a creamier result, use whole milk or oat milk. If you prefer a lighter drink, opt for almond milk or soy milk.
    • Go “Dirty”: Add a shot of espresso to your vanilla chai latte to make it a dirty chai—a great option if you want a stronger caffeine boost while enjoying the spiced chai flavours.
    • Customise the Sweetness: Adjust the amount of sugar in the concentrate to your taste. If you prefer a less sweet drink, reduce the sugar.
    Keyword Chai Concentrate, Chai Latte, Chai Latte Recipe, Vanilla Chai Latte
    11th November 2024 0 comments
    0 FacebookTwitterPinterestPocketThreadsBlueskyEmail
    Newer Posts
    Older Posts

    Hi, I'm Hunar!

    Welcome to Ace of Spoons! My name is Hunar, and I'm a food blogger, photographer, and content creator based in the UK. This blog is all about creating delicious, foolproof recipes that are worth your time and effort in the kitchen. Whether you're a seasoned cook or just starting out, I want to provide you with recipes that are easy to follow and always turn out amazing.

    Search

    Popular Posts

    • 1

      No Bake Tiramisu Cheesecake

      12th September 2024
    • 2

      Classic Tiramisu Recipe

      19th December 2023
    • 3

      Viral Dubai Chocolate Cheesecake

      12th December 2024
    • 4

      No Oven Needed: No Bake Oreo Cheesecake Recipe

      5th September 2023
    • 5

      Cinnamon Roll Pancakes Recipe

      5th March 2023

    Instagram

    • Instagram
    • Pinterest
    • Email
    • Tiktok
    Ace of spoons
    • Home
      • Home 1
    • Recipes
    • Categories
      • Main Dishes
      • Noodles
      • Breakfast
      • Vegetarians
    • About
    • Contact