Ace of spoons
  • Home
  • Recipes
  • Categories
    • No Bake
    • Breakfast
    • Brownies and Bars
    • Cakes
    • Main Dishes
    • Baked goods & Pastries
  • About
  • Contact
Top Posts
Banana Bread Pancakes 
 No Bake Lemon Curd Cheesecake
 Cherry Vanilla Matcha Latte
Tiramisu Pancakes 
Easy English Pancakes (Crepes)
Best American Buttermilk Pancakes
Easy High-Protein Bagels 
Rachels’ Iconic Thanksgiving Trifle: A ‘Friends’ Classic
Viral Dubai Chocolate Cheesecake
Vanilla Chai Latte
Ace of spoons
  • Home
  • Recipes
  • Categories
    • No Bake
    • Breakfast
    • Brownies and Bars
    • Cakes
    • Main Dishes
    • Baked goods & Pastries
  • About
  • Contact
Ace of spoons
Ace of spoons
  • Home
  • Recipes
  • Categories
    • No Bake
    • Breakfast
    • Brownies and Bars
    • Cakes
    • Main Dishes
    • Baked goods & Pastries
  • About
  • Contact
Uncategorised

No Bake Tiramisu Cheesecake

by Hunar Baig 12th September 2024
written by Hunar Baig

No Bake Tiramisu Cheesecake

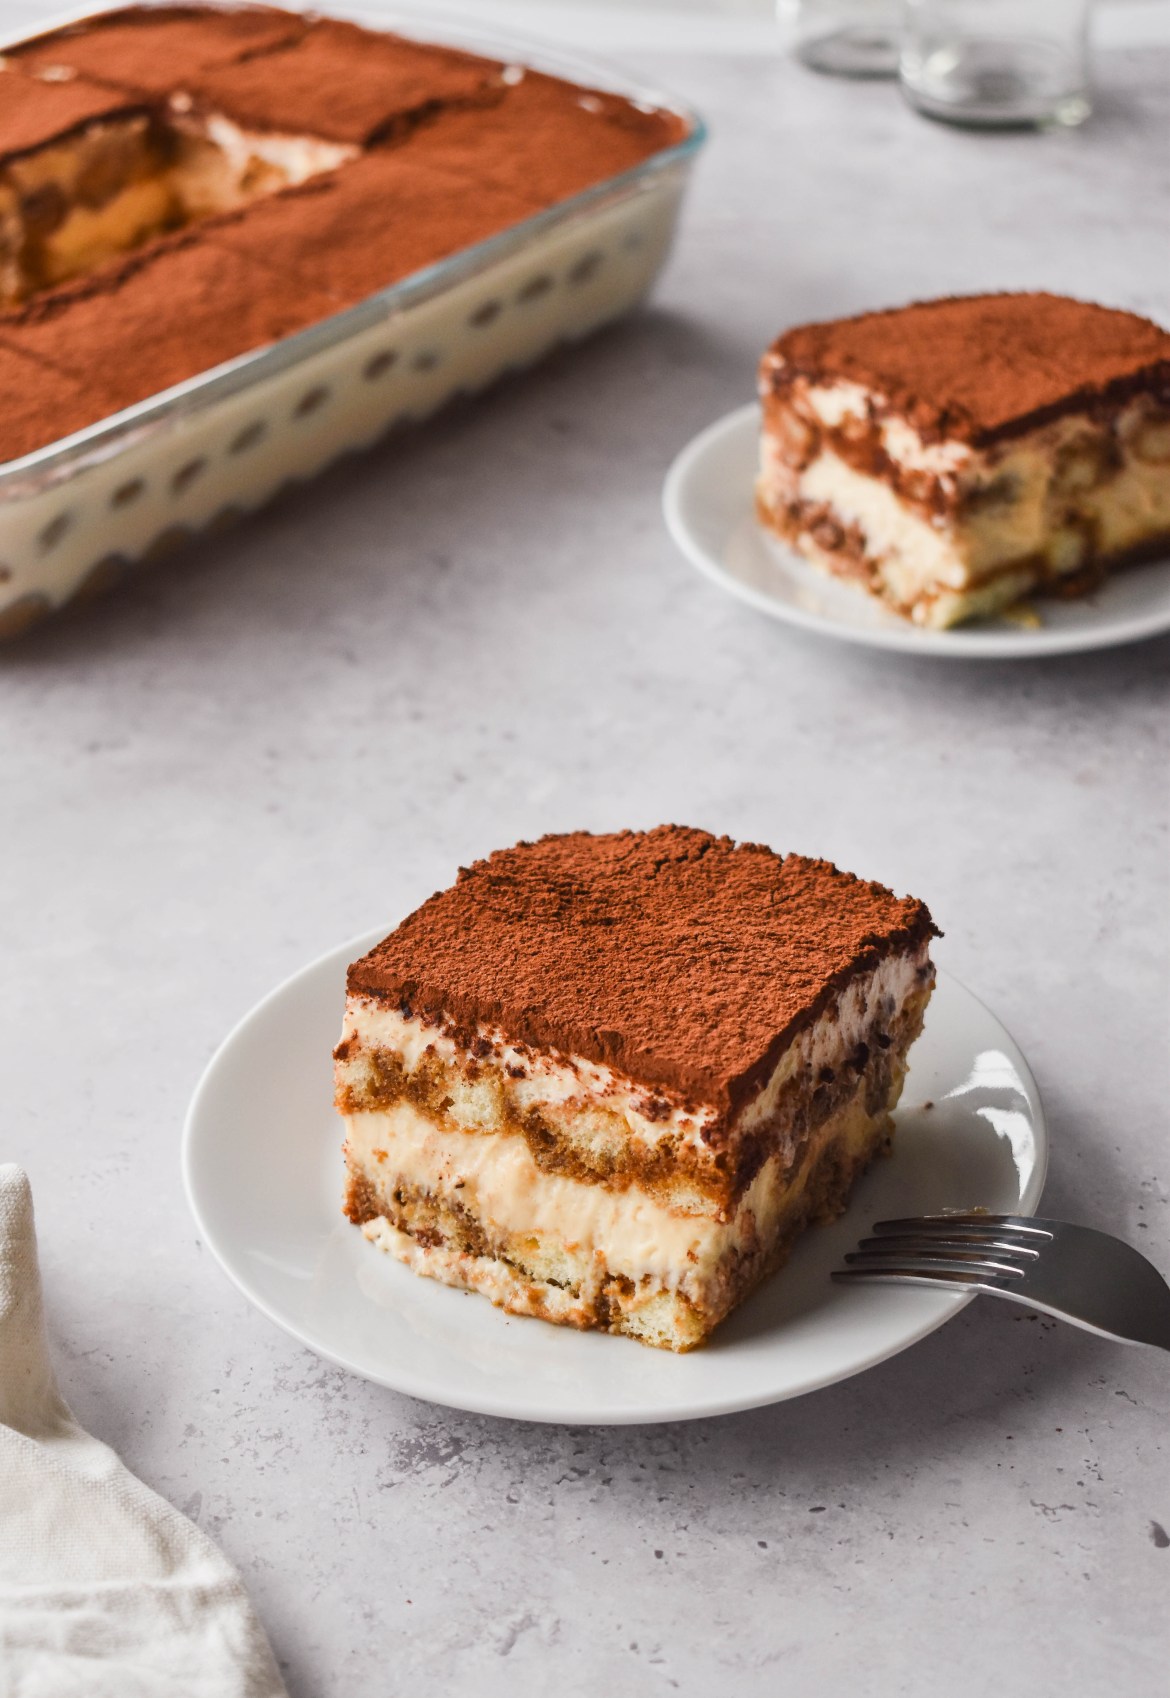
Tiramisu and cheesecake are undoubtedly two of the best desserts ever created, put them together and you have heaven on a plate! This tiramisu cheesecake has it all, a crumbly biscuit base, with fluffy cream cheese, ladyfingers soaked in rich coffee, topped with even more whipped cream and tons of chocolate powder. If you’re a dessert person, this ones for you!

What is no bake cheesecake? 

No bake cheesecake is a simpler, creamier, softer version of a regular cheesecake. Since there is no baking required it also means that is A LOT easier than a standard baked cheesecake. Baked cheesecakes have a silky texture that is quite firm, while no bake cheesecakes are soft, and super light. Personally, I am a big fan of both!

Will no-bake cheesecake firm up in the fridge?

Yes! This no-bake tiramisu cheesecake will set up nicely in the fridge, and have a light, soft and almost mousse-like texture. You should allow no bake cheesecake to set up for at least 6 – 8 hours or, for best results, refrigerate overnight. The longer you allow it to sit in the fridge, the better it will taste and the firmer it will be.

Ingredient Notes – No Bake Tiramisu Cheesecake

The ingredients that go into this No Bake Tiramisu Cheesecake

Digestive biscuits or Graham crackers – of course we need biscuits for the biscuit base! But feel free to use any dry, sweet biscuits of your choice.

Cream Cheese – will be the base for the cheesecake. 

Mascarpone Cheese – gives you that classic tiramisu flavour.

Double Cream / Heavy Cream – for the cheesecake filling and topping.

Chilled Coffee / Espresso – perfect to flavour the tiramisu cheesecake with.

Lady Fingers – to create a classic tiramisu layer, in the middle of the cheesecake!

White Chocolate – will add so much more flavour and sweetness.

Vanilla Extract – adds that classic vanilla flavour.

Salt – to balance everything out.

Lemon Juice – helps set the cheesecake without gelatine.

Melted Butter – for the crisp buttery base.

Icing Sugar + Sugar – to sweeten the cheesecake filling with.

Cocoa Powder – is the perfect topping for this tiramisu cheesecake.

How to make No Bake Tiramisu Cheesecake

Prepare the Crust:

  1. In a food bag with a rolling pin, crush the biscuits into a fine crumb. Alternatively, you can use a food processor.
  2. Combine the crumbs with melted butter and mix until it resembles wet sand.
  3. Press the crumb mixture into the bottom and slightly up the sides of a greased and 8-inch or 9-inch springform pan.
  4. Freeze the crust for 10 – 20 minutes while preparing the rest of the recipe.

Make the Coffee Mixture:

  1. Brew the instant coffee with hot water and let it cool completely. Alternatively, you can prepare two shots of espresso for a richer taste and allow to cool.

Prepare the Cheesecake Filling:

  1. In a large bowl or a stand mixer, beat the softened cream cheese and mascarpone cheese until smooth.
  2. Next, add the icing sugar, caster sugar, salt, instant coffee powder, and vanilla extract, mixing until well combined.
  3. In a separate bowl, whip the double cream or heavy cream until stiff peaks form.
  4. Gently fold one-third of the whipped cream into the cream cheese mixture.
  5. Add the remaining whipped cream and fold gently until everything is combined.
  6. Finally, fold in the melted white chocolate, followed by the lemon juice. Your cheesecake base is now ready.

Assemble the Tiramisu Cheesecake:

  1. Remove the crust from the freezer.
  2. Pour half of the cheesecake filling onto the crust and spread it evenly.
  3. Dip the ladyfingers into the cooled coffee mixture and arrange them in a single layer over the cheesecake filling.
  4. Add the remaining cheesecake filling and spread it evenly.
  5. Whip the double cream / heavy cream, icing sugar, and vanilla until light and fluffy.
  6. Gently spoon and swirl the whipped cream over the cheesecake. (Be careful not to move the cheesecake mixture underneath.)
  7. Sift cocoa powder over the top of the tiramisu cheesecake.
  8. Cover tightly and refrigerate for at least 6 – 8 hours, or ideally overnight.
  9. Slice, serve and enjoy!

How do you remove a no-bake cheesecake from the pan?

Whether you are using a springform or loose bottomed cake pan, the best way to remove your cheesecake from the pan. Is to use a small sharp paring knife and run it along the edge of your cheesecake, to release the cheesecake. 

Once released you can unlock the springform pan or, if using a loose bottomed pan, then place a tin underneath the cheesecake and slide the ring of the pan down gently. If you wish to remove the base, simply use the same clean, small sharp paring knife and run it between the base of the cheesecake and the base of the pan to release it.

How long does a no bake tiramisu cheesecake last?

This no bake cheesecake is the perfect dessert to make ahead of time because it stores so well. You can store any leftovers in the fridge, in an airtight container or, on a plate or a tray covered in plastic wrap, for up to 5 days.

Best tips and tricks for making No Bake Tiramisu Cheesecake:

  • Chill the cheesecake as long as possible – the cheesecake needs to chill for at least 6 – 8 hours, ideally overnight. Basically the longer it chills the better the cheesecake will taste.
  • Use room temperature cream cheese and mascarpone – this makes all the difference. Using the room temperature cream cheese, will ensure the cheesecake filling is super smooth.
  • Don’t overmix the no bake cheesecake filling – overmixing the cheesecake filling will make the cheesecake tough, instead of light and mousse like.
  • Use a sharp + clean knife – helps you get even clean slices, that looks super professional!

Tips and Tricks – No Bake Tiramisu Cheesecake

  • Chill the cheesecake as long as possible – the cheesecake needs to chill for at least 6 – 8 hours, ideally overnight. Basically the longer it chills the better the cheesecake will taste.
  • Use room temperature cream cheese – this makes all the difference. Using the room temperature cream cheese, will ensure the cheesecake filling is super smooth.
  • Don’t overmix the no bake cheesecake filling – overmixing the cheesecake filling will make the cheesecake tough, instead of light and mousse like.
  • Use a sharp + clean knife – helps you get even clean slices, that looks super professional!
  • The recipe video is on my TikTok and IG – please tag me @aceofspoons if you make this recipe!

No Bake Tiramisu Cheesecake

Hunar Baig
Tiramisu and cheesecake are undoubtedly two of the best desserts ever created, put them together and you have heaven on a plate!
Print Recipe Pin Recipe
Prep Time 1 hour hr
Total Time 1 hour hr
Course Dessert
Cuisine American, Italian
Servings 8 – 12 servings

Equipment

  • 8 – 9 inch loose bottom or springform cake pan
  • Stand mixer or hand mixer
  • Rubber Spatula

Ingredients
  

Biscuit Base Ingredients

  • 250 g digestive biscuits or graham crackers
  • 80 g melted butter

Cheesecake Ingredients

  • 250 g cream cheese
  • 250 g mascarpone cheese
  • 250 ml double cream / heavy cream
  • 50 g white sugar (1/4 cup)
  • 60 g icing sugar / powdered sugar (1/2 cup)
  • 100 g melted white chocolate
  • 2 tsp vanilla extract or paste
  • 1/4 tsp salt
  • 1/2 tsp instant coffee powder / espresso powder (if using instant coffee granules, simply dissolve in 1 tbsp water)
  • 1 tbsp lemon juice

Tiramisu Layer Ingredients

  • Lady fingers (about 100g)
  • 2 tsp instant coffee powder / espresso powder
  • 50 ml hot water (to brew the coffee in)

Topping + Decoration Ingredients

  • 250 ml double cream / heavy cream (1 cup)
  • 2 tbsp icing sugar / powdered sugar
  • Cocoa powder (for dusting on top)

Instructions
 

Prepare the Base

  • In a food bag with a rolling pin, crush the biscuits into a fine crumb. Alternatively, you can use a food processor.
  • Combine the crumbs with melted butter and mix until it resembles wet sand.
  • Press the crumb mixture into the bottom and slightly up the sides of a greased and 8-inch or 9-inch springform pan.
  • Freeze the crust for 10 – 20 minutes while preparing the rest of the recipe.

Make the Coffee Mixture

  • Brew the instant coffee with hot water and let it cool completely. Alternatively, you can prepare two shots of espresso for a richer taste and allow to cool.

Prepare the Cheesecake Filling

  • In a large bowl or a stand mixer, beat the softened cream cheese and mascarpone cheese until smooth.
  • Next, add the icing sugar, caster sugar, salt, instant coffee powder, and vanilla extract, mixing until well combined.
  • In a separate bowl, whip the double cream or heavy cream until stiff peaks form.
  • Gently fold one-third of the whipped cream into the cream cheese mixture.
  • Add the remaining whipped cream and fold gently until everything is combined.
  • Finally, fold in the melted white chocolate, followed by the lemon juice. Your cheesecake base is now ready.

Assemble the Tiramisu Cheesecake:

  • Remove the crust from the freezer.
  • Pour half of the cheesecake filling onto the crust and spread it evenly.
  • Dip the ladyfingers into the cooled coffee mixture and arrange them in a single layer over the cheesecake filling.
  • Add the remaining cheesecake filling and spread it evenly.
  • Whip the double cream / heavy cream, icing sugar, and vanilla until light and fluffy.
  • Gently spoon and swirl the whipped cream over the cheesecake. (Be careful not to move the cheesecake mixture underneath.)
  • Sift cocoa powder over the top of the tiramisu cheesecake.
  • Cover tightly and refrigerate for at least 6 – 8 hours, or ideally overnight.
  • Slice, serve and enjoy!

Notes

  • Chill the cheesecake as long as possible – the cheesecake needs to chill for at least 6 – 8 hours, ideally overnight. Basically the longer it chills the better the cheesecake will taste.
  • Use room temperature cream cheese – this makes all the difference. Using the room temperature cream cheese, will ensure the cheesecake filling is super smooth.
  • Don’t overmix the no bake cheesecake filling – overmixing the cheesecake filling will make the cheesecake tough, instead of light and mousse like.
  • Use a sharp + clean knife – helps you get even clean slices, that looks super professional!
  • The recipe video is on my TikTok and IG – please tag me @aceofspoons if you make this recipe!
Keyword Cheesecake, No bake cheesecake, No Bake Tiramisu Cheesecake, TIramisu, Tiramisu Cheesecake
12th September 2024 0 comments
2 FacebookTwitterPinterestPocketThreadsBlueskyEmail
DessertsDough and PastriesPies and Tarts

Classic Strawberry Tart

by Hunar Baig 2nd September 2024
written by Hunar Baig

There’s nothing quite like a flaky, buttery pastry filled with a creamy vanilla custard and topped with juicy, ripe strawberries. It’s the perfect mix of sweet, tart, and creamy. Whether you’re celebrating something special or just want a little treat, this strawberry tart is a must-try.

What is a Classic Strawberry Tart?

A classic French strawberry tart, is a crisp sweet dough pastry case and classic vanilla pastry cream, then topped with fresh strawberries and topped with a shiny fruity flavoured glaze. This timeless dessert is a perfect showcase of the delicate balance between sweet and tart flavours, making it a true classic and honestly sooo easy to make! 

Ingredient Notes – Classic Strawberry Tart

The ingredients that go into the Best Classic Strawberry Tart

Pastry Ingredients

All Purpose Flour / Plain Flour – is the perfect base for a buttery crumbly dough

Butter – provides moisture and fat, for a rich buttery pastry

Icing Sugar – using icing sugar, will help sweeten and soften the pastry

Salt – balances everything out

Eggs – will bind the pastry together

Pastry Cream Filling Ingredients

Whole Milk – is the base for the pastry cream

Double Cream/Heavy Cream – adds so much creaminess and richness

Eggs + Egg Yolks – is the base to this rich cream filling

Butter – adds so much richness to the pastry cream

White Sugar – will sweeten the cream 

Vanilla Paste or Vanilla Extract – will add so much flavour and that classic vanilla smell

Cornflour/Cornstarch – will help thicken the pastry cream

Salt – balances out all of flavours

Topping + Glaze Ingredients

Strawberries – of course! You can’t make a strawberry tart without strawberries.

Apricot Jam – or any jam of your choice, this will give you a shiny gorgeous glaze to top the strawberries with

Water – to help thin out the glaze

How to keep the strawberries from bleeding:

To prevent the strawberries from bleeding into the pastry cream:

  1. Ensure the strawberries are dry to avoid excess moisture.
  2. Place them on top of the tart just before serving. 
  3. For added protection against bleeding, you can seal the strawberries with a shiny glaze. This will help maintain the vibrant colour and prevent the tart from becoming soggy.

How to make a Classic Strawberry Tart – step by step

Prepare the Pastry:

  1. In a large bowl, combine the flour, salt, and icing sugar. Mix well.
  2. Add the chopped butter and press it into the flour mixture until it resembles wet sand.
  3. Crack the egg into the mixture and combine until the dough forms a clump.
  4. Wrap the dough in cling film and refrigerate for at least 30 minutes.

Make the Pastry Cream:

  1. In a large heat-resistant bowl, whisk together the egg, egg yolks, white sugar, cornstarch, and salt.
  2. In a saucepan, heat the milk and cream over medium heat until the milk is warm with bubbles around the edges.
  3. Remove the milk/cream mixture from the heat and slowly whisk in one cup of it into the egg mixture.
  4. Return the egg mixture to the saucepan with the milk/cream and cook over low-medium heat, whisking constantly, until the pastry cream thickens and is smooth.
  5. Once thickened and smooth, remove the pastry cream from the heat and whisk in the butter.
  6. Strain the pastry cream through a sieve to ensure a smooth texture.
  7. Cover the pastry cream with cling film and let it cool to room temperature.

Assemble the Tart:

  1. Preheat the oven to 175 degrees Celsius (350 degrees Fahrenheit).
  2. Roll out the dough on a floured surface to a size slightly larger than your tart tin.
  3. Place the rolled dough into the tart tin and trim the edges with a sharp knife. Use any leftover dough to fill in any holes or tears.
  4. Prick the entire bottom of the pastry case with a fork, but not all the way through. 
  5. Then, allow the pastry case to cool in the fridge for an additional 30 minutes or in the freezer for 15 minutes, to prevent shrinking.
  6. Once chilled, place scrunched-up parchment paper in the centre of the pastry and fill it with baking beans or dry rice.
  7. Blind bake the pastry for 15 minutes. Remove the paper and baking beans, and bake for an additional 5 minutes, or until the pastry is golden and crisp. If the middle of the pastry puffs up, carefully prick the bottom with a fork to release the steam.
  8. Let the pastry cool completely before filling it with the pastry cream.
  9. Spread the pastry cream evenly over the cooled pastry base.
  10. Wash and thoroughly dry the strawberries and slice into even slices.
  11. Arrange the sliced strawberries on top of the pastry cream in your desired pattern.
  12. Prepare the glaze by mixing the jam and water in a small saucepan over medium heat until thickened, this should only take a few minutes. Let it cool.
  13. Brush the glaze over the strawberries to seal them and add a shiny finish.
  14. Slice and serve your delicious strawberry tart!

How should you store Strawberry Tart?  

To keep the strawberry tart fresh and delicious, store it in the refrigerator, covered with plastic wrap or an airtight container. This will help prevent the fruit from drying out and the pastry from becoming soggy.   

How long does a Strawberry Tart last?

A strawberry tart typically lasts for 2-3 days when stored properly in the refrigerator. Covering it with plastic wrap or an airtight container will help maintain its freshness and prevent the fruit from drying out.

Can I use other fruits?

Yes! Of course, you could use any fruit you like. I love using a mix of summer fruits, including pineapple, melon, grapes, and mandarins. But feel free to get creative and use any fruit you like.

Can I use shop bought pastry?

You can! To make this an easier and quicker process, you could either use a pre-made pastry case or ready to roll pastry, simply prepare to package instructions and follow the rest of the recipe as written.

Tips and Tricks – Classic Strawberry Tart

  • Preheat your oven: Ensure a perfectly crisp pastry by preheating your oven to the recommended temperature before baking.
  • Want to skip the pastry-making? –  Opt for a pre-made pastry case or ready-to-roll dough. The rest of the recipe is the same – just follow the instructions on the packaging and enjoy
  • Fresh strawberries are a must: Wash and dry the strawberries thoroughly before slicing to prevent excess moisture from affecting the pastry.
  • Using dried beans instead of baking beans: If you don’t have baking beans on hand, dried beans or lentils are a great alternative for blind baking your pastry. They’ll weigh down the dough and prevent it from bubbling up, ensuring a perfectly crisp base for your tart.
  • Don’t miss the recipe video! Find the full tutorial on TikTok and Instagram. Tag @aceofspoons_ if you try this delicious recipe.

Classic Strawberry Tart

Hunar Baig
There’s nothing quite like a flaky, buttery pastry filled with a creamy vanilla custard and topped with juicy, ripe strawberries. It's the perfect mix of sweet, tart, and creamy. Whether you're celebrating something special or just want a little treat, this strawberry tart is a must-try.
Print Recipe Pin Recipe
Prep Time 40 minutes mins
Cook Time 20 minutes mins
Total Time 1 hour hr
Course Dessert
Cuisine French
Servings 8 – 12 servings

Equipment

  • 8 – 9 inch tart tin / pie pan
  • Rolling Pin
  • Whisk
  • Saucepan

Ingredients
  

Pastry Ingredients

  • 240 g plain or all purpose flour (2 cups)
  • 115 g unsalted butter (1/2 cup)
  • 65 g icing sugar / powdered sugar (1/2 cup)
  • 1 whole egg
  • 1/4 tsp salt (skip if using salted butter)

Pastry Cream Ingredients

  • 1 whole egg
  • 2 egg yolks
  • 200 g white sugar (1 cup)
  • 3 1/2 tbsp cornflour
  • 355 ml whole milk (1 1/2 cups)
  • 355 ml double cream (1 1/2 cups)
  • 2 tsp vanilla extract or paste
  • 20 g unsalted butter (1 1/2 tbsp)
  • 1/8 tsp salt (skip if using salted butter)

Topping + Glaze Ingredients

  • Fresh Strawberries
  • 1 tbsp apricot jam (or any jam of choice)
  • 2 tbsp water

Instructions
 

Prepare the Pastry:

  • In a large bowl, combine the flour, salt, and icing sugar. Mix well.
  • Add the chopped butter and press it into the flour mixture until it resembles wet sand.
  • Crack the egg into the mixture and combine until the dough forms a clump.
  • Wrap the dough in cling film and refrigerate for at least 30 minutes.

Make the Pastry Cream:

  • In a large heat-resistant bowl, whisk together the egg, egg yolks, white sugar, cornstarch, and salt.
  • In a saucepan, heat the milk and cream over medium heat until the milk is warm with bubbles around the edges.
  • Remove the milk/cream mixture from the heat and slowly whisk in one cup of it into the egg mixture.
  • Return the egg mixture to the saucepan with the milk/cream and cook over low-medium heat, whisking constantly, until the pastry cream thickens and is smooth.
    You can thicken the cream to your personal preference, but keep in mind it will thicken more as it cools.
  • Once thickened and smooth, remove the pastry cream from the heat and whisk in the butter.
  • Strain the pastry cream through a sieve to ensure a smooth texture.
  • Cover the pastry cream with cling film and let it cool to room temperature.

Assemble the Tart:

  • Preheat an oven to 175 degrees Celsius (350 degrees Fahrenheit).
  • Roll out the dough on a floured surface to a size slightly larger than your tart tin.
  • Place the rolled dough into the tart tin and trim the edges with a sharp knife. Use any leftover dough to fill in any holes or tears.
  • Prick the entire bottom of the pastry case with a fork, but not all the way through.
  • Then, allow the pastry case to cool in the fridge for an additional 30 minutes or in the freezer for 15 minutes, to prevent shrinking.
  • Once chilled, place scrunched-up parchment paper in the centre of the pastry and fill it with baking beans or dry rice.
  • Blind bake the pastry for 15 minutes. Remove the paper and baking beans, and bake for an additional 5 minutes, or until the pastry is golden and crisp. If the middle of the pastry puffs up, carefully prick the bottom with a fork to release the steam.
  • Let the pastry cool completely before filling it with the pastry cream.
  • Spread the pastry cream evenly over the cooled pastry base.
  • Wash and thoroughly dry the strawberries and cut into even slices.
  • Arrange the sliced strawberries on top of the pastry cream in your desired pattern.
  • Prepare the glaze by mixing the jam and water in a small saucepan over medium heat until thickened, this should only take a few minutes. Let it cool.
  • Brush the glaze over the strawberries to seal them and add a shiny finish.
  • Slice and serve your delicious strawberry tart!

Notes

  • Preheat your oven: Ensure a perfectly crisp pastry by preheating your oven to the recommended temperature before baking.
  • Want to skip the pastry-making? –  Opt for a pre-made pastry case or ready-to-roll dough. The rest of the recipe is the same – just follow the instructions on the packaging and enjoy
  • Fresh strawberries are a must: Wash and dry the strawberries thoroughly before slicing to prevent excess moisture from affecting the pastry.
  • Using dried beans instead of baking beans: If you don’t have baking beans on hand, dried beans or lentils are a great alternative for blind baking your pastry. They’ll weigh down the dough and prevent it from bubbling up, ensuring a perfectly crisp base for your tart.
  • Don’t miss the recipe video! Find the full tutorial on TikTok and Instagram. Tag @aceofspoons_ if you try this delicious recipe.
Keyword Strawberry Desserts, Strawberry Tart
2nd September 2024 0 comments
0 FacebookTwitterPinterestPocketThreadsBlueskyEmail
BreadBreakfastDessertsDough and Pastries

Italian Rose Cake – Torta Di Rosa

by Hunar Baig 28th August 2024
written by Hunar Baig

Italian Rose Cake – Torta Di Rosa

Imagine fluffy, soft rolls with a hint of zesty lemon, filled with creamy vanilla butter, and topped with a luscious vanilla glaze. This Italian rose cake, or Torta di Rosa, is a delicious twist on the classic cinnamon roll.

What is a torta di rosa?

Torta di Rosa, or “Rose Cake” in English, is a delightful Italian dessert characterised by its soft, fluffy texture and rosebud-like appearance. The cake is typically made with a rich and flavorful dough that is rolled out, filled with a buttery filling, and then carefully shaped into a bouquet of roses. The finished cake is often dusted with powdered sugar for an extra touch of sweetness.

How to make the rolls soft and fluffy?

The trick to make these rolls soft and fluffy lies in the dough, mainly in properly blooming the yeast so that it is properly activated and can work as it should, leaving you with properly risen fluffy rolls. The other part is in the kneading of the dough, if the dough has been kneaded enough the gluten will develop properly and leave you with pillowy soft rolls, if the gluten is under developed the rolls won’t be as soft.

How to make the Best Italian Rose Cake – step by step

  1. In the bowl of a stand mixer, combine the sugar, salt, and yeast. Add two-thirds of the flour and mix well. Zest the lemon into the flour mixture and create a well in the centre.
  2. In a microwave-safe bowl or jug, heat the water and butter in 30-second increments until warm and the butter is mostly melted. Be careful not to overheat the mixture, as it could kill the yeast.
  3. Crack the eggs into a bowl and whisk them well. Pour the eggs into the well in the flour mixture, followed by the warm water and butter mixture. Stir until combined.
  4. Add the remaining flour and knead the dough for 10-15 minutes. You’ll know it’s ready when it no longer sticks to the slides of the bowl. Another way to check if the dough is ready is to perform the windowpane test. (To perform the windowpane test, pinch off a small piece of dough and stretch it gently. If it’s stretchy and translucent, you’ve kneaded it enough.)
  5. Cover the dough with cling film and a cloth, and let it rise in a warm place for about an hour, or until it has doubled in size.
  6. While the dough is rising, prepare the vanilla filling by mixing the softened butter, sugar, and vanilla in a bowl, until smooth.
  7. Once the dough has risen, punch it down and roll it out into a long rectangle on a well-floured surface. Spread the vanilla butter mixture evenly over the dough, leaving a small space on the edge.
  8. From the long end, roll the dough away from you into a tight roll, sealing the bottom edge by pinching the dough together.
  9. Use unflavored floss or a sharp knife to cut the dough into 8 evenly sized rolls. Place them in a greased 8 or 9-inch cake pan and let them rise again for about 30 minutes.
  10. Bake the rolls at 175 degrees Celsius (350 degrees Fahrenheit) for 30 minutes, or until they are golden brown and no longer doughy. Allow them to cool.
  11. While the cake is cooling, make the glaze by, whisking the icing sugar, milk, and vanilla paste or extract in a large bowl until smooth. Adjust the consistency by adding more milk if needed.
  12. Once the rolls have cooled slightly, spread the glaze evenly over the Torta di Rosa and enjoy!

How to store Italian Rose Cake?

Store this delicious Italian Rose Cake in an airtight container, once the frosting has fully set, stored at room temperature it will last around 3 days and stored in the fridge it should last for about a week!

Should I use all purpose flour or bread flour for italian rose cake?

All-purpose flour all the way! All-purpose flour is the best choice for Italian rose cake. While bread flour has a higher protein content, and is generally better for cinnamon rolls. Italian rose cake (Torta Di Rosa) requires a softer, more delicate dough. All-purpose flour provides the perfect balance of gluten and starch for a tender and fluffy cake.

Ingredient Notes – Italian Rose Cake

The ingredients that go into the Best Italian Rose Cake

Dough Ingredients

All Purpose Flour / Plain Flour – is the perfect base for this soft &  fluffy Italian Rose Cake

Yeast – leavens the cake, while providing lightness and height

Eggs – binds the rolls together and adds more lightness

Butter – provides moisture and fat, while also softening the rolls

Sugar – will help activate the yeast

Water – makes the rolls moist, soft and tender

Salt – balances everything out

Zest of a Lemon – is traditionally used to add flavour to the Torta Di Rosa

Vanilla Butter Filling Ingredients

Butter – is the base for the filling

White Sugar – will sweeten the rolls and provide so much flavour

Vanilla Paste or Vanilla Extract – will add so much flavour and that classic vanilla smell

Vanilla Glaze Ingredients

Icing Sugar – is the base for the vanilla glaze

Vanilla Paste or Vanilla Extract – will add so much flavour and that classic vanilla smell

Milk – will help thin out the frosting and make it slightly creamier

Tips and Tricks – Italian Rose Cake / Torta Di Rosa

  • Use unflavoured floss – to cut the rolls, instead of a knife. This will give you a cleaner cut and make sure the rolls don’t get squished.
  • Store the Italian Rose Cake – in a airtight container, once the glaze has fully set and store at room temperature at they should last for about 3 days
  • If you don’t have a rolling pin – use can use a closed bottle of olive oil instead
  • The recipe video is on my TikTok and IG – please tag @aceofspoons_ if you make this recipe

Italian Rose Cake – Torta Di Rosa

Hunar Baig
Imagine fluffy, soft rolls with a hint of zesty lemon, filled with creamy vanilla butter, and topped with a luscious vanilla glaze. This Italian rose cake, or Torta di Rosa, is a delicious twist on the classic cinnamon roll.
Print Recipe Pin Recipe
Prep Time 30 minutes mins
Cook Time 30 minutes mins
Proof Time 1 hour hr
Total Time 2 hours hrs
Course Bread, Breakfast, Cake, Dessert
Cuisine Italian
Servings 8 servings

Equipment

  • Stand mixer
  • 8-9 inch cake pan
  • Rolling Pin
  • Whisk

Ingredients
  

Dough Ingredients

  • 600 g all purpose flour or plain flour (5 cups)
  • 1 packet dry active yeast (7 g)
  • 75 g white sugar (1/3 cup)
  • 1 tsp salt (skip if using salted butter)
  • 2 eggs
  • 250 ml water (1 cup)
  • 85 g unsalted butter (6 tbsp)
  • Zest of one lemon

Vanilla Butter Filling Ingredients

  • 125 g unsalted butter
  • 150 g white sugar (3/4 cup)
  • 1 tsp vanilla paste or extract

Vanilla Glaze Ingredients

  • 120 g icing sugar
  • 1-3 tbsp milk
  • 1/2 tsp vanilla paste or extract

Instructions
 

  • In the bowl of a stand mixer, combine the sugar, salt, and yeast. Add two-thirds of the flour and mix well. Zest the lemon into the flour mixture and create a well in the centre.
  • In a microwave-safe bowl or jug, heat the water and butter in 30-second increments until warm and the butter is mostly melted. Be careful not to overheat the mixture, as it could kill the yeast.
  • Crack the eggs into a bowl and whisk them well. Pour the eggs into the well in the flour mixture, followed by the warm water and butter mixture. Stir until combined.
  • Add the remaining flour and knead the dough on medium-high speed for 10-15 minutes. You’ll know it's ready when it no longer sticks to the slides of the bowl. Another way to check if the dough is ready is to perform the windowpane test. (To perform the windowpane test, pinch off a small piece of dough and stretch it gently. If it's stretchy and translucent, you've kneaded it enough.)
  • Cover the dough with cling film and a cloth, and let it rise in a warm place for about an hour, or until it has doubled in size.
  • While the dough is rising, prepare the vanilla filling by mixing the softened butter, sugar, and vanilla in a bowl, until smooth.
  • Once the dough has risen, punch it down and roll it out into a long rectangle on a well-floured surface. Spread the vanilla butter mixture evenly over the dough, leaving a small space on the edge.
  • From the long end, roll the dough away from you into a tight roll, sealing the bottom edge by pinching the dough together.
  • Use unflavored floss or a sharp knife to cut the dough into 8 evenly sized rolls. Place them in a greased 8 or 9-inch cake pan and let them rise again for about 30 minutes.
  • Bake the rolls at 175 degrees Celsius (350 degrees Fahrenheit) for 30 minutes, or until they are golden brown and no longer doughy. Allow them to cool.
  • While the cake is cooling, make the glaze by, whisking the icing sugar, milk, and vanilla paste or extract in a large bowl until smooth. Adjust the consistency by adding more milk if needed.
  • Once the rolls have cooled slightly, spread the glaze evenly over the Torta Di Rosa and enjoy!

Notes

  • Use unflavoured floss – to cut the rolls, instead of a knife. This will give you a cleaner cut and make sure the rolls don’t get squished.
  • Store the Italian Rose Cake – in a airtight container, once the glaze has fully set and store at room temperature at they should last for about 3 days
  • If you don’t have a rolling pin – use can use a closed bottle of olive oil instead
  • The recipe video is on my TikTok and IG – please tag @aceofspoons_ if you make this recipe
Keyword Cake, Italian Rose Cake, Torta Di Rosa
28th August 2024 0 comments
0 FacebookTwitterPinterestPocketThreadsBlueskyEmail
DessertsIce Cream

No Churn Berry Ripple Ice Cream

by Hunar Baig 18th July 2024
written by Hunar Baig

No Churn Berry Ripple Ice Cream

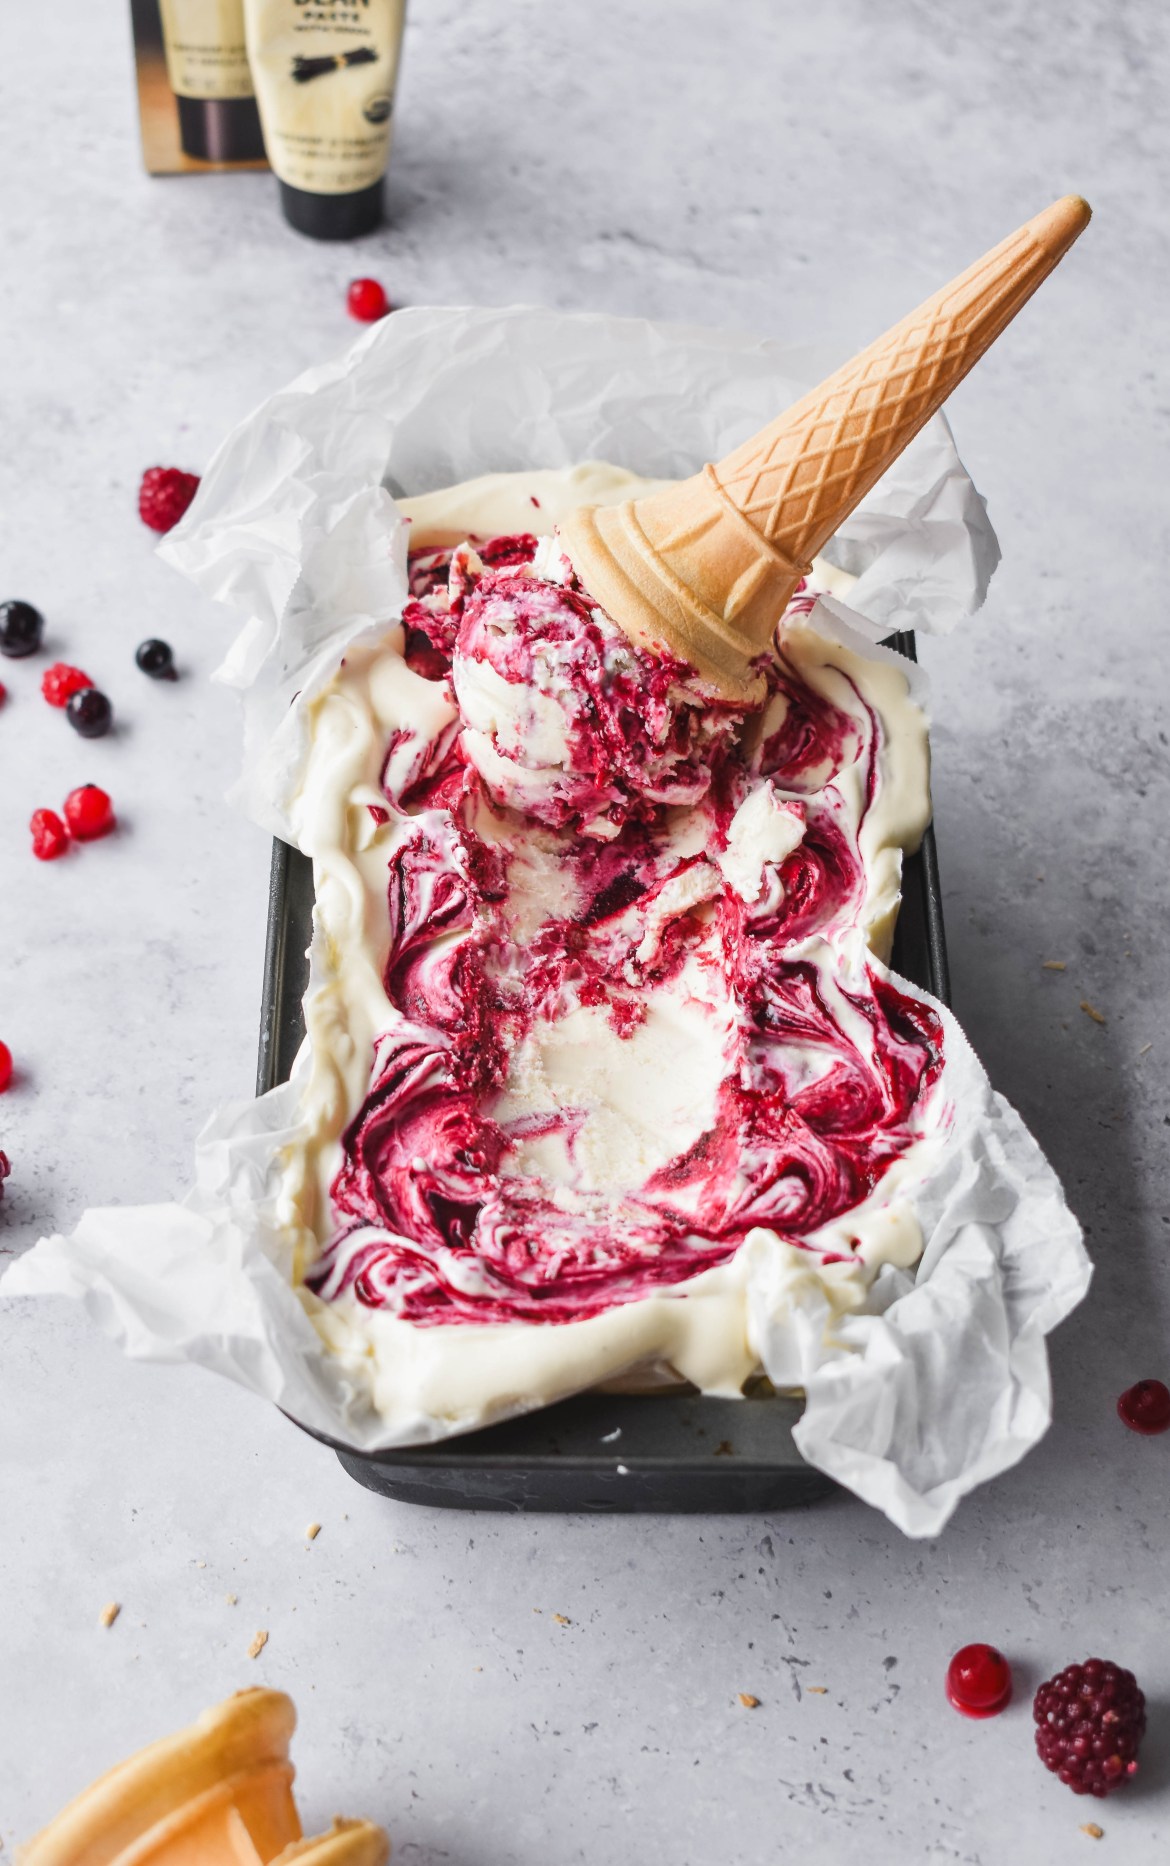
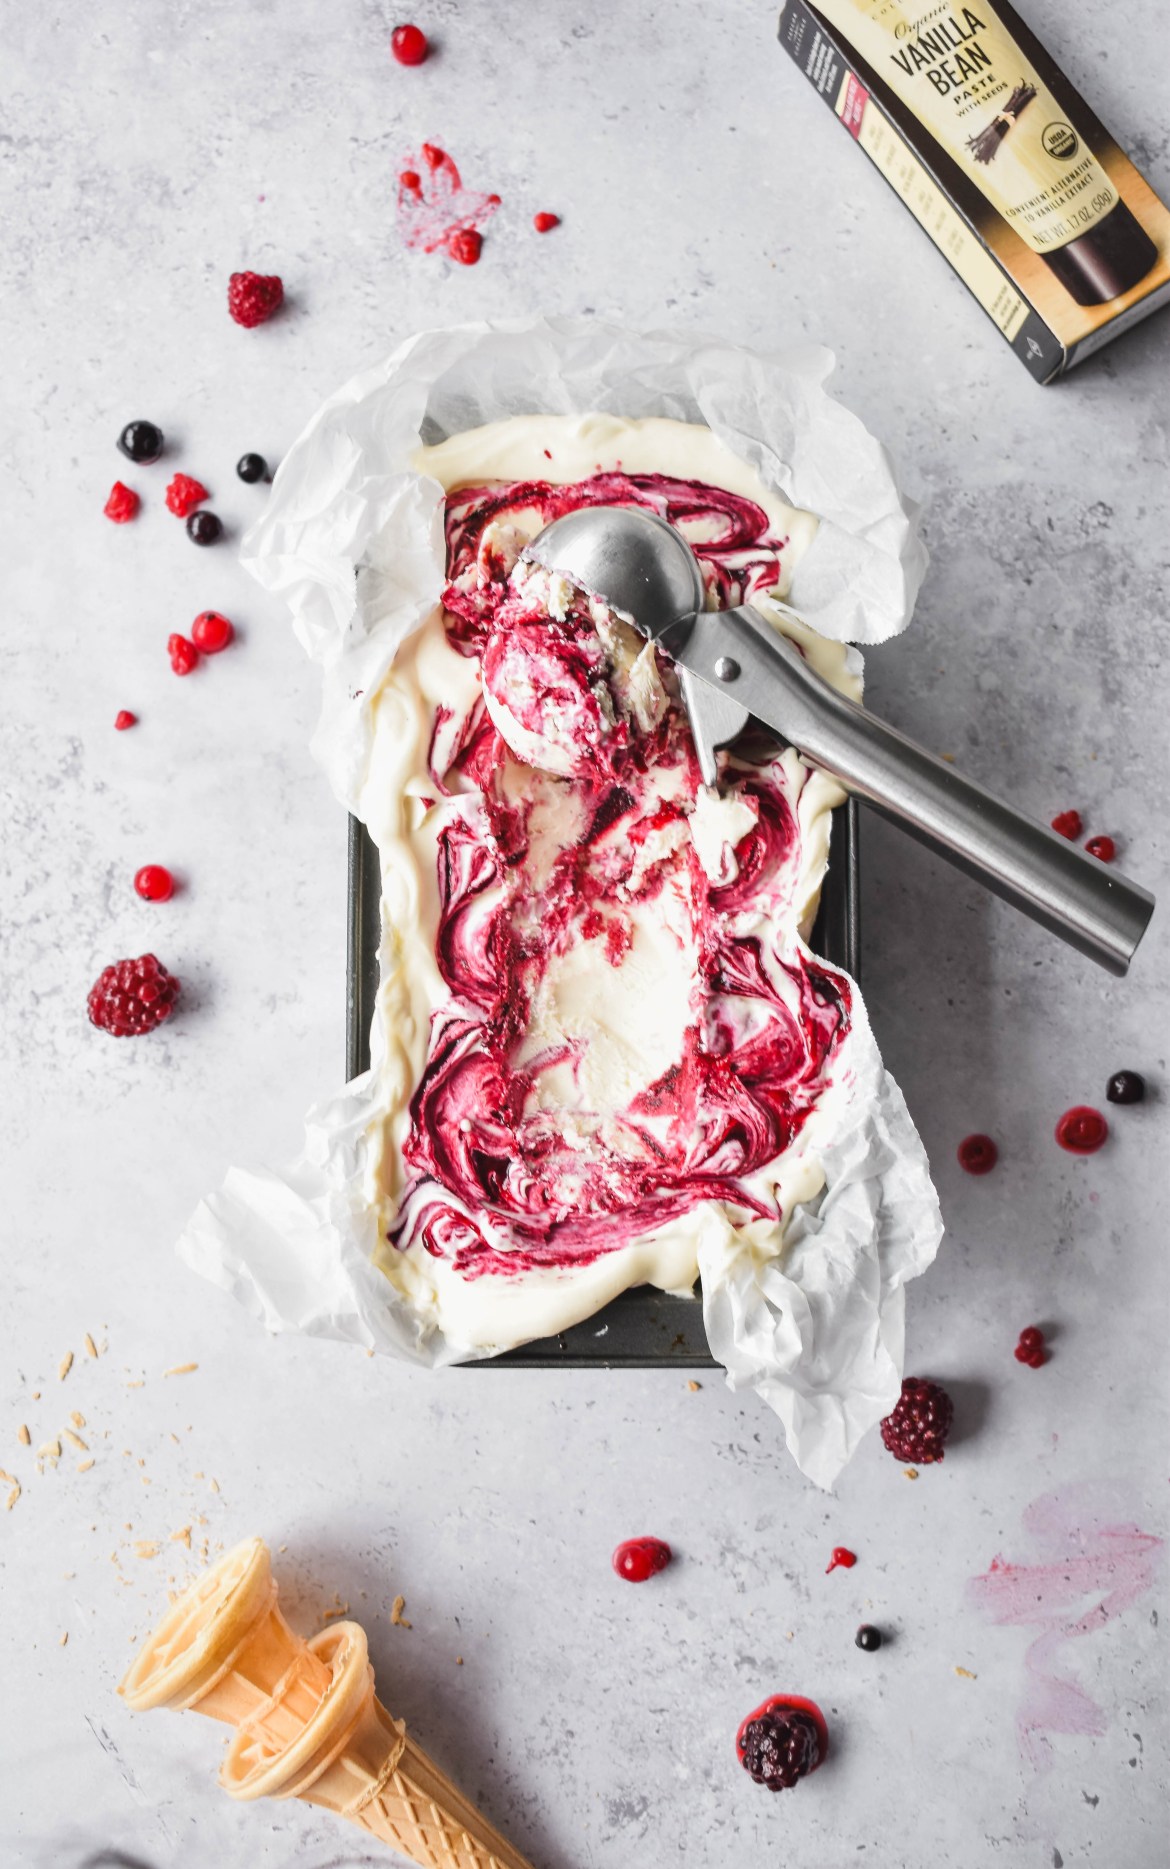
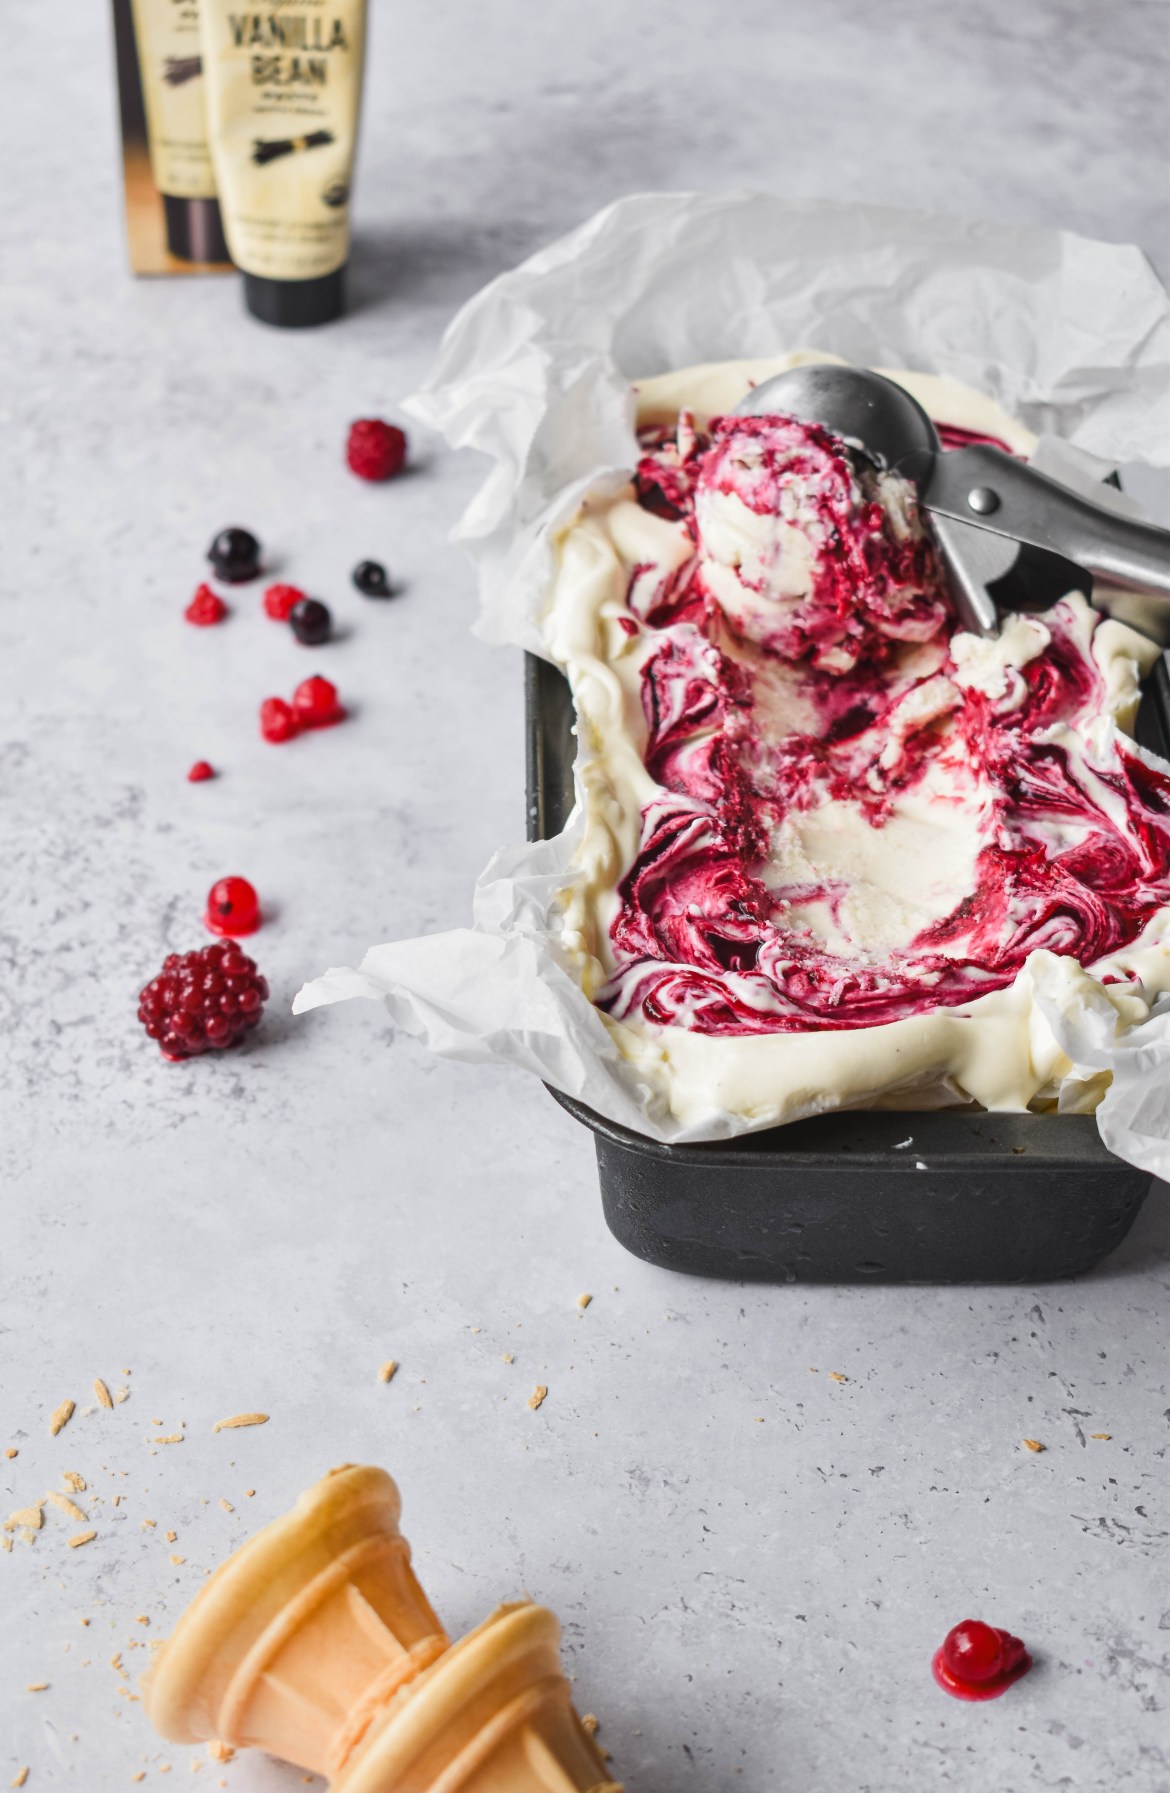
This no churn berry ripple ice cream is impossibly creamy, bursting with vibrant berry flavour, and the best part? It’s surprisingly easy to make! In just 10 minutes of prep time, you can whip up this delicious dessert that rivals any fancy ice cream shop. Ready to learn how?

What is no churn ice cream? 

No churn ice cream is ice cream that doesn’t require an ice cream machine, long churning time or even any eggs. The two main ingredients in no churn ice cream are double cream / heavy cream and sweetened condensed milk. The combination of these two ingredients, when whipped, makes a light and fluffy ice cream base ready to freeze and become the creamiest ice cream you’ve ever had!

What does Berry Ripple Ice Cream taste like?

Berry ripple ice cream is a smooth, velvety vanilla base that melts in your mouth, with bursts of sweet and tart berry sauce. Each bite is a perfect balance of creamy richness and refreshing fruitiness. Think of a classic raspberry ripple screwball ice cream but elevated. This homemade version boasts a deeper, richer vanilla flavor and a more vibrant berry sauce, bursting with fresh summer berries. It’s the nostalgia of classic ice cream with a touch of gourmet indulgence.

How to make Berry Ripple Ice Cream

  1. In a medium saucepan, combine the frozen berries, sugar, lemon juice and salt. Cook for 8-10 minutes on a medium-low heat, stirring regularly, until the mixture thickens and most of the berries have broken down.
  2. Strain the berry mixture through a sieve with a spoon, pressing to extract as much sauce as possible. Until you have a smooth berry sauce and set aside to cool.
  3. In a large mixing bowl, whip the double cream / heavy cream until medium-soft peaks form. Aim for light and fluffy, not stiff.
  4. Gently fold in the sweetened condensed milk and vanilla paste until everything is combined and the ice cream base is ready.
  5. Prepare your loaf tin or dish by lining it with some scrunched-up parchment paper (this will make it easier to clean later).
  6. Pour â…“ of the ice cream base into the loaf pan and smooth it into an even layer. Then, top with a few spoonfuls of the berry mixture.
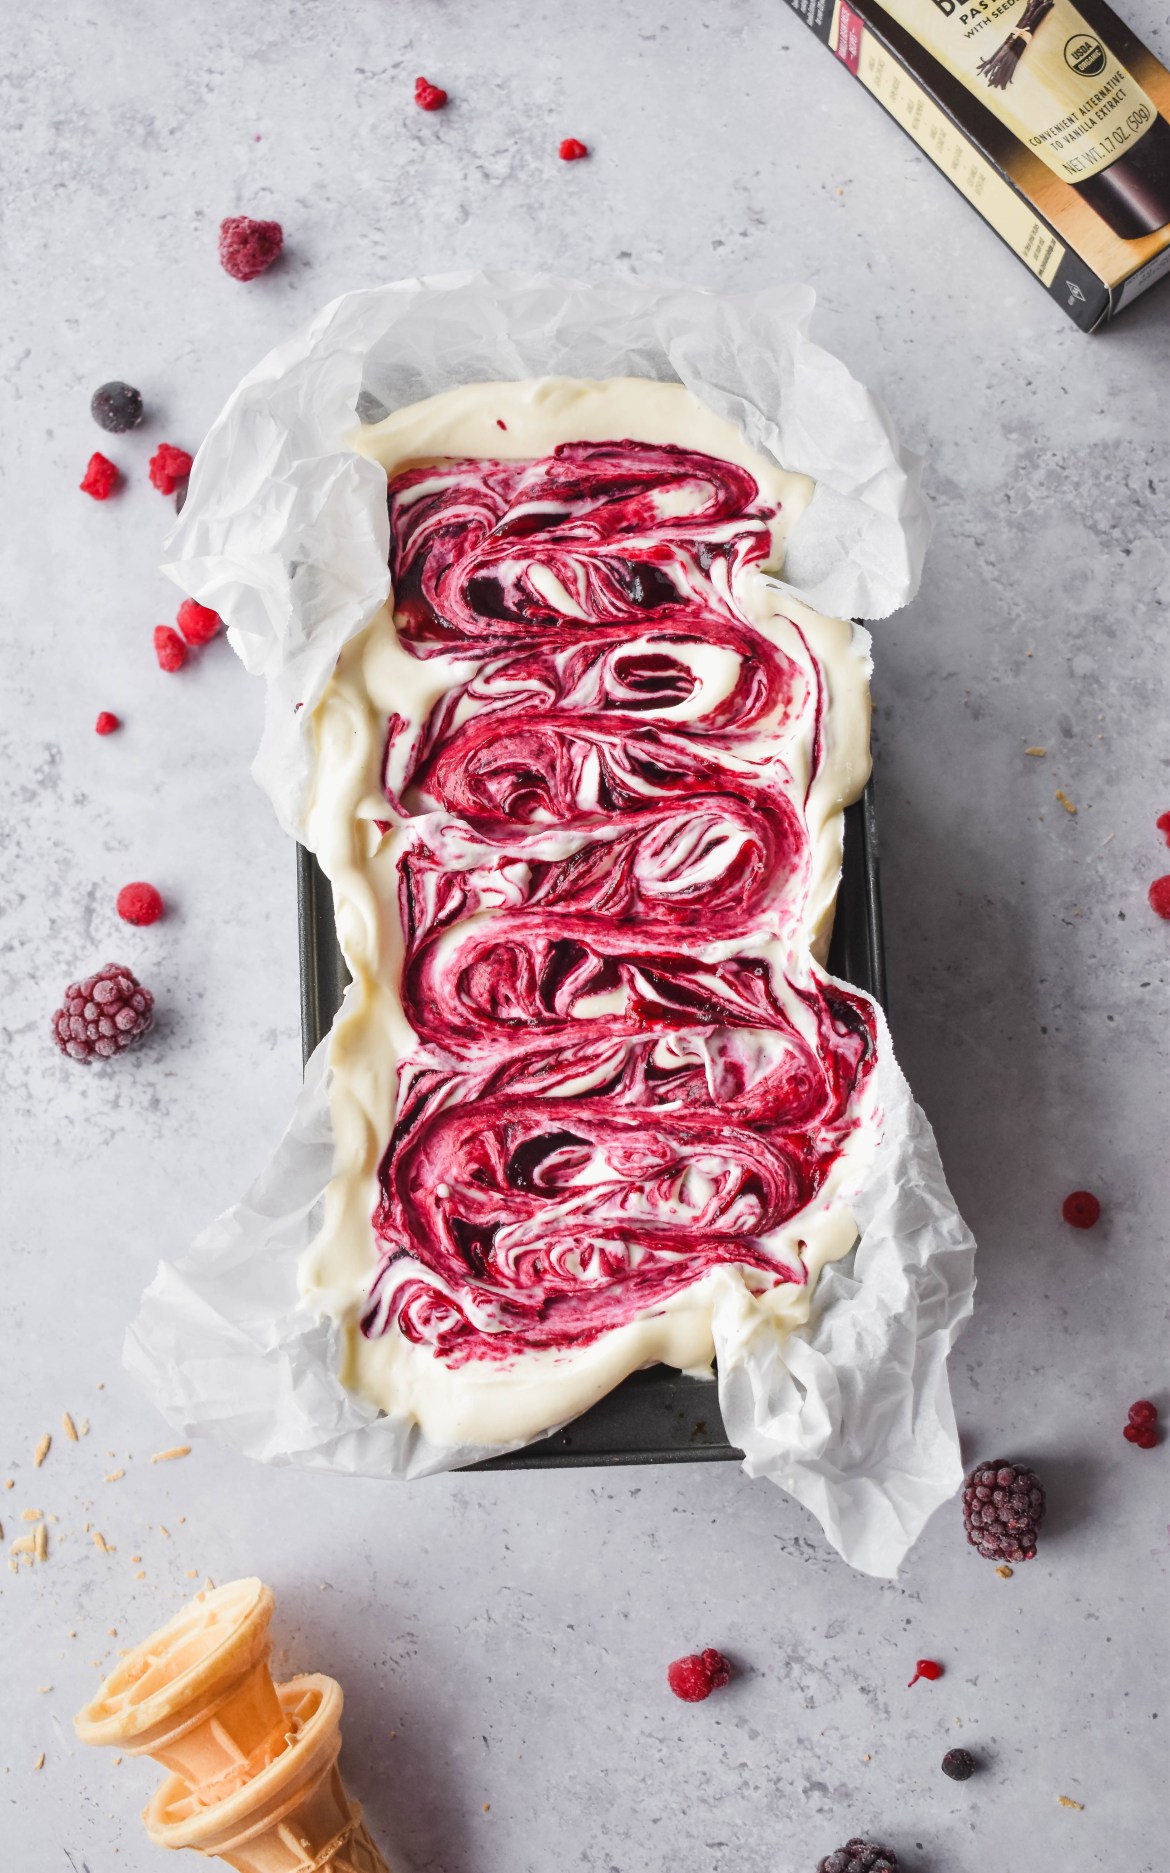
  7. Use a butter knife to swirl the berry sauce gently into the ice cream base. Repeat these steps, using â…“ of the ice cream base and some berry sauce per layer, until all the ingredients are used.
  8. Freeze for 8 – 12 hours before serving and enjoy!

How do you make no churn ice cream creamy and not icy?

The secret ingredient that not only stops the ice cream from getting icy and adds a ton of flavour is: vanilla! The vanilla paste or extract lowers the freezing temp of the ice cream, making it slower to freeze and therefore, forming smaller ice crystals , ultimately making a smoother ice cream. The other ingredient that stops the ice cream from going icy is sweetened condensed milk, which softens the ice cream!

How long does no-churn ice cream last in the freezer? 

Once your no-churn ice cream is frozen, pop it in an airtight container or wrap it well with plastic wrap. The ice cream will last for about 1 to 3 months if kept in the freezer and stored properly. A word of caution, if the ice cream melts completely after it has frozen solid, do not refreeze it, it is no longer safe to eat!

What does no-churn ice cream mean?

Unlike traditional ice cream recipes, no-churn versions don’t require churning during the freezing process. This makes them ideal for those who don’t have an ice cream maker or prefer a simpler method. While no-churn ice cream achieves a creamy texture, it might be slightly denser compared to ice cream made with an ice cream maker due to the lack of churning.

Ingredient Notes

The ingredients that go into this Berry Ripple Ice Cream 

Double Cream / Heavy Cream – is the perfect base for creamy and rich no churn ice cream

Sweetened Condensed Milk – will sweeten the berry ripple ice cream, bind everything together and soften the ice cream

Vanilla Paste – adds so much flavour, depth and that classic vanilla smell – not to mention that it keep the ice cream from getting icy

Frozen Berries – I love using real berries, for a rich and vibrant flavour and gorgeous purple color

Sugar – to add more much needed sweetness to the berry sauce

Salt – balances everything out and makes sure the ice cream isn’t too sweet

Lemon Juice – will help give the berry component a bright color and add some tartness

Tips and Tricks – Berry Ripple Ice Cream 

  • Always let the ice cream sit out for a couple of minutes to soften, before scooping.
  • Place your ice cream scoop into a mug of hot water for a couple of minutes before scooping, this will not only make the ice cream easier to serve, but also make the ice cream scoops more even and round.
  • Using some scrunched up parchment paper to line the tin you put the ice cream into, will make clean up super easy!
  • The recipe video is on my TikTok and IG – please tag @aceofspoons_ if you make this recipe

Berry Ripple Ice Cream

Hunar Baig
This no churn berry ripple ice cream is impossibly creamy, bursting with vibrant berry flavour, and the best part? It's surprisingly easy to make! In just 10 minutes of prep time, you can whip up this delicious dessert that rivals any fancy ice cream shop. Ready to learn how?
Print Recipe Pin Recipe
Prep Time 10 minutes mins
Total Time 10 minutes mins
Course Dessert, Ice Cream
Servings 12 servings

Equipment

  • Large bowl
  • Hand whisk or Stand mixer
  • Saucepan
  • Loaf pan or Dish

Ingredients
  

No Churn Ice Cream Base

  • 600 ml double cream / heavy cream (2 1/2 cups)
  • 1 tin condensed milk (397 ml)
  • 2 tsp vanilla paste (or extract)

Berry Sauce

  • 250 g frozen mixed berries (1 1/3 cups)
  • 50 g white sugar (1/4 cup)
  • Juice of half a lemon
  • Pinch of salt

Instructions
 

  • In a medium saucepan, combine the frozen berries, sugar, salt and lemon juice. Cook for 8-10 minutes on a medium-low heat, stirring regularly, until the mixture thickens and most of the berries have broken down.
  • Strain the berry mixture through a sieve with a spoon, pressing to extract as much sauce as possible. Until you have a smooth berry sauce and set aside to cool.
  • In a large mixing bowl, whip the double cream / heavy cream until medium-soft peaks form. Aim for light and fluffy, not stiff.
  • Gently fold in the sweetened condensed milk and vanilla paste (or extract) until everything is combined and the ice cream base is ready.
  • Prepare your loaf tin or dish by lining it with some scrunched-up parchment paper (this will make it easier to clean later).
  • Pour â…“ of the ice cream base into the loaf pan and smooth it into an even layer. Then, top with a few spoonfuls of the berry mixture.
  • Use a butter knife to swirl the berry sauce gently into the ice cream base. Repeat these steps, using â…“ of the ice cream base and some berry sauce per layer, until all the ingredients are used.
  • Freeze for 8 – 12 hours before serving and enjoy!

Notes

  • Always let the ice cream sit out for a couple of minutes to soften, before scooping.
  • Place your ice cream scoop into a mug of hot water for a couple of minutes before scooping, this will not only make the ice cream easier to serve, but also make the ice cream scoops more even and round.
  • Using some scrunched up parchment paper to line the tin you put the ice cream into, will make clean up super easy!
  • The recipe video is on my TikTok and IG – please tag @aceofspoons_ if you make this recipe
Keyword Ice cream, No Churn Ice Cream
18th July 2024 0 comments
0 FacebookTwitterPinterestPocketThreadsBlueskyEmail
DessertsIce Cream

Easy Orange Creamsicle – Popsicles

by Hunar Baig 28th June 2024
written by Hunar Baig

Easy Orange Creamsicle – Popsicles

Think creamy vanilla and sunshine-y orange in a frozen treat – but better! This homemade orange creamsicle popsicle recipe is bursting with fresh flavours, and it’s a no churn ice cream recipe! The way the creamy vanilla and bright orange flavours intertwine is pure magic. These popsicles are more than just a treat, they are a summer staple.

What is a no churn ice cream? 

Is ice cream that doesn’t require an ice cream machine or long churning time or even any eggs. The two main ingredients in no churn ice cream are cream and sweetened condensed milk, the combination of both of these ingredients when whipped, is a light and fluffy ice cream base ready to freeze and become no churn ice cream.

How to make Orange Creamsicle – Popsicles

  1. In a blender, combine peeled and chopped oranges, sugar, salt, and vanilla bean paste. Add orange food coloring (if using) for a brighter hue. Blend until smooth and set aside.
  2. In a large bowl, whisk together double cream / heavy cream, condensed milk, yogurt, and vanilla bean paste until thickened slightly. Don’t overmix – you want it light and creamy, not fluffy.
  3. Now, add ½ cup of the vanilla ice cream mixture into the blended orange mixture and mix well. 
  4. Then simply, alternatively pour each mixture into a popsicle mould, alternating layers until the molds are almost full. Leave a small space (about ¼ inch) at the top for expansion. Insert popsicle sticks and freeze for at least 8 hours, or ideally overnight. 
  5. Once frozen, simply remove the popsicles from the moulds and enjoy your homemade orange creamsicles!

How do you make homemade ice cream creamy and not icy?

The secret ingredient that not only stops the ice cream from getting icy and adds a ton of flavour is: vanilla! The vanilla paste or extract lowers the freezing temp of the ice cream, making it slower to freeze and therefore, forming smaller ice crystals , ultimately making a smoother ice cream. The other ingredient that stops the ice cream from going icy is sweetened condensed milk, which softens the ice cream!

How long does no-churn Orange Creamsicles last? 

Once the no churn Orange Creamsicles are solid – store in the freezer in popsicle bags or individually wrapped with cling film. They should last 4 weeks if kept in the freezer and stored properly. A word of caution, if the popsicles melt completely after it has frozen solid, do not refreeze it, it is no longer safe to eat!

What is the texture of an Orange Creamsicle? 

This orange creamsicle recipe is a no churn ice cream that has a creamy, velvety and light texture. The secret to what makes this  ice cream so light and creamy is that the base of  double cream / heavy cream whipped to soft peaks with natural yogurt and sweetened condensed milk. No churn ice cream also contains plenty of fat but not a lot of water resulting in a velvety, luscious ice cream.

What does an Orange Creamsicle taste like?

Orange creamsicles, sometimes known as orange dreamsicles are creamy ice cream popsicles that are a perfect blend of dreamy vanilla and fresh sweet orange swirled together. It has a sweet but not too sweet taste, a smooth creamy texture and a delightfully fruity flavour. 

Ingredient Notes

The ingredients that go into this Easy Orange Creamsicle – Popsicles

Double Cream / Heavy Cream – is the perfect base for creamy and rich no churn popsicles

Natural Yogurt – will add some structure and creaminess to the popsicles

Sweetened Condensed Milk – will sweeten the orange creamsicles, bind everything together and soften the ice cream

Vanilla Paste – adds so much flavour, depth and that classic vanilla smell – not to mention that it keep the ice cream from getting icy

Oranges – I love using real oranges for a great flavour and that bright beautiful orange color

Sugar – to add more much needed sweetness

Salt – balances everything out and makes sure the popsicles aren’t too sweet

Orange Food Colouring (optional) – this is optional but it makes the creamsicles a super pretty orange color

Tips and Tricks – Easy Orange Creamsicle – Popsicles

  • Let the popsicles sit out for a couple of minutes to soften, before removing from the mould.
  • Place your popsicle mould into a bowl of warm water for a couple of minutes before removing, this will make the popsicles easier to serve.
  • The recipe video is on my TikTok and IG – please tag @aceofspoons_ if you make this recipe

Easy Orange Creamsicles

Hunar Baig
Think creamy vanilla and sunshine-y orange in a frozen treat – but better! This homemade orange creamsicle popsicle recipe is bursting with fresh flavours, and it's a no churn ice cream recipe!
Print Recipe Pin Recipe
Prep Time 20 minutes mins
Total Time 20 minutes mins
Course Dessert, Ice Cream
Cuisine American
Servings 10 popsicles

Equipment

  • Popsicle Mould
  • Popsicles Sticks
  • Blender
  • Large bowl
  • Hand Whisk (optional)

Ingredients
  

Orange Ice Cream

  • 2 medium oranges
  • 1/2 tsp vanilla bean paste or extract
  • 65 g white sugar (1/3 cup)
  • 1/8 tsp salt
  • a little bit of orange food colouring (optional)

Vanilla Ice Cream

  • 120 ml double cream / heavy cream (1/2 cup)
  • 130 g natural yoghurt (1/2 cup)
  • 180 ml condensed milk (6oz)
  • 1 tsp vanilla bean paste or extract

Instructions
 

  • In a blender, combine peeled and chopped oranges, sugar, salt, and vanilla bean paste. Add orange food coloring (if using) for a brighter hue. Blend until smooth and set aside.
  • In a large bowl, whisk together double cream / heavy cream, condensed milk, yogurt, and vanilla bean paste until thickened slightly. Don't overmix – you want it light and creamy, not fluffy.
  • Now, add ½ cup of the vanilla ice cream mixture into the blended orange mixture and mix well.
  • Then simply, alternatively pour each mixture into a popsicle mould, alternating layers until the molds are almost full. Leave a small space (about ¼ inch) at the top for expansion. Insert popsicle sticks and freeze for at least 8 hours, or ideally overnight.
  • Once frozen, simply remove the popsicles from the molds and enjoy your homemade orange creamsicles!

Notes

  • Let the popsicles sit out for a couple of minutes to soften, before removing from the mould.
 
  • Place your popsicle mould into a bowl of warm water for a couple of minutes before removing, this will make the popsicles easier to serve.
 
  • The recipe video is on my TikTok and IG – please tag @aceofspoons_ if you make this recipe
Keyword Ice cream, Orange, Orange Cremsicle, Popsicle
28th June 2024 0 comments
0 FacebookTwitterPinterestPocketThreadsBlueskyEmail
CakesDesserts

Tres Leches Cake 

by Hunar Baig 26th May 2024
written by Hunar Baig

Tres Leches Cake 

This delicious cake, soaked in three types of milk, is called a tres leches cake and it’s a favourite of mine for a reason. With this easy-to-follow recipe, you’ll be able to impress your friends and family with your baking skills in no time. So grab your apron and get ready to bake up a mouthwatering treat that will leave everyone wanting more!

What is a Tres Leches Cake?

Tres Leches Cake, is a Latin American dessert that is a creamy, dreamy delight. It’s a light, fluffy vanilla sponge, soaked in a sweet milky mixture which makes the cake even softer. Finally this sweet dessert is topped with a fluffy whipped cream, and fresh strawberries. It’s a guaranteed crowd-pleaser at potlucks and celebrations, a delightful way to impress guests with your dessert-making skills (though it’s surprisingly easy to make!)

What does tres leches mean?

“Tres leches” literally translates from Spanish to “three milks.” This refers to the key ingredient in the tres leches cake: a soaking mixture made with three different types of milk. These milks are typically: evaporated, condensed and whole milk. The combination of these three milks is what creates the incredibly moist texture and a creamy sweet taste that tres leches cake is known for.

Tres Leches Cake – 3 Biggest Mistakes When Making Tres Leches Cake

There is nothing like a dreamy, rich tres leches cake and this is how you can achieve this at home!

  1. Skipping the Cool Down: This is a crucial step! You might be tempted to pour the milk soak over a warm cake, but please don’t. A warm cake won’t absorb the milk evenly, leading to a soggy bottom and a dry top. Let the cake cool completely before adding the milk soak. Patience is key!
  2. Overmixing the Batter: Tres leches cake is known for its light and fluffy texture. Overmixing the batter can lead to a tough and dense cake, the base for this cake is eggs which means we need to keep as much air as we can, for a soft, fluffy sponge.
  3. Not Letting the Cake Soak Long Enough: The magic of tres leches is the perfect balance between cake and milk. Don’t rush this process! After pouring the milk soak, let the cake refrigerate for at least 4 hours, but ideally overnight. This allows the milk to fully saturate the cake, creating that signature soft and creamy texture.

How to make a Classic Tres Leches Cake – step by step

  1. Preheat an oven to 175 degrees celsius / 350 degrees F.
  2. In 2 large bowls, separate your eggs placing the whites in one bowl and the yolks in the other.
  3. Next, add half of the sugar into the egg yolks and the other half into the egg whites. Set the egg whites to one side.
  4. Add the vanilla and salt into the egg yolks and whip until light and fluffy. The egg yolk mixture should be a pale yellow color.
  5. Next, pour the buttermilk into the egg yolks and gently fold, until well mixed.
  6. Sift the flour and baking powder into the yolks and softly fold until fully combined and there are no streaks of flour left. Then, set this mixture aside.
  7. Now, start whipping the egg whites until super light and fluffy. The egg whites should be able to hold a stiff peak and be completely white in color.
  8. Add ¼ of the egg whites into the egg yolk mixture and gently fold, making sure not to lose too much air.
  9. Then, VERY GENTLY fold in the egg yolks into the rest of the egg whites until fully combined.
  10. Finally, pour the cake batter into an ungreased baking pan and smooth it into an even layer. Bake for 25 to 30 minutes, or until a toothpick inserted in the centre of the cake comes out clean. Remove from the oven and allow the cake to cool completely.
  11. For the milk mixture, simply combine the evaporated, condensed and whole milk in a bowl, with the vanilla. Mix well, until fully combined.
  12. Once the cake is fully cooled, poke all over with a fork and pour over your three milk mixture. Make sure you get all the sides and that there are no dry spots on the cake.
  13. Place the cake into the refrigerator and allow to soak for at least 4 hours or ideally overnight.
  14. Finally, whip together the double cream, icing sugar and vanilla, until light and fluffy. And top the cake with the whipped cream and smooth into an even layer. Then decorate as you wish, slice and enjoy!

What does tres leches cake taste like?

A classic tres leches cake has a distinct milky vanilla taste, that isn’t too sweet. It’s a really soft and fluffy cake, soaked in a milky vanilla mixture and topped with sweetened whipped cream and sometimes also topped with cinnamon – for a warmer flavour profile.

How to decorate a tres leches cake?

Tres Leches cake is all about its light and fluffy texture soaked in a delicious milk mixture. Here are some really easy and classic ways to decorate:

  • Cinnamon Sprinkle: A dusting of ground cinnamon adds a warm touch and complements the flavors beautifully. Sprinkle it over the whipped cream for a simple yet elegant look.
  • Fresh Strawberries: A scattering of fresh sliced strawberries, adds a pop of color and freshness.
  • Chopped Nuts: Toasted almonds, pecans, or chopped hazelnuts add a nice textural contrast and a nutty flavor. Gently sprinkle them onto the whipped cream for a festive touch.

Ingredient Notes

The ingredients that go into this Tres Leches Cake Recipe

Eggs – is the base and structure for this light and fluffy cake

Sugar – provides sweetness and adds structure 

Flour – a must for the cake part of the tres leches cake

Salt – to balance everything out

Vanilla Paste or Extract – I am using Taylor & College’s Organic Vanilla Bean Paste, which adds so much flavour, depth and that classic vanilla smell

Buttermilk – adds moisture and tenderness to cake

Evaporated, Condensed, Whole Milk  – is the 3 milks in this classic tres leches soak

Double Cream / Heavy Cream – for that classic whipped cream topping

Icing Sugar – to help add some sweetness to the whipped cream topping

Tips and Tricks – Tres Leches Cake

  • Skipping the Cool Down: This is a crucial step! You might be tempted to pour the milk soak over a warm cake, but please don’t. A warm cake won’t absorb the milk evenly, leading to a soggy bottom and a dry top. Let the cake cool completely before adding the milk soak. Patience is key!
  • Overmixing the Batter: Tres leches cake is known for its light and fluffy texture. Overmixing the batter can lead to a tough and dense cake, the base for this cake is eggs which means we need to keep as much air as we can, for a soft, fluffy sponge.
  • Not Letting the Cake Soak Long Enough: The magic of tres leches is the perfect balance between cake and milk. Don’t rush this process! After pouring the milk soak, let the cake refrigerate for at least 4 hours, but ideally overnight. This allows the milk to fully saturate the cake, creating that signature soft and creamy texture.
  • The recipe video is on my TikTok and IG – please tag @aceofspoons_ if you make this recipe

Tres Leches Cake

Hunar Baig
This delicious cake, soaked in three types of milk, is called a tres leches cake and it's a favourite of mine for a reason. With this easy-to-follow recipe, you'll be able to impress your friends and family with your baking skills in no time
Print Recipe Pin Recipe
Prep Time 45 minutes mins
Cook Time 30 minutes mins
Total Time 1 hour hr 15 minutes mins
Course Dessert
Cuisine Latin American
Servings 12 servings

Equipment

  • Stand Mixer or Hand Whisk
  • 9*13 Baking Pan or Tray

Ingredients
  

Cake Ingredients

  • 5 eggs
  • 250 g caster sugar (1 ¼ cups)
  • 1 tsp Taylor & Colledge Organic Vanilla Bean Paste (or vanilla extract)
  • ½ tsp salt
  • 80 ml buttermilk (â…“ cup)
  • 130 g plain or all purpose flour
  • 1 ½ tsp baking powder

Three Milk Mixture

  • 1 can evaporated milk (410g)
  • 1 can condensed milk (397g)
  • 125 ml whole milk (½ cup)
  • ½ tsp Taylor & Colledge Organic Vanilla Bean Paste (or vanilla extract)

Whipped Cream Topping

  • 600 ml double cream or heavy cream (2 ½ cups)
  • ½ tsp Taylor & Colledge Organic Vanilla Bean Paste (or vanilla extract)
  • 3 tbsp icing sugar or powdered sugar

Instructions
 

  • Preheat an oven to 175℃ / 350 ℉
  • In 2 large bowls, separate your eggs placing the whites in one bowl and the yolks in the other.
  • Next, add half of the sugar into the egg yolks and the other half into the egg whites. Set the egg whites to one side.
  • Add the vanilla and salt into the egg yolks and whip until light and fluffy. The egg yolk mixture should be a pale yellow color.
  • Next, pour the buttermilk into the egg yolks and gently fold, until well mixed.
  • Sift the flour and baking powder into the yolks and softly fold until fully combined and there are no streaks of flour left. Then, set this mixture aside.
  • Now, start whipping the egg whites until super light and fluffy. The egg whites should be able to hold a stiff peak and be completely white in color.
  • Add ¼ of the egg whites into the egg yolk mixture and gently fold, making sure not to lose too much air.
  • Then, VERY GENTLY fold in the egg yolks into the rest of the egg whites until fully combined.
  • Finally, pour the cake batter into an ungreased baking pan and smooth it into an even layer. Bake for 25 to 30 minutes, or until a toothpick inserted in the centre of the cake comes out clean. Remove from the oven and allow the cake to cool completely.
  • For the milk mixture, simply combine the evaporated, condensed and whole milk in a bowl, with the vanilla. Mix well, until fully combined.
  • Once the cake is fully cooled, poke all over with a fork and pour over your three milk mixture. Make sure you get all the sides and that there are no dry spots on the cake.
  • Place the cake into the refrigerator and allow to soak for at least 4 hours or ideally overnight.
  • Finally, whip together the double cream, icing sugar and vanilla, until light and fluffy. And top the cake with the whipped cream and smooth into an even layer. Then decorate as you wish, slice and enjoy!

Notes

  • Skipping the Cool Down: This is a crucial step! You might be tempted to pour the milk soak over a warm cake, but please don’t. A warm cake won’t absorb the milk evenly, leading to a soggy bottom and a dry top. Let the cake cool completely before adding the milk soak. Patience is key!
  • Overmixing the Batter: Tres leches cake is known for its light and fluffy texture. Overmixing the batter can lead to a tough and dense cake, the base for this cake is eggs which means we need to keep as much air as we can, for a soft, fluffy sponge.
  • Not Letting the Cake Soak Long Enough: The magic of tres leches is the perfect balance between cake and milk. Don’t rush this process! After pouring the milk soak, let the cake refrigerate for at least 4 hours, but ideally overnight. This allows the milk to fully saturate the cake, creating that signature soft and creamy texture.
  • The recipe video is on my TikTok and IG – please tag @aceofspoons_ if you make this recipe
Keyword Milk Cake, Tres Leches, Tres Leches Cake
26th May 2024 0 comments
1 FacebookTwitterPinterestPocketThreadsBlueskyEmail
DessertsNo Bake

No Bake Mini Egg Cheesecake 

by Hunar Baig 29th March 2024
written by Hunar Baig

No Bake Mini Egg Cheesecake

Okay, real talk: we all know mini eggs are amazing, but have you ever thought of turning them into a cheesecake?  Think creamy cheesecake swirled with those delicious little chocolate eggs. Every bite is a party in your mouth, the perfect way to celebrate spring, easter (or, you know, just a Tuesday because who needs an excuse for cheesecake?).

Bonus: This recipe is easier than you think, even for baking newbies. No fancy skills required, just the desire for deliciousness.

What is no bake cheesecake? 

No bake cheesecake is a simpler, creamier, softer version of a regular cheesecake. Since there is no baking required it also means that is A LOT easier than a standard baked cheesecake. Baked cheesecakes have a silky texture that is quite firm, while no bake cheesecakes are soft, and super light. Personally, I am a big fan of both!

How do you remove a no-bake cheesecake from the pan?

Whether you are using a springform or loose bottomed cake pan, the best way to remove your cheesecake from the pan. Is to use a small sharp paring knife and run it along the edge of your cheesecake, to release the cheesecake. Once released you can unlock the springform pan or, if using a loose bottomed pan, then place a tin underneath the cheesecake and slide the ring of the pan down gently. If you wish to remove the base, simply use the same clean, small sharp paring knife and run it between the base of the cheesecake and the base of the pan to release it. 

Will no-bake cheesecake firm up in the fridge?

Yes! This no-bake mini egg cheesecake will set up nicely in the fridge, thanks to some good old lemon juice. The lemon juice will set the cheesecake and allow it to have a light, soft and almost mousse-like texture. You should allow no bake cheesecake to set up for at least 6 – 8 hours or, for best results, refrigerate overnight. The longer you allow it to sit in the fridge, the better it will taste and the firmer it will be. 

How long does a no bake mini egg cheesecake last?

This no bake cheesecake is the perfect dessert to make ahead of time because it stores so well. You can store any leftovers in the fridge, in an airtight container or, on a plate or a tray covered in plastic wrap, for up to 5 days.

Best tips and tricks for making No Bake Mini Egg Cheesecake:

  • Chill the cheesecake as long as possible – the cheesecake needs to chill for at least 6 – 8 hours, ideally overnight. Basically the longer it chills the better the cheesecake will taste.
  • Use room temperature cream cheese – this makes all the difference. Using the room temperature cream cheese, will ensure the cheesecake filling is super smooth.
  • Don’t overmix the no bake cheesecake filling – overmixing the cheesecake filling will make the cheesecake tough, instead of light and mousse like.
  • Use a sharp + clean knife – helps you get even clean slices, that looks super professional!

How to make No Bake Mini Egg Cheesecake

  1. Start by making the crust. Add the digestive biscuits to a food bag and bash into fine crumbs with a rolling pin, or add them to a food processor and process until you have fine crumbs. Then, in a large bowl, mix the biscuit crumbs with melted butter, and mix till you have the texture of wet sand and all the crumbs are moistened.
  2. Lightly grease and line the bottom of a 8-inch or 9-inch springform or loose bottom pan with parchment paper. Scoop the mixture into the pan, and firmly press it down, using a glass or measuring cup, until you have one even layer. 
  3. Then freeze the base for 10 – 20 minutes, while you make the cheesecake filling.
  4. To make the filling: Using a stand mixer fitted with the whisk attachment, or in a large mixing bowl using a handheld mixer, beat room temperature cream cheese until smooth. 
  5. Next, add in the icing sugar and caster sugar. Whisk until light and fluffy.
  6. Then add in the salt, lemon juice and vanilla extract and mix until well combined.
  7. In a separate bowl, pour in the double cream / heavy cream and whisk until, cream thickens and stiff peaks form. 
  8. Add â…“ of the whipped cream and fold gently into the cream cheese mixture. Then, add in the rest of the cream and continue to fold gently, until everything is fully combined.
  9. Then, add in the melted white chocolate and fold gently, until well mixed.
  10. Next, bash up the mini eggs in a bag with a rolling pin or you could chop them if you’d like. Then fold them gently into your cheesecake mixture.
  11. Remove the base from the freezer, pour the cheesecake filling onto the base, and carefully spread it around into one even layer. Place in the fridge for 1 – 2 hrs.
  12. To make the ganache topping: In a microwave safe bowl, break up the milk chocolate and pour in the double cream / heavy cream. Microwave in 30 second increments, until fully melted, stirring in between each increment. Allow to cool to room temp.
  13. Pour the ganache over the cheesecake and spread evenly. Then, cover tightly and place back in the fridge to set for at least 4 to 6 hours or overnight.
  14. Once set, run a sharp knife around the edge of the cheesecake to release it out of the pan. Decorate with extra whipped cream and the mini egg nests, then slice in and enjoy!

Ingredient Notes

The ingredients that go into this No Bake Mini Egg Cheesecake

Mini Eggs – of course we need mini eggs, for a no bake mini egg cheesecake!

Cream Cheese – will be the base for the cheesecake. 

Double Cream / Heavy Cream – for the cheesecake filling, ganache and whipped cream decoration.

Lemon Juice – to help the cheesecake set!

White Chocolate – will add much more flavour and sweetness.

Vanilla Extract – adds that classic vanilla flavour.

Salt – to balance everything out.

Melted Butter – for that buttery biscuit base.

Digestive Biscuits – for the cheesecake base, or you could use graham crackers if you’d like.

Icing Sugar + Sugar – to sweeten the cheesecake filling with.

Milk chocolate – is perfect for the ganache topping!

Tips and Tricks – No Bake Mini Egg Cheesecake

  • Chill the cheesecake as long as possible – the cheesecake needs to chill for at least 6 – 8 hours, ideally overnight. Basically the longer it chills the better the cheesecake will taste.
  • Use room temperature cream cheese – this makes all the difference. Using the room temperature cream cheese, will ensure the cheesecake filling is super smooth.
  • Don’t overmix the no bake cheesecake filling – overmixing the cheesecake filling will make the cheesecake tough, instead of light and mousse like.
  • Use a sharp + clean knife – helps you get even clean slices, that looks super professional!
  • The recipe video is on my TikTok and IG – please tag me @aceofspoons if you make this recipe!

No Bake Mini Egg Cheesecake

Hunar Baig
Okay, real talk: we all know mini eggs are amazing, but have you ever thought of turning them into a cheesecake? Think creamy cheesecake swirled with those delicious little chocolate eggs. Every bite is a party in your mouth, the perfect way to celebrate spring, easter (or, you know, just a Tuesday because who needs an excuse for cheesecake?).
Print Recipe Pin Recipe
Prep Time 30 minutes mins
Chilling Time 4 hours hrs
Total Time 4 hours hrs 30 minutes mins
Course Dessert
Servings 12 – 13 slices

Equipment

  • 8 – 9 inch springform or loose bottomed cake pan
  • 2 Large bowls
  • Stand mixer or handheld mixer
  • Rubber Spatula
  • Small sharp paring knife

Ingredients
  

Biscuit Base

  • 200 g digestive biscuits or graham crackers
  • 80 g butter (melted)

No Bake Mini Egg Cheesecake

  • 500 g cream cheese (17.6 oz)
  • 60 g icing sugar (1/2 cup)
  • 50 g caster sugar (1/4 cup)
  • 1/3 tsp salt
  • 2 tsp vanilla extract
  • 1 tbsp lemon juice
  • 250 ml double cream / heavy cream (1 cup)
  • 100 g white chocolate – melted (3.5 oz)
  • 100 – 200 g mini eggs – depending on how many you like (crushed)

Ganache Topping Ingredients

  • 100 g milk chocolate
  • 100 ml double cream / heavy cream

Mini Egg Nests

  • 100 g milk chocolate (3.5 oz)
  • 25 g butter
  • 1 tsp golden syrup or maple syrup
  • 1 cup cornflakes (crushed)
  • mini eggs to decorate

Decoration – optional

  • whipped cream to top

Instructions
 

No Bake Mini Egg Cheesecake

  • Start by making the crust. Add the digestive biscuits to a food bag and bash into fine crumbs with a rolling pin, or add them to a food processor and process until you have fine crumbs. Then, in a large bowl, mix the biscuit crumbs with melted butter, and mix till you have the texture of wet sand and all the crumbs are moistened.
  • Lightly grease and line the bottom of a 8-inch or 9-inch springform or loose bottom pan with parchment paper. Scoop the mixture into the pan, and firmly press it down, using a glass or measuring cup, until you have one even layer.
  • Then freeze the base for 10 – 20 minutes, while you make the cheesecake filling.
  • To make the filling: Using a stand mixer fitted with the whisk attachment, or in a large mixing bowl using a handheld mixer, beat room temperature cream cheese until smooth and fluffy.
  • Next, add in the icing sugar and caster sugar. Whisk until light and fluffy.
  • Then add in the salt, lemon juice and vanilla extract and mix until well combined.
  • In a separate bowl, pour in the double cream / heavy cream and whisk until, cream thickens and stiff peaks form.
  • Add â…“ of the whipped cream and fold gently into the cream cheese mixture. Then, add in the rest of the cream and continue to fold gently, until everything is fully combined.
  • Then, add in the melted white chocolate and fold gently, until well mixed.
  • Next, bash up the mini eggs in a bag with a rolling pin or you could chop them if you'd like. Then fold them gently into your cheesecake mixture.
  • Remove the base from the freezer, pour the cheesecake filling onto the base, and carefully spread it around into one even layer. Place in the fridge for 1 – 2 hrs.
  • To make the ganache topping: In a microwave safe bowl, break up the milk chocolate and pour in the double cream / heavy cream. Microwave in 30 second increments, until fully melted, stirring in between each increment. Allow to cool to room temp.
  • Pour the ganache over the cheesecake and spread evenly. Then, cover tightly and place back in the fridge to set for at least 4 to 6 hours or overnight.
  • Once set, run a sharp knife around the edge of the cheesecake to release it out of the pan. Decorate with extra whipped cream and the mini egg nests, then slice in and enjoy!

Mini Egg Nests

  • Start by melting together the chocolate, butter and golden syrup in a microwave safe bowl.
  • Then crush the cornflakes in a food bag and add into the chocolate, mix well until the cereal is fully coated.
  • Then, on a lined tray use a teaspoon to make mini nests and top each one with a mini egg and allow the nests to set in the fridge.
  • Enjoy!

Notes

  • Chill the cheesecake as long as possible – the cheesecake needs to chill for at least 6 – 8 hours, ideally overnight. Basically the longer it chills the better the cheesecake will taste.
 
  • Use room temperature cream cheese – this makes all the difference. Using the room temperature cream cheese, will ensure the cheesecake filling is super smooth.
 
  • Don’t overmix the no bake cheesecake filling – overmixing the cheesecake filling will make the cheesecake tough, instead of light and mousse like.
 
  • Use a sharp + clean knife – helps you get even clean slices, that looks super professional!
Keyword Cheesecake recipe, Mini Egg Cheesecake, No bake cheesecake
29th March 2024 0 comments
0 FacebookTwitterPinterestPocketThreadsBlueskyEmail
DessertsNo Bake

No-Bake Biscoff Truffles

by Hunar Baig 6th January 2024
written by Hunar Baig

No-Bake Biscoff Truffles

These no-bake biscoff truffles are truly any biscoff lover’s dream, they are SO easy to make and even easier to eat. Plus they use only 7 ingredients, and you can completely customise your truffles based on what chocolate you use and how you decorate them!

What kind of chocolate do you coat these truffles in?

You can use any kind of chocolate you like, I love using white and blonde chocolate. But, milk, dark or a mix of any of these will work great! I recommend using chocolate slabs, wafers or bars but not chips, as chocolate chips tend to be too thick to coat the truffles when melted.

How to make No-Bake Biscoff Truffles – step by step

  1. Start by adding your biscoff biscuits into a food processor and blitz until you have fine crumbs. You could also use a ziplock bag and a rolling pin, to crush up the biscuits.
  2. Take out one tbsp of crumbs out of the biscuit crumbs and set aside.
  3. Then, add in the cream cheese, biscoff spread, vanilla and salt.and blend till fully combined. Or, if you used the rolling pin method, mix the crumbs with everything else in a bowl, till well combined.
  4. Next, take a tablespoon or small ice cream scoop and mould them into 18 – 20 even balls. Place them onto a tray and into the fridge for an hour, or the freezer for 30 mins.
  5. In a microwave-safe bowl, melt chocolate chips and coconut oil in the microwave in 20 second increments until melted.
  6. Use a large fork like a spatula to scoop each truffle and dip into the melted chocolate. Tap the fork gently against the side of the bowl so that any extra chocolate drips back into the bowl. Place each truffle back on the parchment-lined baking sheet.
  7. Drizzle any extra chocolate on top and sprinkle with the biscoff crumbs. Place back into the fridge until fully hardened, about 30 minutes.
  8. Enjoy!

Ingredient Notes

The ingredients that go into these Easy No-Bake Biscoff Truffles

Biscoff Biscuits – of course! This is the base for the truffles.

Cream Cheese – provides softness and some much needed structure.

Biscoff Spread – binds the truffles together and adds more biscoff flavour.

Vanilla Paste or Extract – adds so much flavour, depth and that classic vanilla smell

Salt – balances everything out and enhances all of the flavours

Chocolate – is key to making these truffles gorgeous and adds a nice snappy layer of chocolate. 

Coconut Oil – makes the chocolate super shiny and snappy!

Tips and Tricks – No-Bake Biscoff Truffles

  • MAKE SURE – your biscoff biscuits (cookies) are in fine crumbs, this will make the truffles smoother.
  • Use a small ice cream scoop or a teaspoon – this will help you get the perfect size for your truffles.
  • To cover the truffles – use two forks and gently toss the truffles in the chocolate and tap off the access.
  • The recipe video is on my TikTok and IG – please tag @aceofspoons_ if you make this recipe

No-Bake Biscoff Truffles

Hunar Baig
These no-bake biscoff truffles are truly any biscoff lover's dream, they are SO easy to make and even easier to eat. Plus they use only 7 ingredients, and you can completely customise your truffles based on what chocolate you use and how you decorate them!
Print Recipe Pin Recipe
Prep Time 10 minutes mins
Chilling Time 30 minutes mins
Total Time 40 minutes mins
Course Cookies, Dessert
Cuisine American
Servings 18 small truffles

Equipment

  • Food Processor (or zip bag and rolling pin)
  • Large bowl
  • Small Scoop

Ingredients
  

Biscoff Truffles

  • 250 g biscoff biscuits/cookies (32 biscuits)
  • 125 g biscoff spread / cookie butter (1/2 cup)
  • 120 g cream cheese (4 oz)
  • 1/2 tsp vanilla extract
  • pinch of salt (optional)

Biscoff Truffle Coating

  • 200 g chocolate (any kind) (7 oz)
  • 1 tbsp coconut oil

Instructions
 

  • Start by adding your biscoff biscuits into a food processor and blitz until you have fine crumbs. You could also use a ziplock bag and a rolling pin, to crush up the biscuits.
  • Take out one tbsp of crumbs out of the biscuit crumbs and set aside.
  • Then, add in the cream cheese, biscoff spread, vanilla and salt.and blend till fully combined. Or, if you used the rolling pin method, mix the crumbs with everything else in a bowl, till well combined.
  • Next, take a tablespoon or small ice cream scoop and mould them into 18 – 20 even balls. Place them onto a tray and into the fridge for an hour, or the freezer for 30 mins.
  • In a microwave-safe bowl, melt chocolate chips and coconut oil in the microwave in 20 second increments until melted.
  • Use a large fork like a spatula to scoop each truffle and dip into the melted chocolate. Tap the fork gently against the side of the bowl so that any extra chocolate drips back into the bowl. Place each truffle back on the parchment-lined baking sheet.
  • Drizzle any extra chocolate on top and sprinkle with the biscoff crumbs. Place back into the fridge until fully hardened, about 30 minutes.
  • Enjoy!

Notes

  • MAKE SURE – your biscoff biscuits (cookies) are in fine crumbs, this will make the truffles smoother.
  • Use a small ice cream scoop or a teaspoon – this will help you get the perfect size for your truffles.
  • To cover the truffles – use two forks and gently toss the truffles in the chocolate and tap off the access.
Keyword Biscoff, Biscoff Truffles, Truffles
6th January 2024 3 comments
0 FacebookTwitterPinterestPocketThreadsBlueskyEmail
DessertsNo Bake

Classic Tiramisu Recipe

by Hunar Baig 19th December 2023
written by Hunar Baig

Classic Tiramisu Recipe

This recipe is an absolute classic. It’s made with layers of sweet, soft lady fingers, soaked in coffee, then light and fluffy mascarpone cream and dusted with chocolate. It’s light, dreamy and so easy to make that, in a few simple steps you’ll be transported to tiramisu heaven! 

What does a classic tiramisu have in it?

A Classic Italian Tiramisu is a coffee-flavoured Italian dessert. It’s made of ladyfingers, or savoiardi biscuits, dipped in espresso, layered with a whipped mixture of eggs, sugar, and mascarpone cheese and layered with cocoa powder. 

Classic Tiramisu – 3 Biggest Mistakes When Making Tiramisu

There is nothing like a dreamy, rich Italian tiramisu and this is how you can achieve this at home!

  1. Over soaking the ladyfingers (savoiardi) – over soaking your savoiardi biscuits or lady fingers, will result in a heavy and slightly sloppy tiramisu. You only want to coat them in the coffee, soaking for a max of 5 seconds, before layering.
  2. Using bad coffee – using crappy coffee is a huge NO-NO in the world of tiramisu. Now, ideally you would use espresso, but I have adjusted this recipe for instant coffee, as this is more accessible. Just make sure your coffee isn’t expired and smells very STRONG.
  3. Not letting it sit – you need to chill and allow your tiramisu to do the same! I know that it can feel like agesss before it’s ready, but leaving this beauty overnight is going to give the dreamiest dessert of your life. So it’s all going to be worth it.

Does authentic tiramisu have alcohol?

No, the most authentic recipe of tiramisu dates back to the 17th century, no alcohol was used then. Even now, when you go to Italy there is hardly ever alcohol in the tiramisu. In fact the tiramisu world cup (annual Tiramisù World Cup) held in italy, forbids the use of alcohol. (also, being a tiramisu world cup judge would be the dream!)

How to make a Classic Tiramisu – step by step

  1. Start by brewing the coffee for the sponge fingers, in a shallow dish or bowl. Simply mix your instant espresso with the hot water, or make 2 shots of espresso and add in an extra cup of hot water to dilute it slightly. Mix well, then set aside to cool.
  2. In 2 large bowls (stainless steel or glass), separate your eggs, placing the whites in one bowl and the yolks in the other.
  3. Next, simmer about 2 inches of water in a saucepan and then take it off of the heat. Then place your egg yolk bowl over it, whisking for about 30 seconds, then do the same to the egg white bowl. This will make sure the eggs are safe to eat.
  4. Now, whisk the egg yolks and half of the sugar for 5 – 6 minutes until the yolks are light, fluffy and pale in colour.
  5. Next, add in the mascarpone, vanilla and salt and whisk well for another 3 – 5 minutes. Until you have no lumps and the mixture is super fluffy. Set this mixture aside.
  6. Now onto the egg whites, you want to add in the other half of the sugar and whisk the egg whites till peaks form. They should be glossy, fluffy and light.
  7. Add the egg whites to the egg yolk mixture ¼ at a time. Fold gently with each addition making sure not to overmix. You want to mix just till you can’t see streaks of the egg white.
  8. To assemble: Quickly dip the lady fingers in the coffee on both sides for 1 – 2 seconds each side. (they will fall apart if you soak them any longer) and place them in a single layer in your desired pan. This size recipe works well in a 10 inch round or a 9 x 13 tray!
  9. Next, smooth on half of the tiramisu cream on top.
  10. Repeat with another layer of ladyfingers and the rest of the cream, then smooth over the top with a small palette knife. 
  11. Finally, dust the tiramisu with cocoa powder and place into the fridge for at least 4 hours or overnight before serving and enjoy!

How long does it take for tiramisu to set?

Tiramisu needs at least six hours in the fridge before serving. This allows all the ladyfingers to soak flavour from the cream and moisture from the coffee. But for the best results, you should allow the tiramisu to set overnight!

How to serve tiramisu:

This is the best way to serve and cut your tiramisu, so that it has clean lines and you can see all of those beautiful layers. Take a clean and very sharp knife, and cleanly slide the knife through the tiramisu, not rocking the knife back and forth. Clean the knife between each slice and then, use a spatula to lift the tiramisu squares out, then use the knife to slide them off of the spatula. (btw: the first piece might be messy, but the rest should be clear sailing.)

Ingredient Notes

The ingredients that go into this Classic Tiramisu Recipe

Lady Fingers (savoiardi biscuits) – is the base and structure of this dreamy tiramisu

Sugar – provides sweetness and adds structure 

Eggs – makes the filling light, creamy and fluffy

Coffee – of course! We need coffee for a classic tiramisu

Mascarpone Cheese – adds so much flavour and creaminess

Vanilla Paste or Extract – adds so much flavour, depth and that classic vanilla smell

Salt – balances everything out and enhances all of the flavours

Cocoa Powder – is key to add that classic tiramisu topping

Tips and Tricks – Classic Tiramisu Recipe

  • Don’t over soak the ladyfingers (savoiardi) – over soaking your savoiardi biscuits or lady fingers, will result in a heavy and slightly sloppy tiramisu. You only want to coat them in the coffee, soaking for a max of 5 seconds, before layering.
  • Use good coffee – using crappy coffee is a huge NO-NO in the world of tiramisu. Now, ideally you would use espresso, but I have adjusted this recipe for instant coffee, as this is more accessible. Just make sure your coffee isn’t expired and smells very STRONG.
  • Let it sit – you need to chill and allow your tiramisu to do the same! I know that it can feel like agesss before it’s ready, but leaving this beauty overnight is going to give the dreamiest dessert of your life. So it’s all going to be worth it.
  • The recipe video is on my TikTok and IG – please tag @aceofspoons_ if you make this recipe

Classic Tiramisu Recipe

Hunar Baig
This recipe is an absolute classic. It’s made with layers of sweet, soft lady fingers, soaked in coffee, then light and fluffy mascarpone cream and dusted with chocolate. It’s light, dreamy and so easy to make that, in a few simple steps you’ll be transported to tiramisu heaven!
Print Recipe Pin Recipe
Prep Time 30 minutes mins
Chill Time 4 hours hrs
Total Time 4 hours hrs 30 minutes mins
Course Dessert
Cuisine Italian

Equipment

  • Hand Mixer or Stand Mixer
  • 2 Large Mixing Bowls
  • small palette knife

Ingredients
  

  • 40 – 45 ladyfingers / sponge fingers (2 packs)
  • 4 eggs (separated)
  • 200 g white sugar (1 cup)
  • 500 g mascarpone cheese (18 oz)
  • 2 tsp vanilla extract or paste
  • 1/2 tsp salt
  • Cocoa powder for dusting

Coffee For The Ladyfingers

  • 2 tbsp instant coffee / espresso powder
  • 1 1/2 cup hot water

Instructions
 

  • Start by brewing the coffee for the sponge fingers, in a shallow dish or bowl. Simply mix your instant espresso with the hot water, or make 2 shots of espresso and add in an extra cup of hot water to dilute it slightly. Mix well, then set aside to cool.
  • In 2 large bowls (stainless steel or glass), separate your eggs, placing the whites in one bowl and the yolks in the other.
  • Next, simmer about 2 inches of water in a saucepan and then take it off of the heat. Then place your egg yolk bowl over it, whisking for about 30 seconds, then do the same to the egg white bowl. This will make sure the eggs are safe to eat.
  • Now, whisk the egg yolks and half of the sugar for 5 – 6 minutes until the yolks are light, fluffy and pale in colour.
  • Next, add in the mascarpone, vanilla and salt and whisk well for another 3 – 5 minutes. Until you have no lumps and the mixture is super fluffy. Set this mixture aside.
  • Now onto the egg whites, you want to add in the other half of the sugar and whisk the egg whites till peaks form. They should be glossy, fluffy and light.
  • Add the egg whites to the egg yolk mixture ¼ at a time. Fold gently with each addition making sure not to overmix. You want to mix just till you can't see streaks of the egg white.
  • To assemble: Quickly dip the lady fingers in the coffee on both sides for 1 – 2 seconds each side. (they will fall apart if you soak them any longer) and place them in a single layer in your desired pan. This size recipe works well in a 10 inch round or a 9 x 13 tray!
  • Next, smooth on half of the tiramisu cream on top.
  • Repeat with another layer of ladyfingers and the rest of the cream, then smooth over the top with a small palette knife.
  • Finally, dust the tiramisu with cocoa powder and place into the fridge for at least 4 hours or overnight before serving and enjoy!

Notes

  • Don’t over soak the ladyfingers (savoiardi) – over soaking your savoiardi biscuits or lady fingers, will result in a heavy and slightly sloppy tiramisu. You only want to coat them in the coffee, soaking for a max of 5 seconds, before layering.
  • Use good coffee – using crappy coffee is a huge NO-NO in the world of tiramisu. Now, ideally you would use espresso, but I have adjusted this recipe for instant coffee, as this is more accessible. Just make sure your coffee isn’t expired and smells very STRONG.
  • Let it sit – you need to chill and allow your tiramisu to do the same! I know that it can feel like agesss before it’s ready, but leaving this beauty overnight is going to give the dreamiest dessert of your life. So it’s all going to be worth it.
Keyword Classic Tiramisu Recipe, TIramisu, Tiramisu Recipe
19th December 2023 1 comment
0 FacebookTwitterPinterestPocketThreadsBlueskyEmail
ChickenQuick dishes

How to Make Crispy Air Fryer Chicken Wings

by Hunar Baig 11th December 2023
written by Hunar Baig

Crispy Air Fryer Chicken Wings

There are few things I LOVE more than chicken wings. Now, make them easier, healthier, less messy and you’ve got crispy air fryer chicken wings. What I love about this recipe is that you make one marinade and then can make as many flavours of wings as you like just by changing the sauces. The possibilities are LITERALLY endless.

Skin Off or On: Crispy Air Fryer Chicken Wings

This is a non negotiable for crispy wings in the airfryer, but you have to have skin on chicken wings. You see, the skin adds some much needed fat and since we aren’t using a thick batter, it’s what the batter will stick to, in order to get a crispy coating.

How long do you cook chicken wings in the airfryer?

Cook the wings in your airfryer at 200c (400F) for 30 minutes, turning halfway (15 mins) through. This is the general measurement, but your wings might need a few minutes more or less depending on how big or small they are. You’ll know the wings are cooked when they are, crispy and golden all over, and when you cut them with a knife the inside is soft and completely white.

What does baking powder do to air fryer wings?

Baking powder, not bicarbonate of soda, will give the wings a nice thin and crispy coating. The baking powder reacts with the chicken skin to raise the pH level and and creates tiny air bubbles, which helps form that lacey crispy coating 

Best tips and tricks for making Crispy Air Fryer Chicken Wings:

  • Pat the chicken wings dry – will help make the chicken crispier and allow the marinade to stick to the wings easier.
  • Lay them out flat – laying them out flat will make them cook faster and more evenly. This will also create an even browning all over the wings.
  • Use baking powder (baking soda) – this makes all the difference. Using baking powder, will make the wings extra and crispy and help keep the insides moist.
  • Use less salt – in whatever sauce you are using to toss your crispy wings in, as we are already adding some salt and flavour in.

How to make Crispy Air Fryer Chicken Wings

  1. Start by patting the wings dry with some paper towels.
  2. Then, place the dry chicken wings into a large bowl and add in all of the marinade ingredients.
  3. Give the wings a good mix (I like to use some gloves here) until they are well coated.
  4. Now, place the wings in a single even layer in your airfryer and air fry at 200c (400F) for 30 minutes, turning halfway (15 mins) through. 
  5. You’ll know the wings are cooked when they are, crispy and golden all over, and the meat inside is soft and completely white.
  6. Finally take your wings out of the airfryer and toss in a sauce of your choice, just be mindful that your wings already have some salt so you’ll need less salt in your sauce. (I have a few recipes below!)
  7. Serve, and enjoy!

Ingredient Notes

The ingredients that go into this Crispy Air Fryer Chicken Wings

Chicken Wings – of course we need chicken wings! Skin on, for more flavour and crispness. 

Salt – to season the wings with.

Black & White Pepper – will add so much more flavour.

Sweet Paprika – will add so much colour.

Garlic & Onion Powder – adds so much flavour and depth.

Neutral Oil – will make the wings brown evenly.

Baking Powder – makes the wings super crispy!

Cornflour (Corn starch) – provides some more crunch and helps create a thin crispy coating. 

Tips and Tricks – Crispy Air Fryer Chicken Wings

  • Pat the chicken wings dry – will help make the chicken crispier and allow the marinade to stick to the wings easier.
  • Lay them out flat – laying them out flat will make them cook faster and more evenly. This will also create an even browning all over the wings.
  • Use baking powder (baking soda) – this makes all the difference. Using baking powder, will make the wings extra and crispy and help keep the insides moist.
  • Use less salt – in whatever sauce you are using to toss your crispy wings in, as we are already adding some salt and flavour in.
  • The recipe video is on my TikTok and IG – please tag @aceofspoons_ if you make this recipe

Crispy Air Fryer Chicken Wings

Hunar Baig
What I love about this recipe is that you make one marinade and then can make as many flavours of wings as you like just by changing the sauces. The possibilities are LITERALLY endless.
Print Recipe Pin Recipe
Prep Time 10 minutes mins
Cook Time 30 minutes mins
Total Time 40 minutes mins
Course Main Course
Cuisine American
Servings 1 kg

Equipment

  • Air Fryer
  • Large bowl
  • Tongs

Ingredients
  

  • 1 kg chicken wings w/ the skin on (2 lbs)
  • 1 tsp salt
  • 1/2 tsp black pepper
  • 1/2 tsp white pepper
  • 1/2 tsp garlic powder
  • 1/2 tsp onion powder
  • 1/4 tsp sweet paprika (optional)
  • 1 tsp baking powder
  • 1 tbsp cornflour / corn-starch
  • 1 tbsp neutral oil (I like using vegetable or rapeseed oil)

Instructions
 

  • Start by patting the wings dry with some paper towels.
  • Then, place the dry chicken wings into a large bowl and add in all of the marinade ingredients.
  • Give the wings a good mix (I like to use some gloves here) until they are well coated.
  • Now, place the wings in a single even layer in your airfryer and air fry at 200c (400F) for 30 minutes, turning halfway (15 mins) through.
  • You’ll know the wings are cooked when they are, crispy and golden all over, and the meat inside is soft and completely white.
  • Finally take your wings out of the air fryer and toss in a sauce of your choice, just be mindful that your wings already have some salt so you’ll need less salt in your sauce. (I have a few recipes below!)
  • Serve, and enjoy!

Notes

  • Pat the chicken wings dry – will help make the chicken crispier and allow the marinade to stick to the wings easier.
  • Lay them out flat – laying them out flat will make them cook faster and more evenly. This will also create an even browning all over the wings.
  • Use baking powder (baking soda) – this makes all the difference. Using baking powder, will make the wings extra and crispy and help keep the insides moist.
  • Use less salt – in whatever sauce you are using to toss your crispy wings in, as we are already adding some salt and flavour in.
Keyword Air fryer, Air fryer wings, Chicken Wings, Crispy wings
11th December 2023 0 comments
0 FacebookTwitterPinterestPocketThreadsBlueskyEmail
Newer Posts
Older Posts

Hi, I'm Hunar!

Welcome to Ace of Spoons! My name is Hunar, and I'm a food blogger, photographer, and content creator based in the UK. This blog is all about creating delicious, foolproof recipes that are worth your time and effort in the kitchen. Whether you're a seasoned cook or just starting out, I want to provide you with recipes that are easy to follow and always turn out amazing.

Search

Popular Posts

  • 1

    No Bake Tiramisu Cheesecake

    12th September 2024
  • 2

    Classic Tiramisu Recipe

    19th December 2023
  • 3

    Viral Dubai Chocolate Cheesecake

    12th December 2024
  • 4

    No Oven Needed: No Bake Oreo Cheesecake Recipe

    5th September 2023
  • 5

    Cinnamon Roll Pancakes Recipe

    5th March 2023

Instagram

  • Instagram
  • Pinterest
  • Email
  • Tiktok
Ace of spoons
  • Home
    • Home 1
  • Recipes
  • Categories
    • Main Dishes
    • Noodles
    • Breakfast
    • Vegetarians
  • About
  • Contact